
WHAT IS THIS & WHY DO I NEED ONE?
A “WordPress Theme” is a collection of files that work together to provide the overall design interface for your website. Think of a theme as the ‘skin’ that sits on top of the underlying nuts and bolts framework of the site.
HOW MUCH DOES IT COST?
There are FREE WordPress Themes and there are Premium WordPress Themes that range in price from $10 – $150.
If you would like to check out some Premium WordPress Theme’s, click here , then click on ‘Themes & Templates’ in the top menu and from the drop down menu choose ‘WordPress Themes’. You can select a theme and then click the green ‘Live Demo’ button that appears in the body of the page to get an indication of how the site would appear with that particular theme installed.
While there are limited options built-in with a FREE theme; it’s all we need for a basic custom Birthday website. Time to install and customize a WordPress theme!
1. Log in to your WordPress site Admin if you’re not already logged in (i.e. http://www.yourdomain.com/wp-login.php).
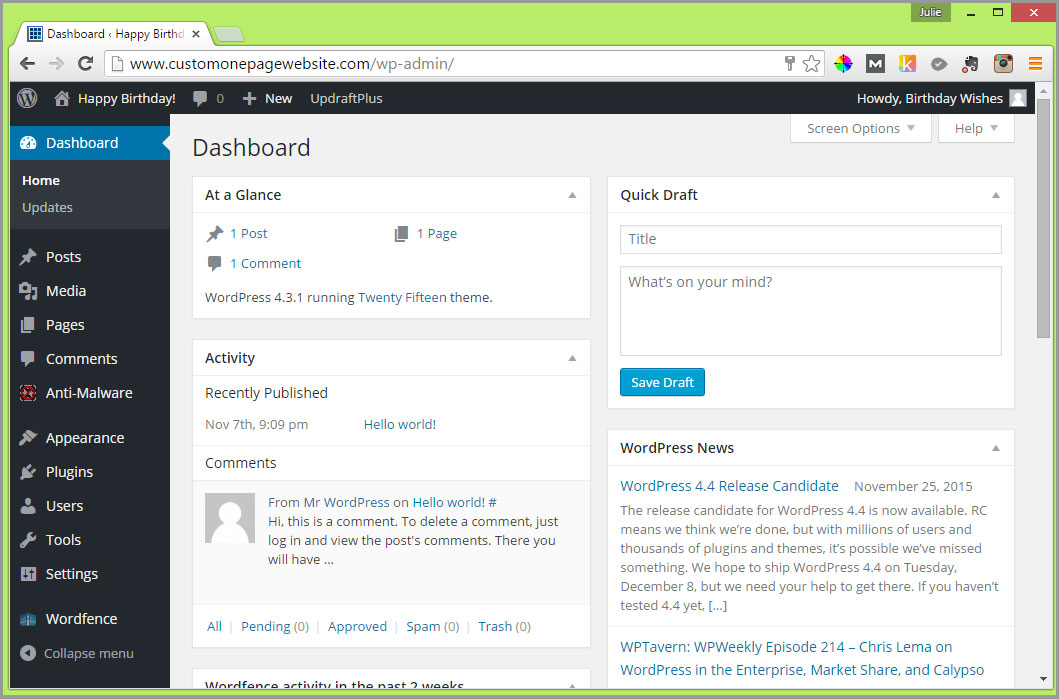
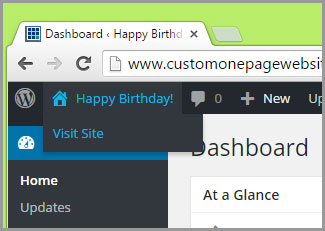
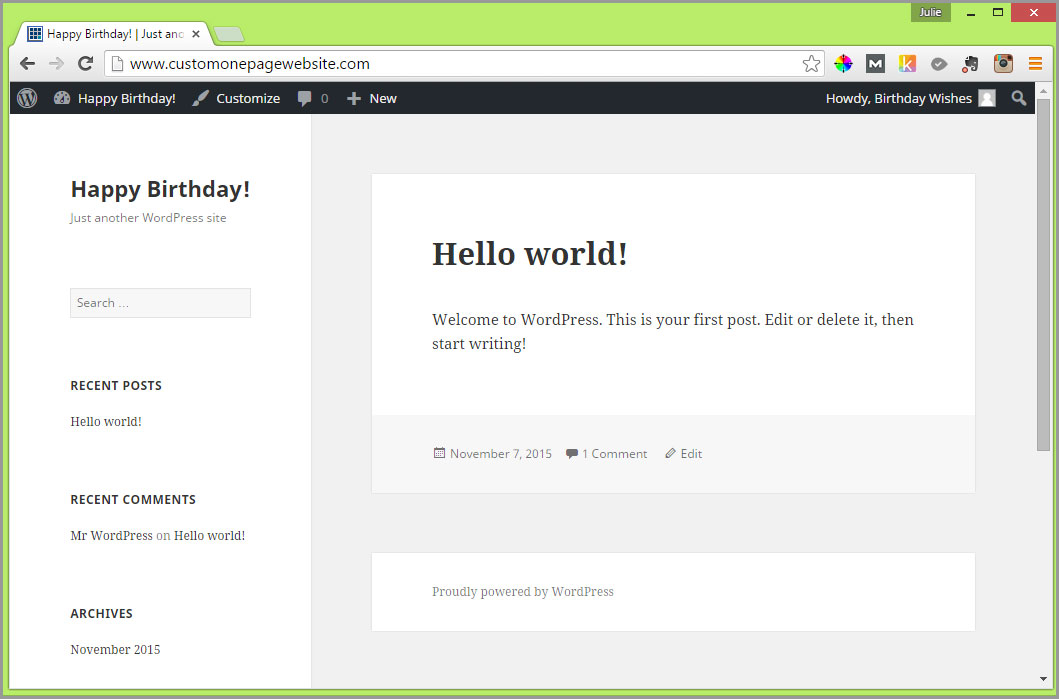
2. To see what your site currently looks like, hold your mouse over the ‘home’ icon in the dark grey bar at the top left of the screen. A drop down menu will appear with an option to “Visit Site”. Click it!
You should see a similar screen to the one below.
To return to the WordPress editor, simply click on the ‘dashboard’ icon that is now where the ‘home’ icon was previously. When the drop down sub menu appears, click on “Dashboard”. Amazing, eh?!
Note that when you are logged out of WordPress you won’t be able to transition back and forth like this. In other words, anyone visiting yourdomain.com won’t see the dark grey bar at the top of the screen. You’re the only one with these magic powers!

3. From the ‘Dashboard’ page, mouse over the left side menu to “Appearance” and from the sub menu that appears, choose “Themes”.
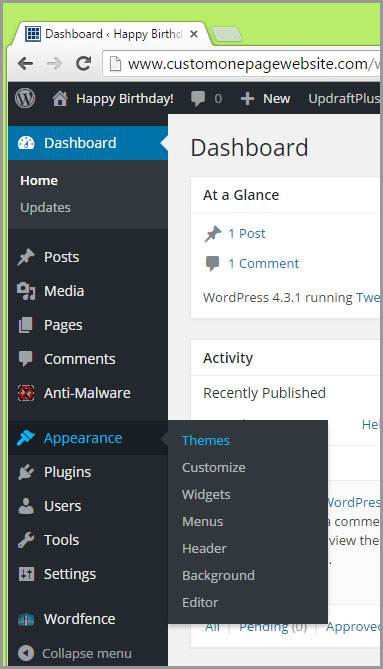
Your screen should look similar to the one below:
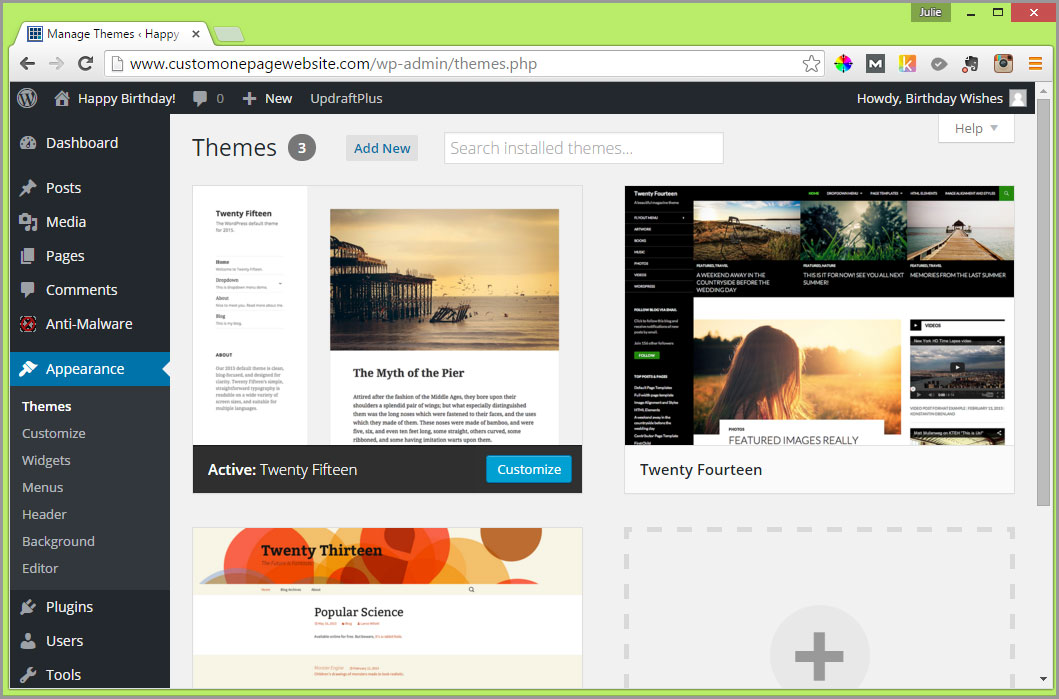
The theme that is currently active is “Twenty Fifteen”. You will know which theme is active, as it will always be in the first position with a grey bar under it and blue “Customize” button. We are going to add a new theme to the ones currently available, then we’re going to delete the 3 themes that are currently displayed (for security reasons).
Above the active theme there is a grey button that says “Add New”. When you mouse over it, the button will change to blue with white text. Click on the button!
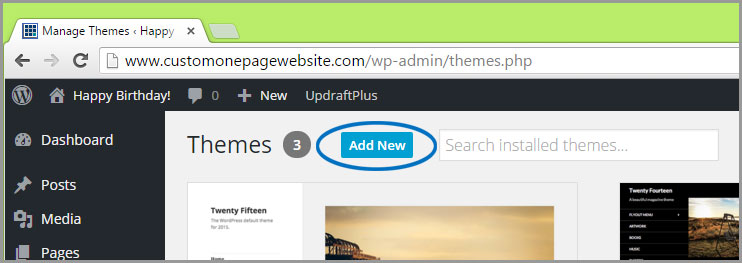
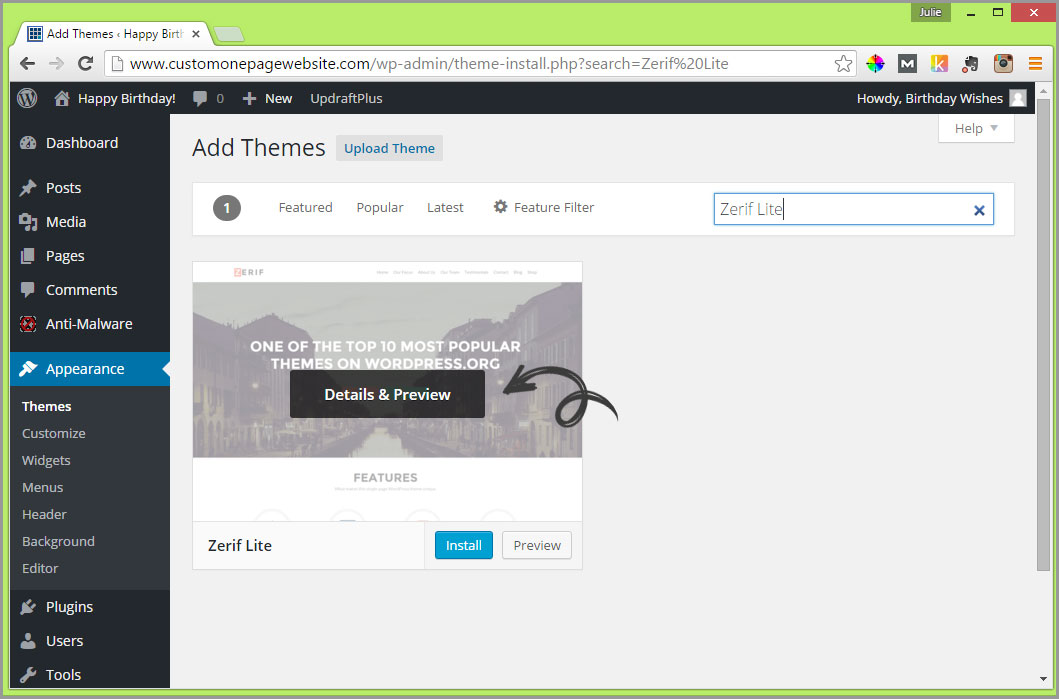
Your screen should look similar to the one below. In the “Search themes” box (circled), enter the following (without the quotations) “Zerif Lite”.

When you move your mouse over the Zerif Lite thumbnail image “Details & Preview”, “Install” and “Preview” buttons will be displayed. Click on the dark grey “Details & Preview” button.
You should now be looking at a screen similar to the one below.
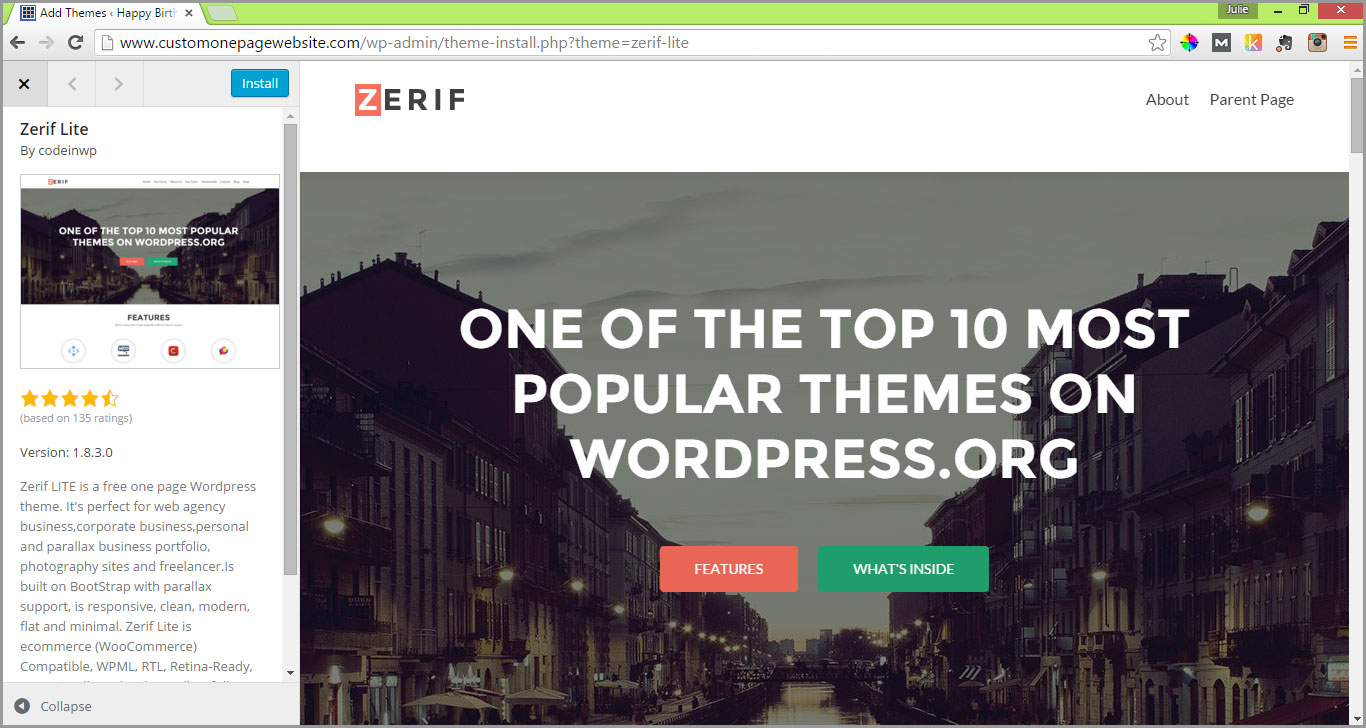
You can scroll down the right side of the main demo to get a feel for the structure of the theme. Once you’ve had a peek, click on the blue “Install” button at the top left side of the page.
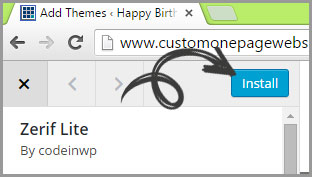
4. After you hit the “Install” button for the Zerif Lite theme your screen will look like this:
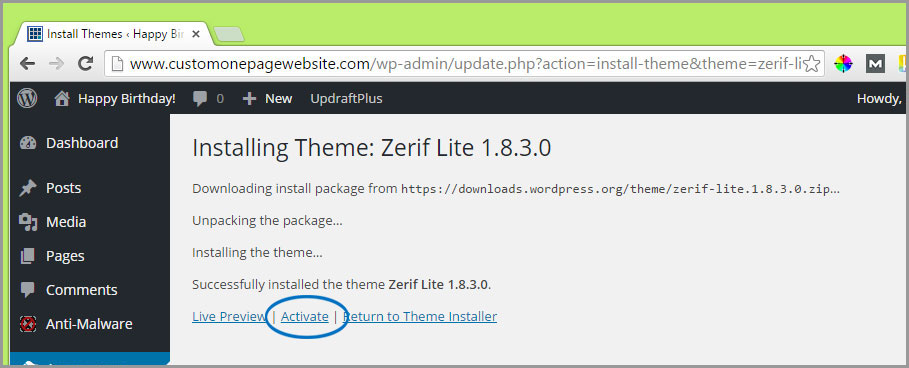
You need to click on the “Activate” link. Once you’ve done so, you’ll be presented with a screen that displays a thumbnail of the Zerif Lite theme with a dark grey bar at the bottom of it, highlighting that it’s “Active” and also displaying a blue “Customize” button.

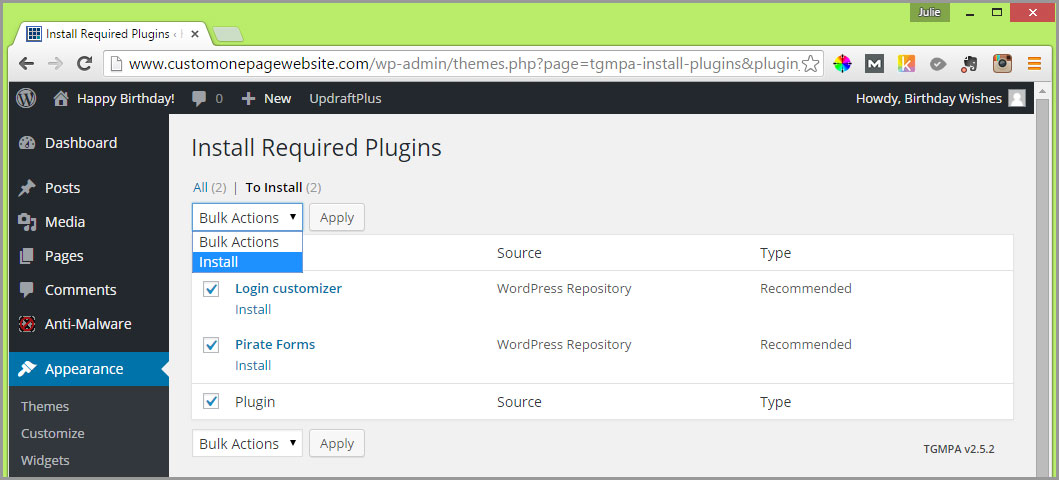
5. Before we customize the theme, take a look at the message above it that says, “This theme recommends the following plugins: Login customizer and Pirate Forms”. Let’s install them now by clicking on the link “Begin installing plugins”. You will be taken to the following screen:

Click on the check box to the left of the word “Plugin”. This will select both plugins. Then from the “Bulk Actions” menu select “Install” and click on the “Apply” button.
You will be taken to a screen similar to the one below that lets you know the plugins installation is complete.
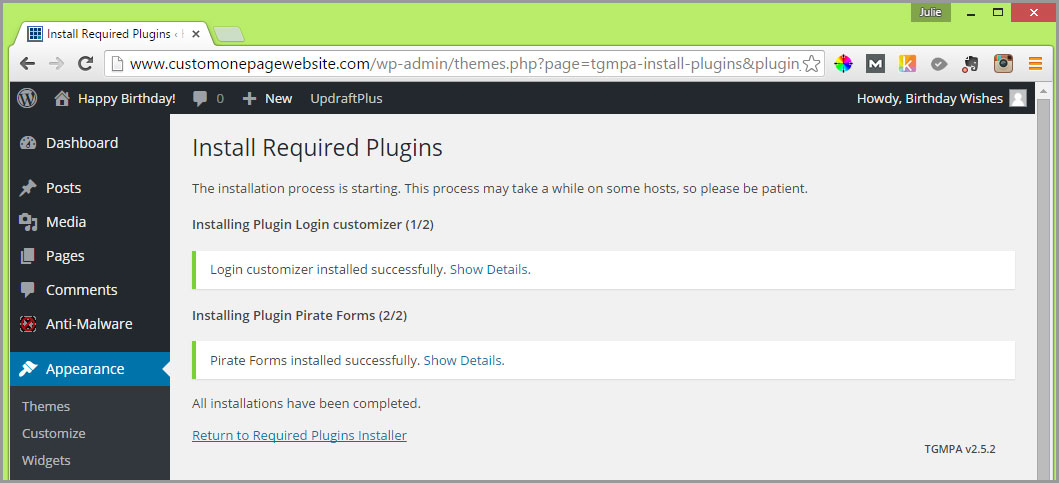
The next step is to “Activate” the plugins you just installed. To do so, click on the link that says “Return to Required Plugins Installer”. Notice that the Status column for both plugins says “Installed But Not Activated”. Click the “Plugin” checkbox to select both plugins, then select “Activate” from the “Bulk Actions” drop down menu and click on the “Apply” button.

Click the blue “Return to the Dashboard” link that appears on the next screen. (A blue pop up box that references a security add on may appear off the left side menu. You can click on the ‘x’ to “Dismiss this notice”).
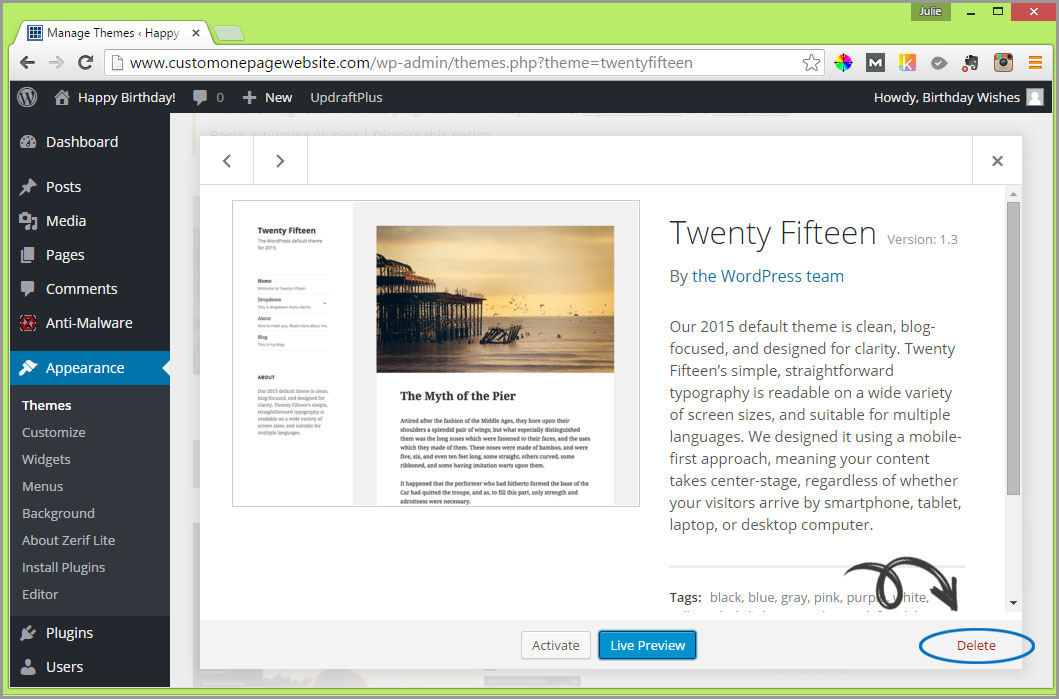
6. Now, let’s go back to “Appearance” > “Themes” so we can delete the three default themes that we won’t be using. Click on the “Theme Details” button of the “Twenty Fifteen” theme.

You’ll see a red “Delete” button in the lower left corner of the next screen presented. Click on it!It’s best to eliminate themes and plugins that aren’t activated so the opportunity for hackers to find holes to attack your site are minimized.
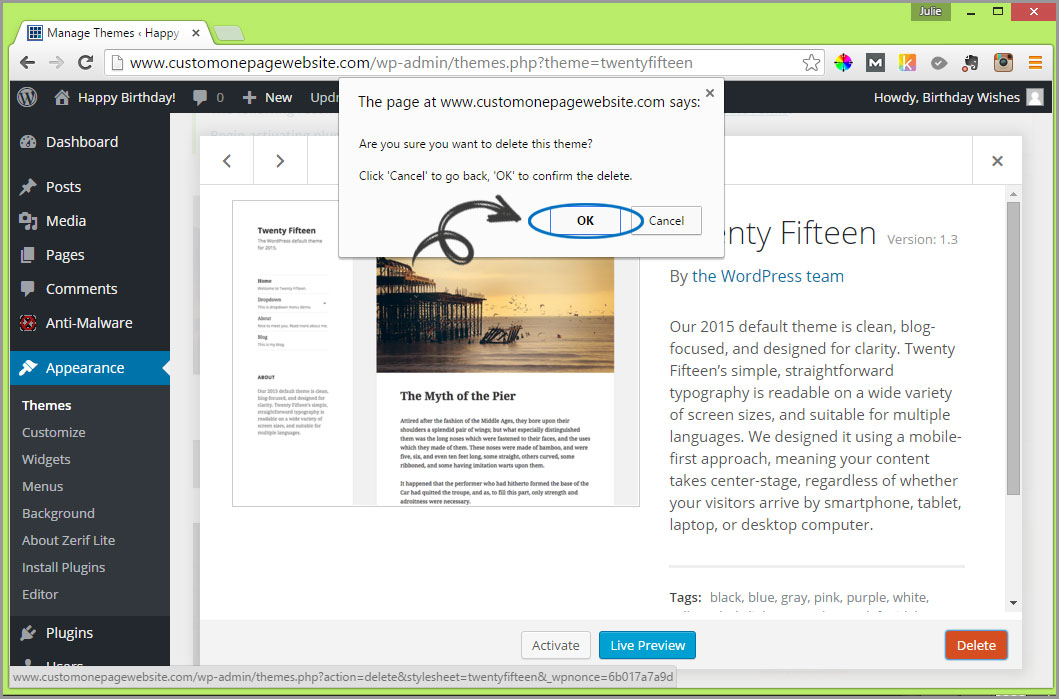
A pop up box will appear requesting that you confirm that you want to delete this theme. Click the “OK” button.
Repeat the above actions for the “Twenty Fourteen” and “Twenty Thirteen” themes.
TIME TO CUSTOMIZE OUR THEME!
1. From the “Appearances” sub menu (left side) select “Customize”.

You will be taken to a screen that looks like this:
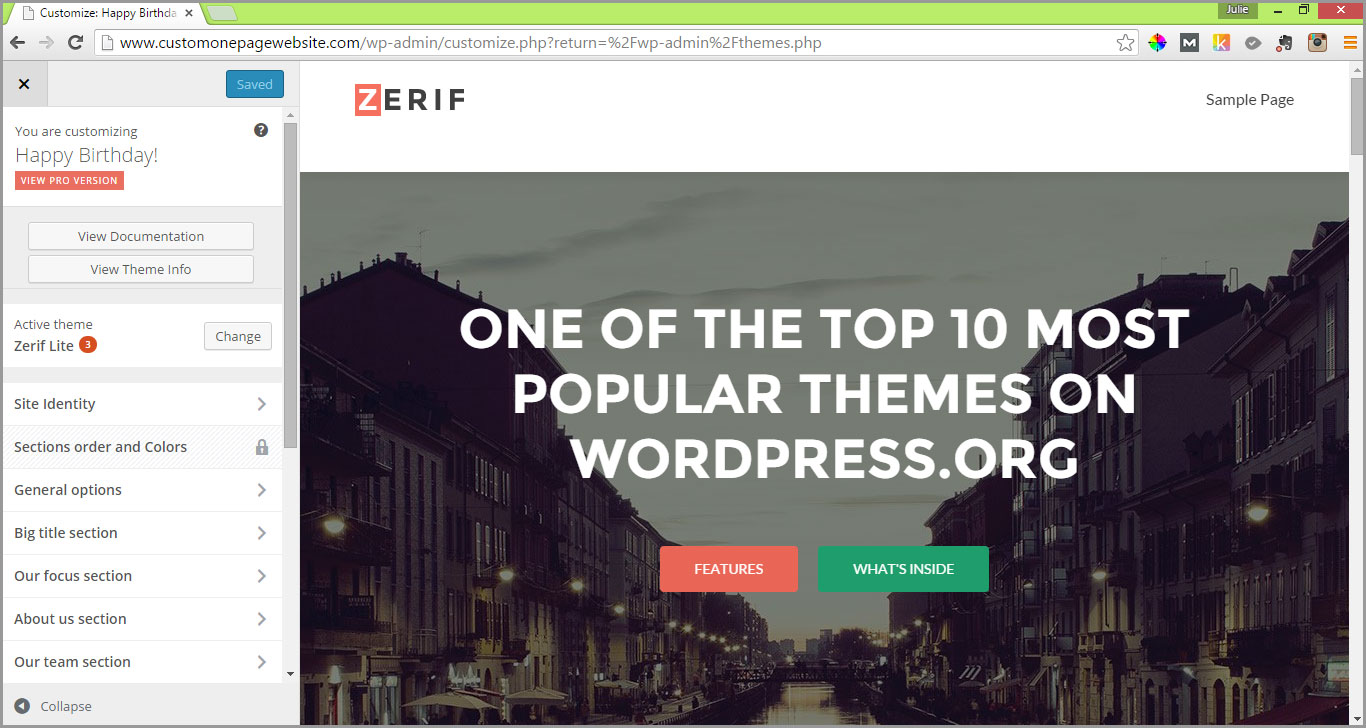
Using the far right hand scroll bar, scroll down so you can see the different sections of the page that we will be working with.
2. NAVIGATION OVERVIEW: The Customizer allows you to preview changes to your site before publishing them. You can also navigate to different pages on your site to preview them.
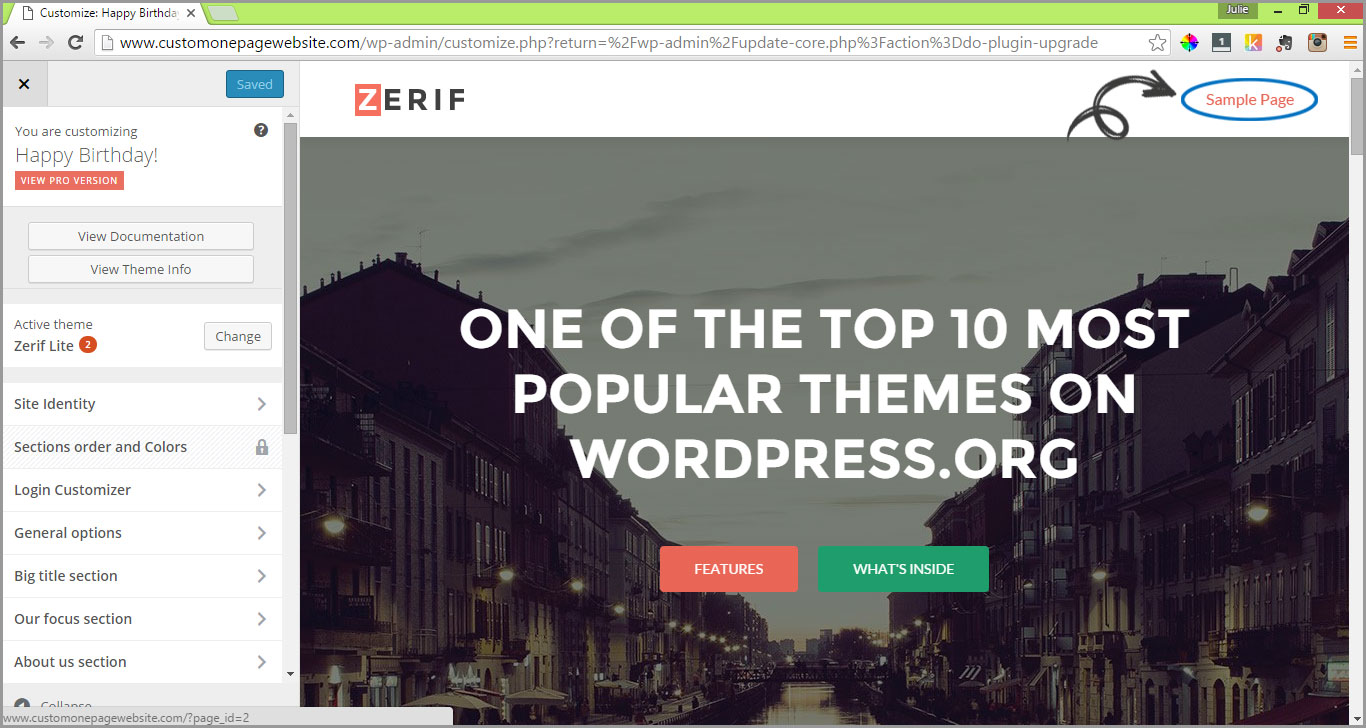
For example, if you click on the “Sample Page” menu item in the top right corner you will be taken to the interior content “Sample Page”.
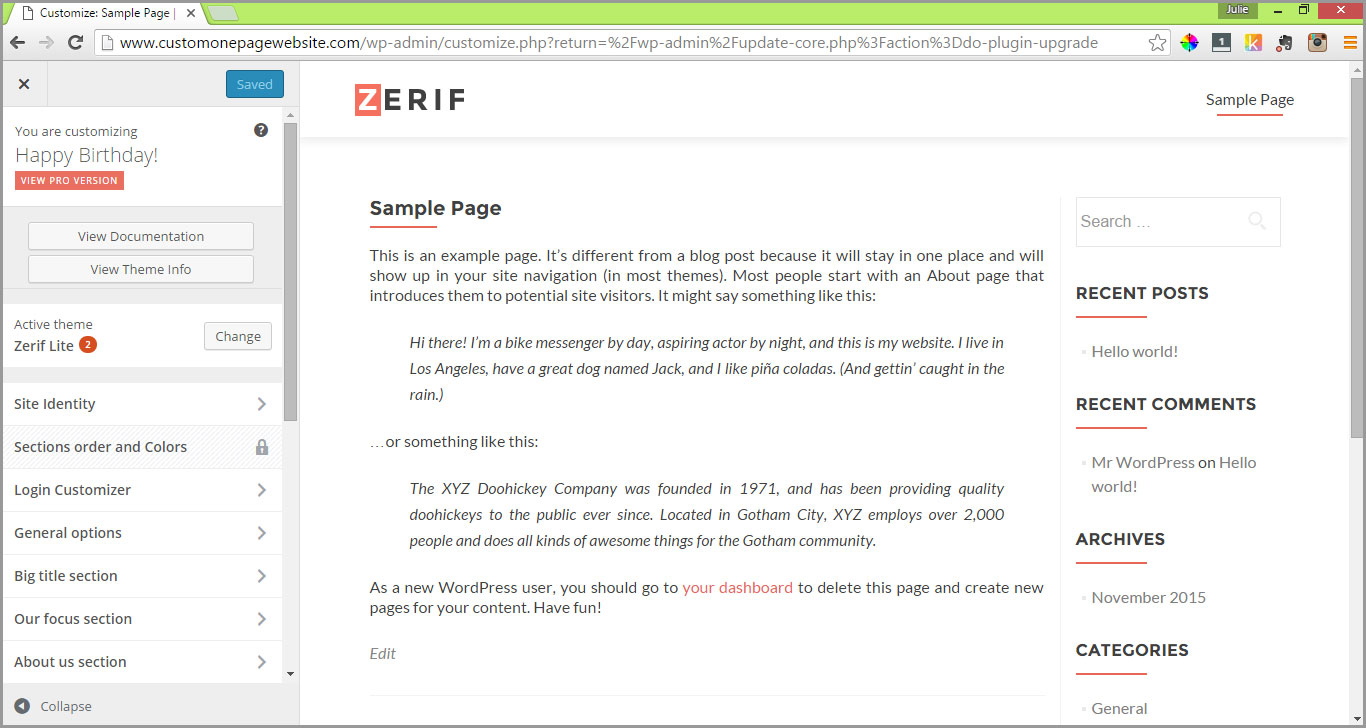
Click on the “Zerif” logo to return to the Home Page.
The Zerif theme is a responsive theme that is split into sections.
DID YOU KNOW?
A responsive theme’s layout adjusts to your device’s screen size. It provides an optimal viewing experience, easy reading and navigation on mobile phones, tablets, laptop and desktop computers.
If you scroll down the left hand menu you’ll see there are several sections with an arrow next to them indicating that you can click them to edit. With the free Zerif Lite version that we have installed you aren’t able to change any of the sections that have a lock icon next to them.
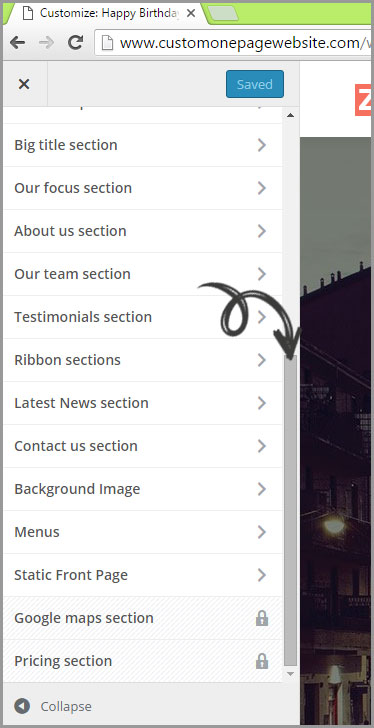
If you want to be able to move sections around, change the color scheme, add Google Maps or a pricing section (the latter two are more suitable for a business website than a special occasion website), then you can upgrade to the Zerif Pro While you are confined to the colors designated in the free Zerif Lite version, they are pretty neutral and you can infuse your color choices into the logo, background image and other elements.
The Pro version also comes with some cool animated parallax effects. This e-Course is focused on the free Zerif Lite version, however if you do upgrade to the Pro version and have implementation questions, feel free to shoot me an email at [email protected].
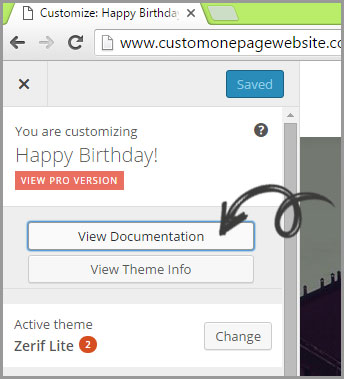
If you click on the “View Documentation” button it will open up a new page that provides additional information on how to use the theme.
If you click on the “View Theme Info” button you’re taken back to your dashboard to a screen that notifies you of any important notices related to your theme install.
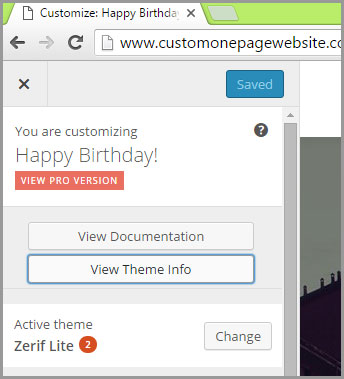
NOTE: Clicking on the number in the red circle next to Zerif Lite takes you to the same information. For the time being, don’t worry about these notifications.
LET’S CUSTOMIZE AND ADD IN CONTENT!
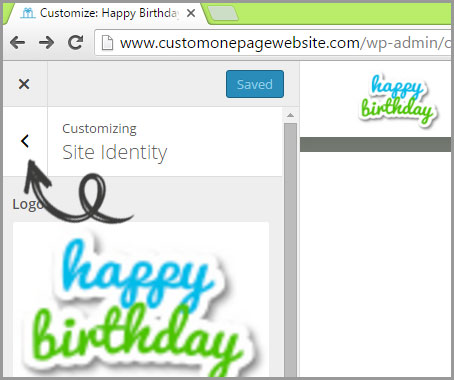
i. SITE IDENTITY: Click anywhere in the row that says “Site Identity >”. The left sidebar is replaced with options related to your core site identity that you may edit.
The first thing we need to do here is replace the “ZERIF” logo at the top of the screen with our own.
![]()
Your logo should be no wider than 109 pixels and the height can range between 32 to 80 pixels. I have output a simple “HAPPY BIRTHDAY” graphic the correct size that you are welcome to download in a zip file that contains all the graphics/templates for this site.
NOTE: If you would like to have a custom graphic created for you, you can check out this Gig on fiverr.com.
Make sure you take note of where you extract the happy-birthday-logo.jpg graphic to on your system so that you know where to find it to upload it to the WordPress theme. Click the “Select Image” button under the “Logo” sub heading. A “Select Image” screen will pop up like the one shown below.
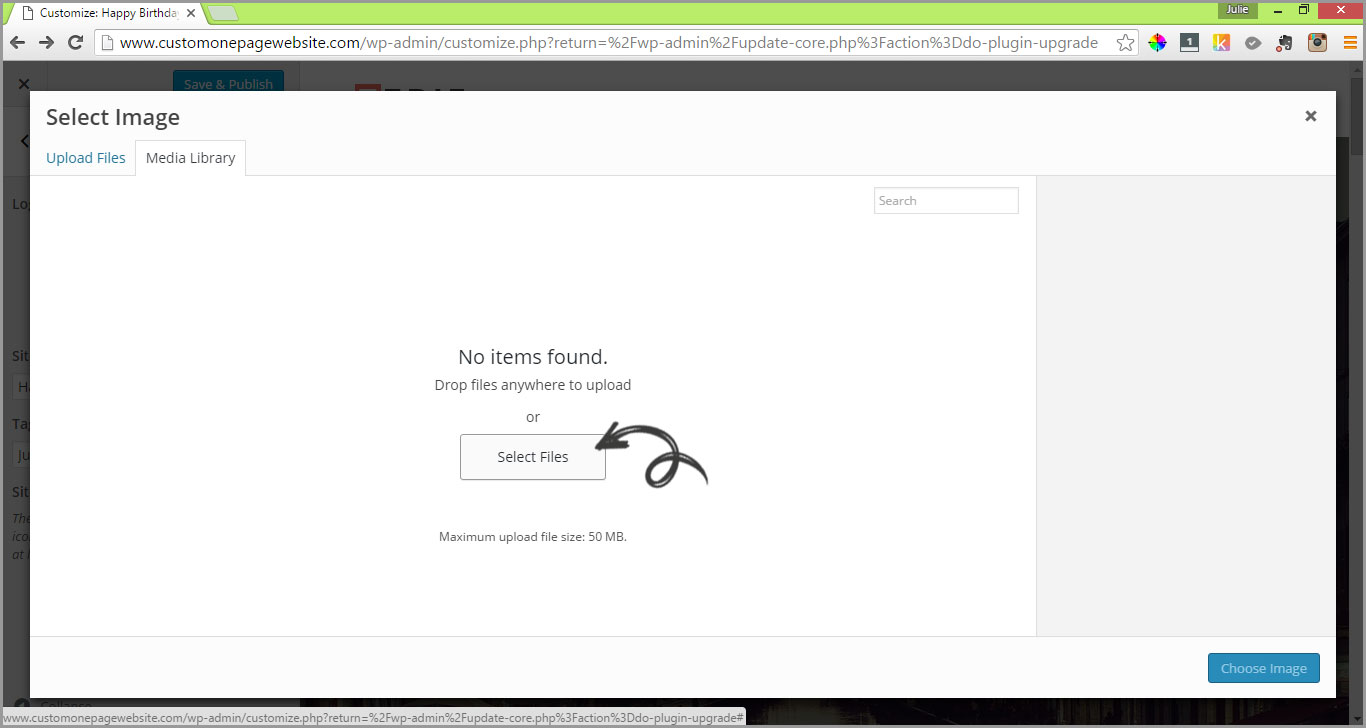
Click on the “Select Files” button and navigate to the directory that happy-birthday-logo.jpg is stored in. Select the file and click “Open”.
![]()
The image will be uploaded into your WordPress “Media Library” and should already be selected (surrounded by a blue box with a check mark). If it’s not selected, go ahead and click on the image.
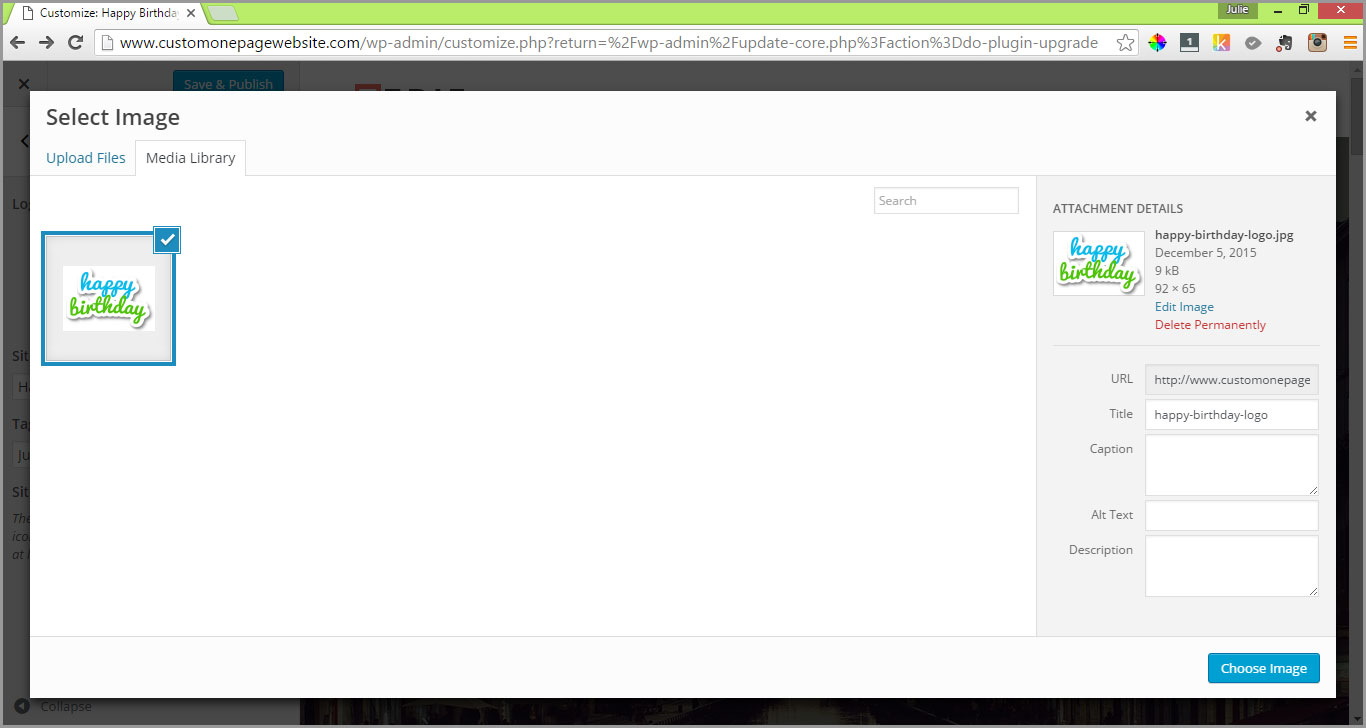
You’ll notice that on the right side of the screen there is an area with links to “Edit Image” or “Delete Permanently”. There are also fields for the URL, Title, Caption, Alt Text and Description. I recommend that you put a description of the graphic in the “Alt Text” field, as it is read by screen readers, allowing the content and function of the image to be accessible to those with visual or certain cognitive disabilities. The other fields are important if you are creating a blog that you hope to monetize, as they effect on page search engine optimization, but that is another course! For our purposes once you’ve filled in the “Alt Text” field, you can go ahead and click on the blue “Choose Image” button.
You will be returned to the theme “Customize” page where you can now see that the Zerif logo that was previously on the Home Page has been replaced with our Happy Birthday logo. Make sure you click the blue “Save & Publish” button at the top of the left side bar. Well done!
![]()
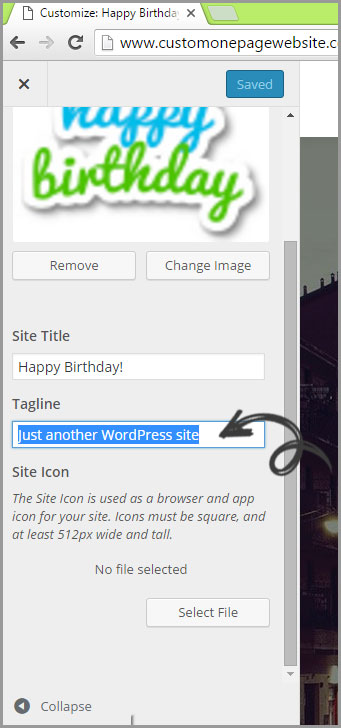
As you can see now in the left side bar the new graphic is displayed along with buttons to “Remove” or “Change Image”. You can experiment with different graphic images and get a real time view of how they will appear. Just remember to stick to the recommended graphic size of 109 pixels’ width, by 32 to 80 pixels high.
Under the “Change Image” button are fields for the “Site Title” (which you already set up earlier when you configured your WordPress install) and “Tagline”. If you want to change your “Site Title” you can do so now. Let’s change the default “Tagline” from “Just another WordPress Site” to something like “Hope your Birthday is filled with special moments!”.
Lastly, for this section, we’re going to upload a Site Icon graphic that is at least 512 pixels wide by 512 pixels tall. This is used as a browser and app icon for the site so its design should be simple. The one we’re uploading is included in the zip file you downloaded earlier and is called happy-birthday-app-icon.jpg. NOTE: You must extract the file from the zip file prior to uploading.
![]()
Click on the “Select File” button under the “Site Icon” heading, then click on the “Upload Files” link at the top of the page. Click on the “Select Files” button and browse to the location of the file that you extracted. Select the file and click the “Open” button to upload it. Don’t forget to “Save & Publish”.
![]()
NOTE: You can hit the Collapse button at any time to have a full preview of your site minus the left hand sidebar. Just hit the button again to make the sidebar reappear.
You are done with the “Site Identity” section, so simply click the arrow before the section title to return to the full menu.
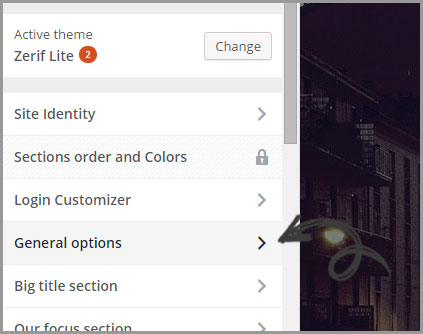
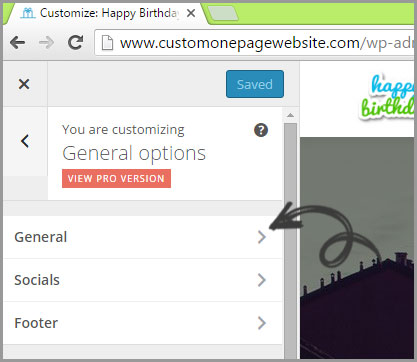
ii. GENERAL OPTIONS: Bypass the “Login Customizer” and continue to the “General options” menu.
Drill down again on the next sidebar presented by selecting “General”.
You’ll be presented with the following:

In the “Copyright” field enter the year and the person’s name that you’re gifting the site to in order to protect the content from being used elsewhere.
You can also check the box for “Enable accessibility?” if you think doing so would benefit any visitors to the site.
Click the blue “Save & Publish” button at the top and return to the General options menu by selecting the arrow next to the “General” section title.
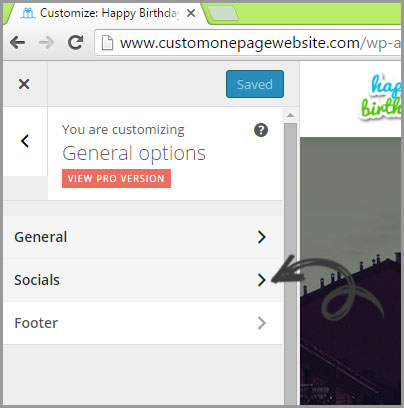
Let’s take a look at “Socials” by clicking on the arrow next to it.
The next sidebar will display fields for some popular social media channels. In the preview area scroll down to the bottom of the page. You will see the icons for each of these social media networks displayed in the lower right corner (you’ll also see the copyright that you just added!).

If the recipient is actively involved with any of these social media hubs you can add their links in the applicable fields. You may have a contact on your list who the Birthday girl or boy would love to connect with, so if you share the link to the completed Birthday site with friends and loved ones, they will have access to the recipient’s social media links and another opportunity to reach out.
Right now the # that is in each field is causing the related social media icon to be displayed. Remove these first, click on the blue “Save & Publish” button and then add any complete social URLs that you wish to display (i.e. https://www.facebook.com/CustomBirthdayWishes/ )

When you’re done this, click the arrow next to the “Socials” title to return to the “General options” menu choices.
Click the arrow next to the “Footer” menu title.
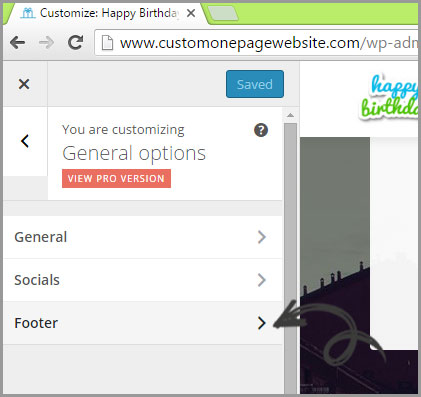
The footer contains address, email and phone number icons and info by default.

You may want to add an email address so that if the Birthday webpage link is shared and others would like to contribute content they can get in touch with you. The phone number and address fields make more sense for a small business or an online resume website than a personal webpage.
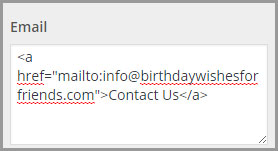
To modify the default email address, replace “mailto:[email protected]” with “mailto:YOUR EMAIL” and change “>[email protected]</a>” to “>Contact Us</a>”.
Please note that for any of the social media fields that you DON’T wish to appear in the footer, clear the default information from the field AND click the “Remove” button for each associated icon.
When you’re finished modifying these settings, click on the blue button at the top of the screen that says “Save & Publish”.
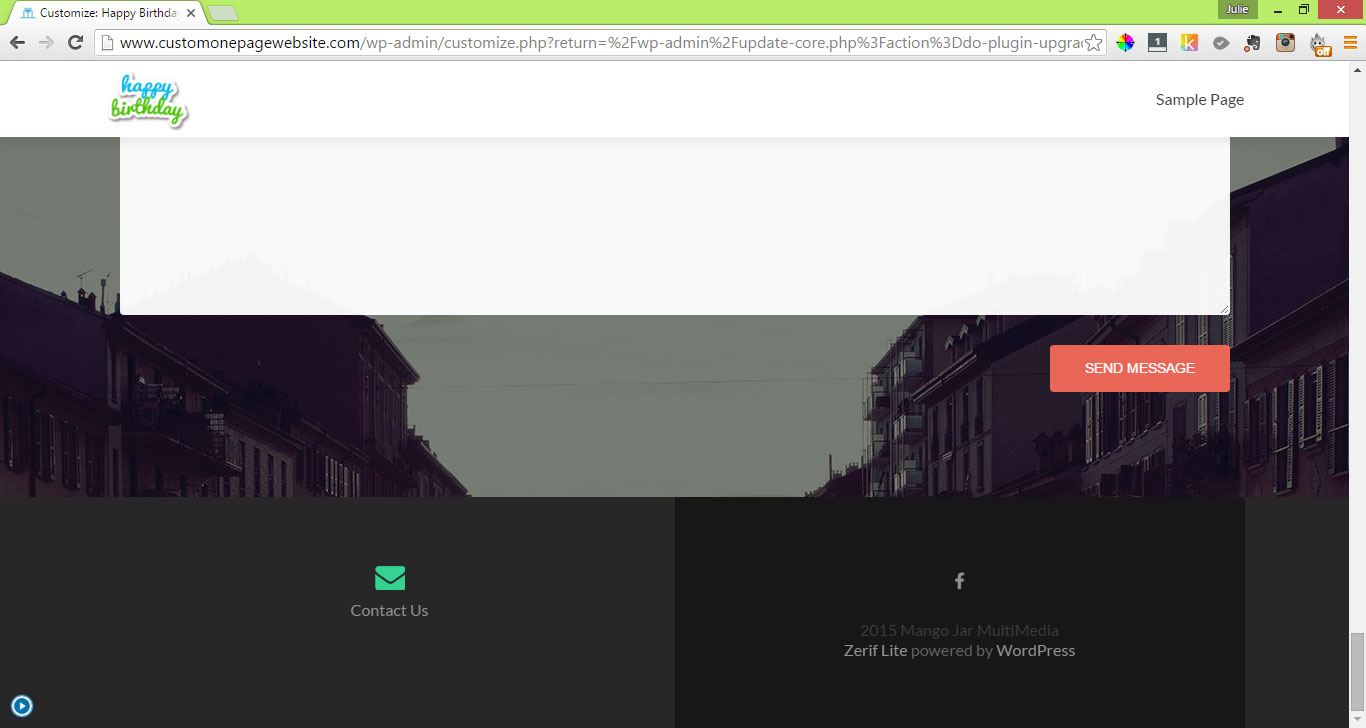
Your footer should now look similar to this:
Now click the arrow to the left of the “Footer” title to return to the “General options” sidebar and then click the arrow to the left of “General options” to return to the main sidebar.
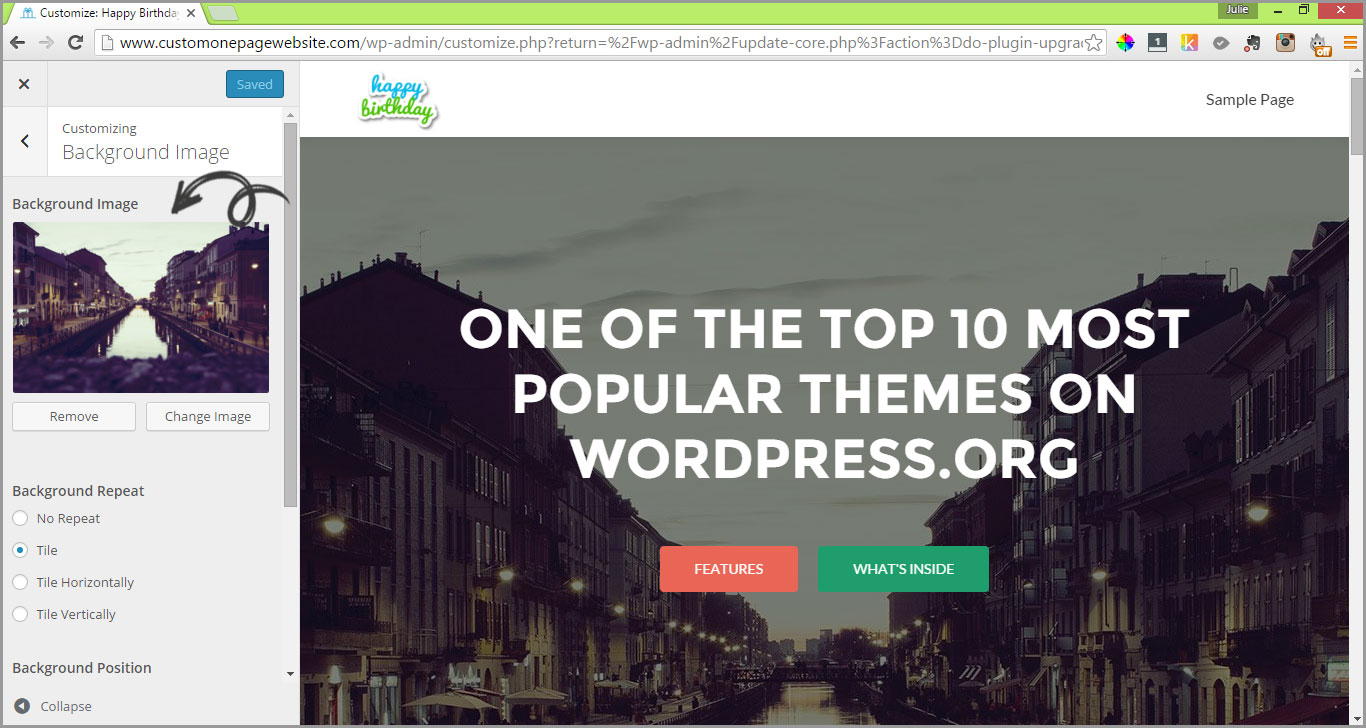
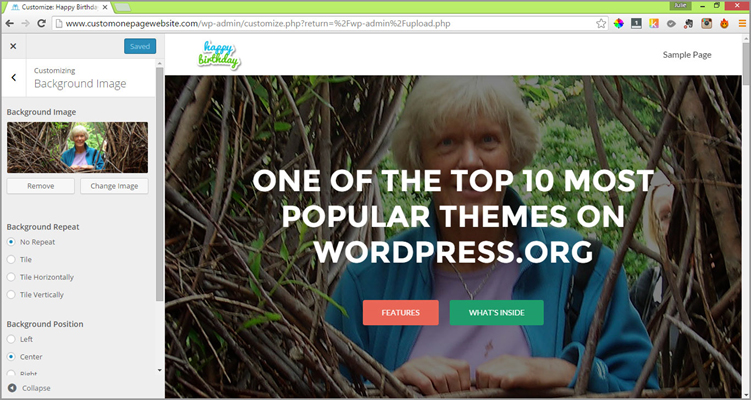
iii. MAIN IMAGE: Next, let’s take a quick detour and scroll down the menu options to “Background Image”. This is the large image that sits in the background of the Big title section at the top of the page and the Contact Us section near the bottom footer of the page.
I’m going to add a picture of my beautiful Mother here, but you can add an image of whatever you like that is personal to the recipient.
If you would prefer to have a more unique, customized image displayed here, recommend going to fiverr ; mouse over “Graphics & Design” and then choose “Illustration” from the drop down menu; then click on the “High Rating” link at the top of the results. I promise you will be astounded by the quality of artists happy to create an illustration or painting effect from a photo for such a nominal fee. Recommend that you pay any extra for a high resolution image (that is, if you’re happy with the base gig result) so that you may also have it printed for the recipient.
The theme documentation recommends that the size of this image is 2048 pixels wide by 1365 pixels high, however make sure you keep any important subject matter in the top 325 pixels of height. If you would like help with graphic creation, you can check out this Gig on fiverr.com .
Click on the “Change Image” button under the “Background Image” section header to upload the new graphic and upload your desired background image via the same process as we just went through with happy-birthday-logo.jpg.
NOTE: If you get an error when you try to upload your image, go back to the Dashboard of your site admin (by clicking the small ‘x’ at the top left of the Customizer preview mode) and click on “Media” in the left sidebar menu. Click on “Add New” and then “Select Files” to upload your image into the media library. Once you’ve done so, simply return to the Customizer by selecting Appearance > Customize.
Under the “Background Repeat” sub heading, check the “No Repeat” radio button and under the “Background Position” sub heading, check “Center”. Make sure you hit the blue “Save & Publish” button at the top of the screen after you’ve made these adjustments.
iv. WELCOME CONTENT: Now scroll back up the left side menu until you see the menu heading “Big title section”. Click on this to expand it.
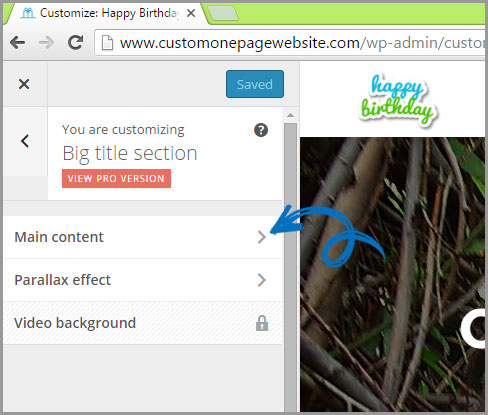
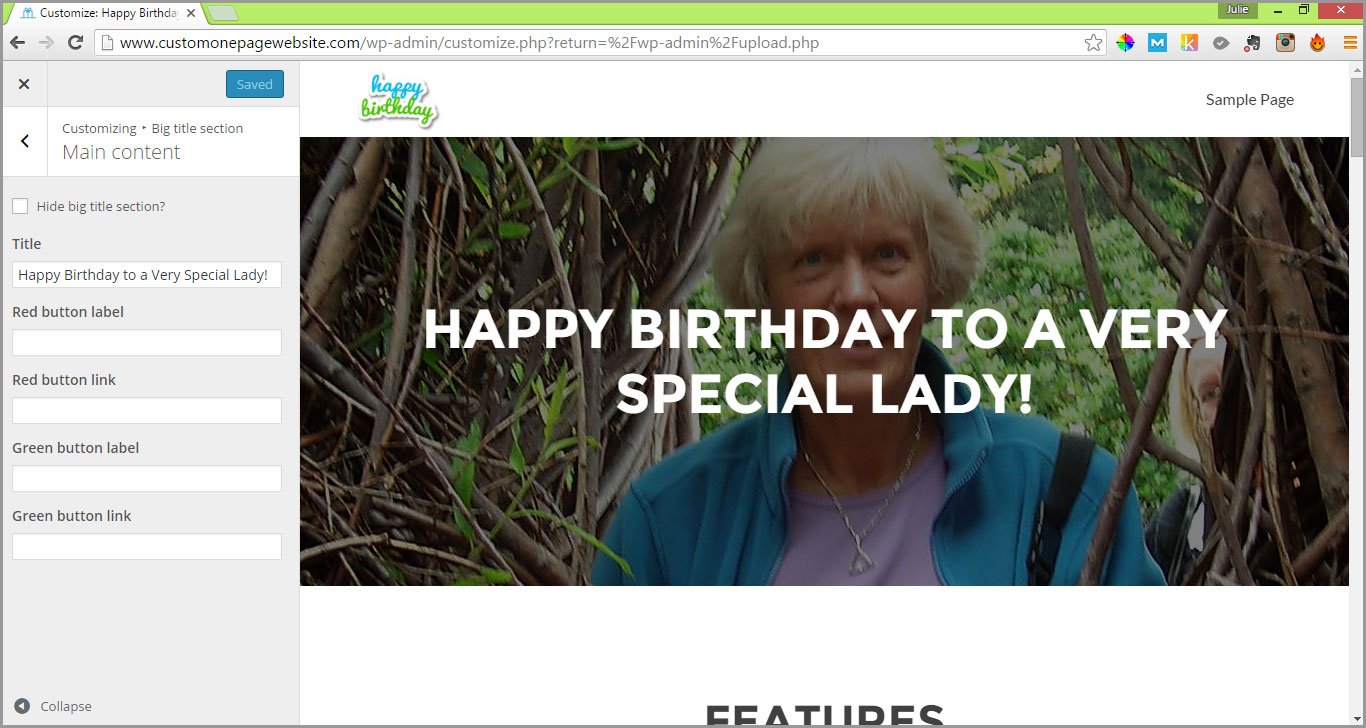
Then click on the “Main content” label to expand it. You can check the “Hide big title section?” box just to see what this does. You’ll notice the large background image you just uploaded, along with the title and two buttons disappear and the next section (Features = Our Focus) moves up to take its place. Given we want to have a nice bold image and welcoming title, let’s leave this box unchecked and move on to the next setting.
In the “Title” field add a short expression that conveys what this webpage is about. I’ve chosen “Happy Birthday to a Very Special Person!” This will display in all CAPS even if you enter it in upper and lower case as that is the style of font the theme has been set up with.
We don’t need the red and green buttons, so let’s hide both of these simply by removing the content from all the button fields.
Click the blue “Save & Publish” button at the top of the screen.
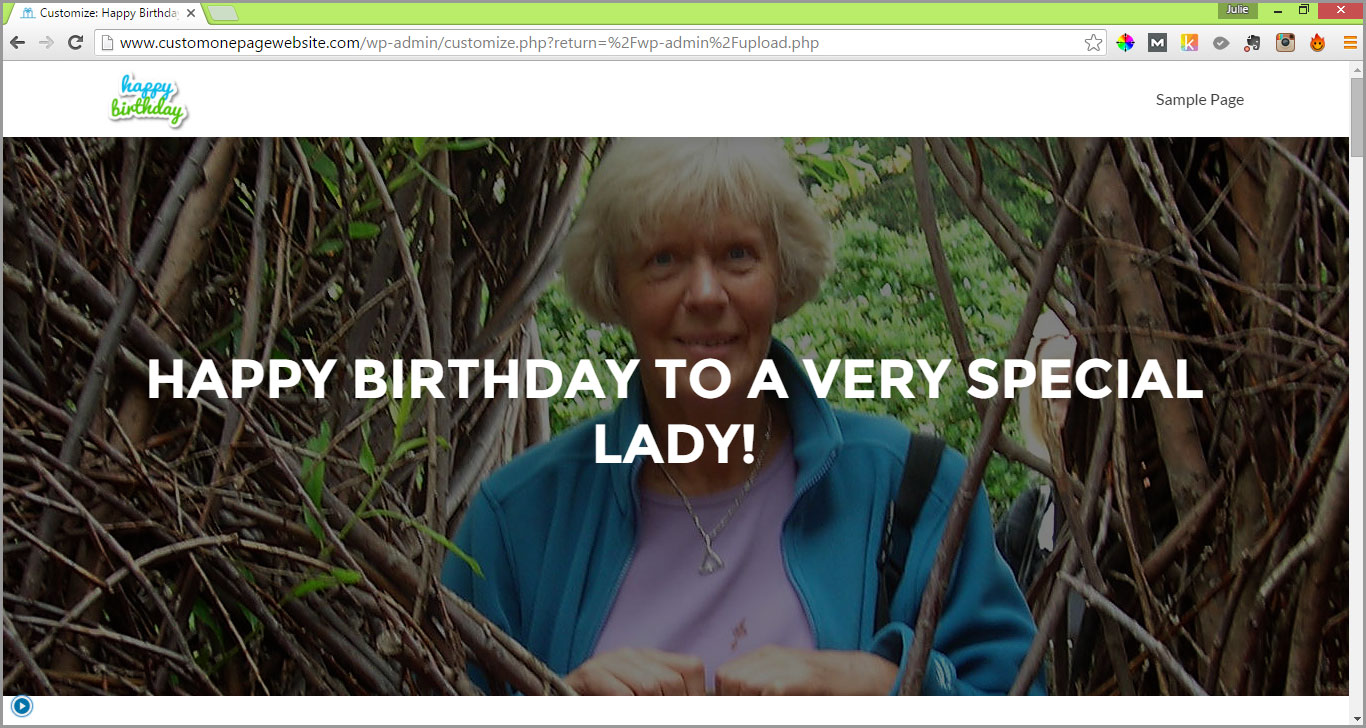
When you removed the buttons, the lower portion of the background image disappeared. This is the reason for keeping the important part of your image subject matter at the top of the graphic. If you scroll down the page where the background image repeats, you’ll see that the background graphic is displayed in its entirety. And don’t forget to collapse the sidebar using the arrow in the lower left corner so you can preview what the page will look like full screen!
Included with Zerif Lite is the option to have a “Parallax effect” rather than a flat background. A big web design trend of the moment is parallax scrolling, which involves the background moving at a slower rate to the foreground, creating a 3D effect as you scroll down the page. This involves the creation of layered objects and is outside the scope of this guide.
v. FEATURES = OUR FOCUS SECTION: Now let’s tackle the “Our focus section” by selecting it from the main sidebar menu. This is the content section in the webpage that currently says “FEATURES”.
You will be presented with a sub menu like the one below:
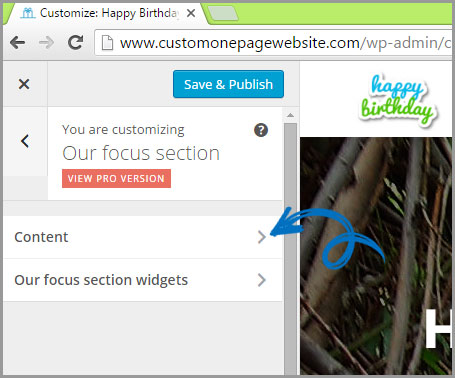
Click on the “Content” menu item.
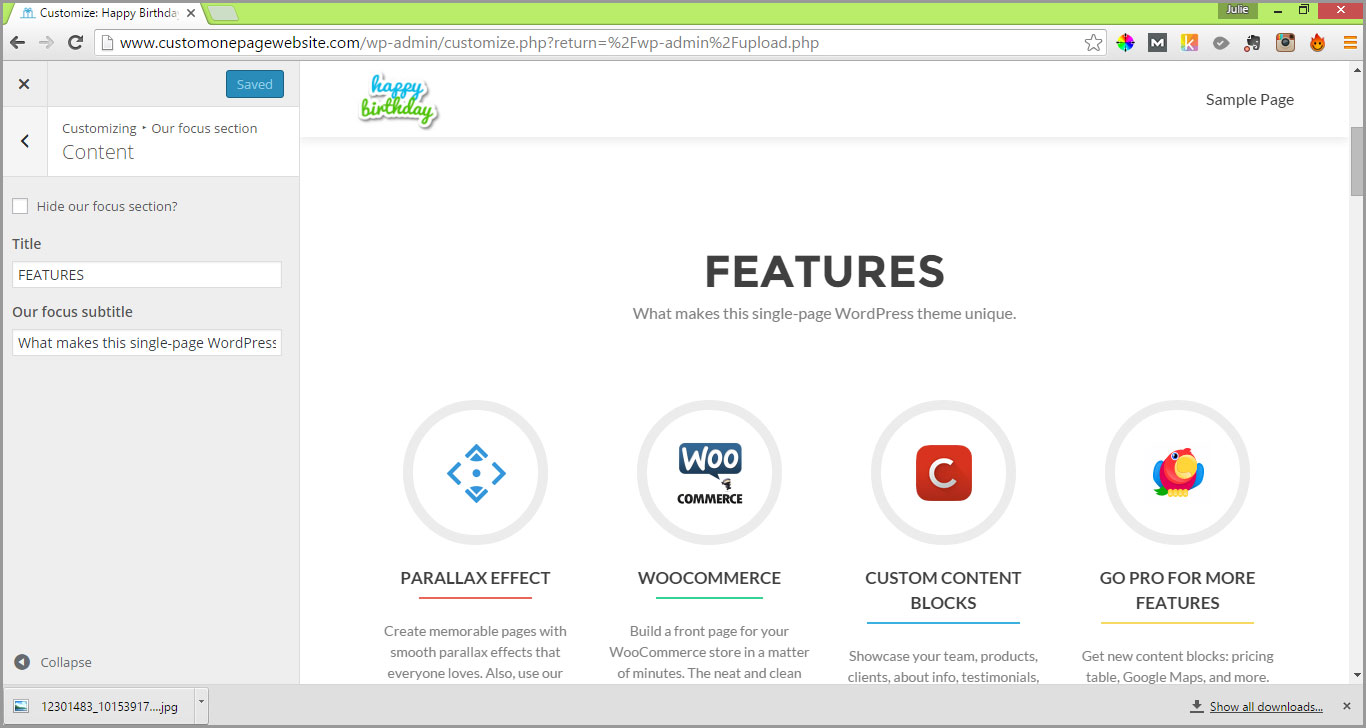
As with the previous section, you can check the “Hide our focus section?” box to see this section disappear and the “About us section” move up in its place. However, the way this section is styled provides us with a great opportunity to create an area where we can let the Birthday recipient know some of the things that make them special to us!
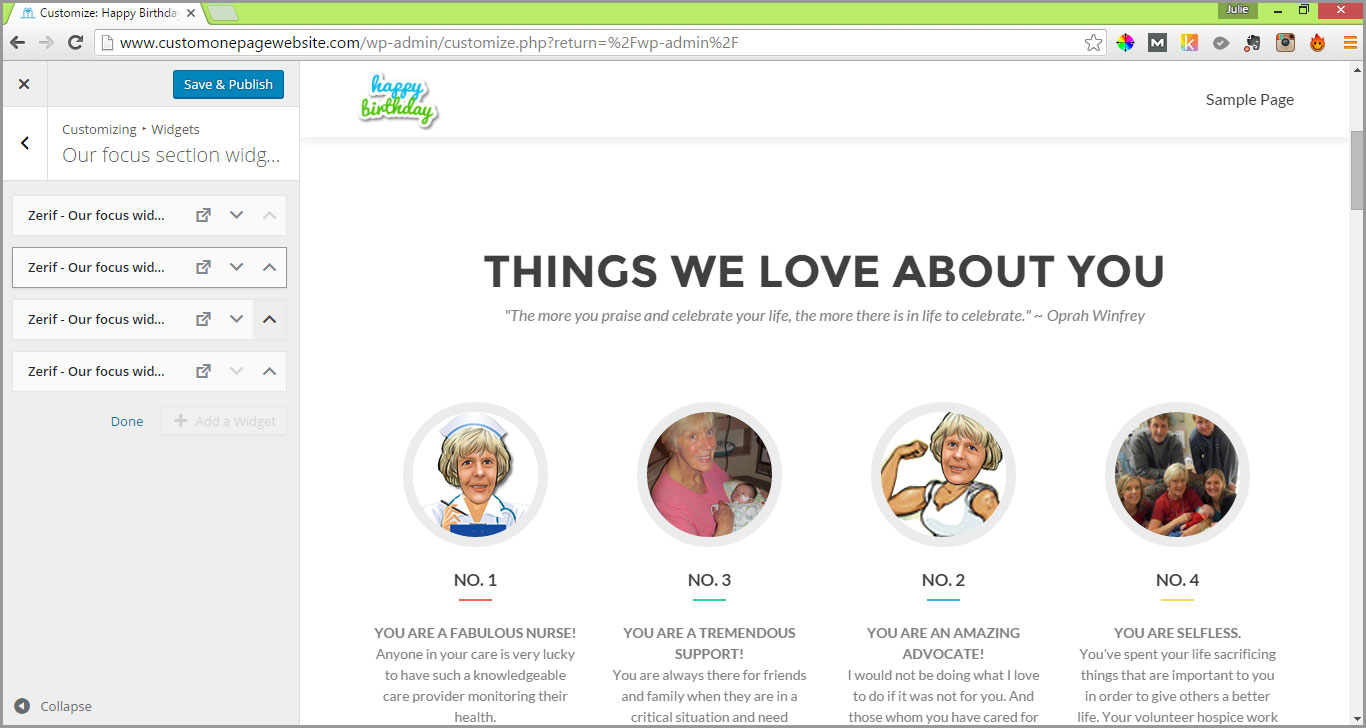
Let’s change the “Title” field of the Our Focus section from “FEATURES” to “THINGS WE LOVE ABOUT YOU…” OR a headline that highlights one of the content ideas you researched earlier.
If you wish to add a subtitle below this, you can revise the text in the “Our Focus subtitle” field. If you don’t want to have a subtitle here completely remove the text from this field and then hit the blue “Save & Publish” button at the top of the screen.
I’m going to add a quote that is relative to this section and was imparted by someone I know my Mom is fond of.
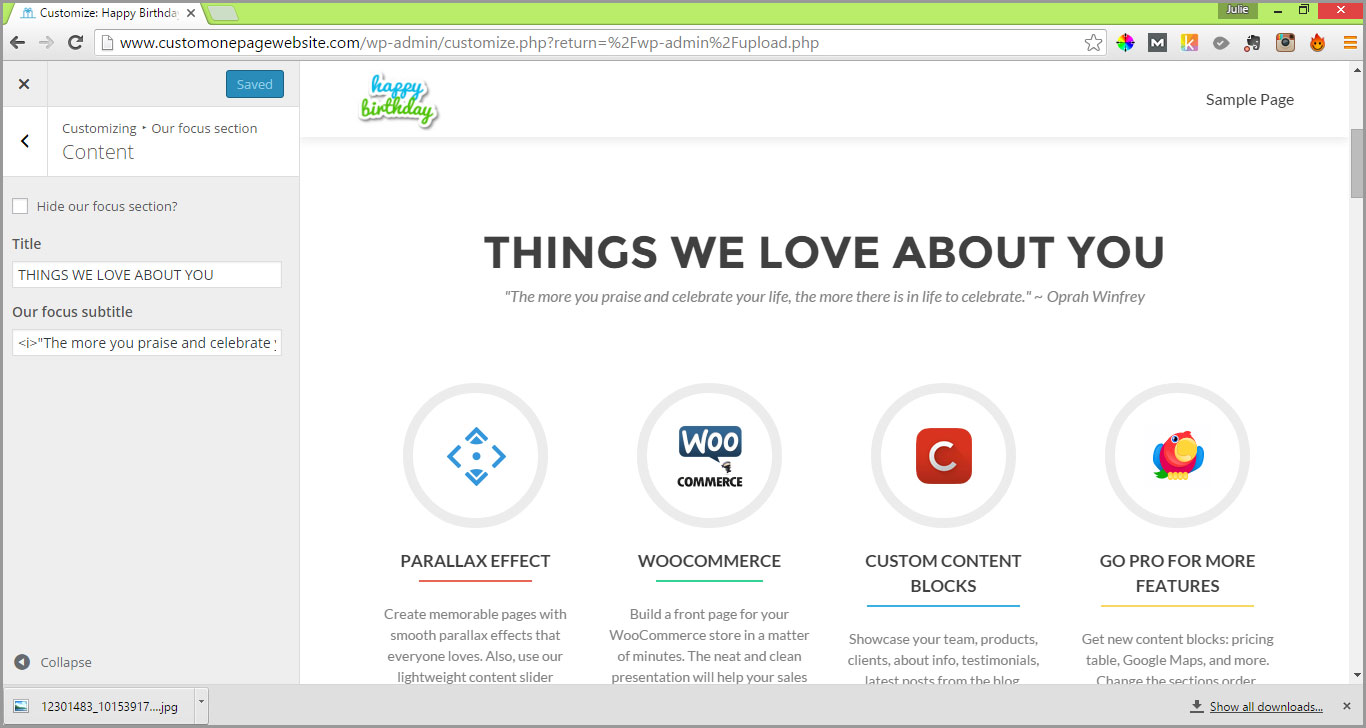
Here’s where I teach you your first piece of HTML if you aren’t already familiar with it! I wanted to modify the style of the subtitle so that it is in italics (given that it is a quote) and to do so I had to add in a piece of HTML markup language. Entering <i> before the word or phrase and </i> after the word or phrase you wish to appear in italics will make it so! Easy, eh?!
You’ll notice that there aren’t any additional fields to edit under the “Our focus section” on the left side, yet under the heading we just revised there are clearly four icon images, each with a smaller heading and a paragraph of text beneath them. We need to move to another section to edit these, so let’s do this now.
Click the arrow to the left of the Content title to return to the “Our focus section” menu options. Then select “Our focus section widgets”.
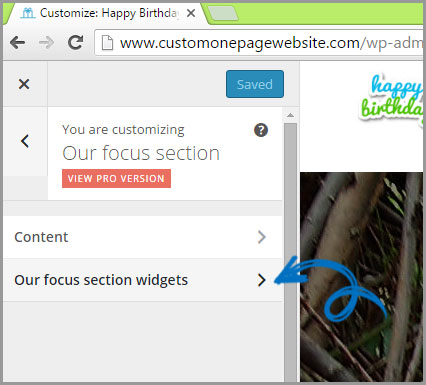
You’ll be presented with a new left side menu where you can customize widgets for the “Our focus section”.

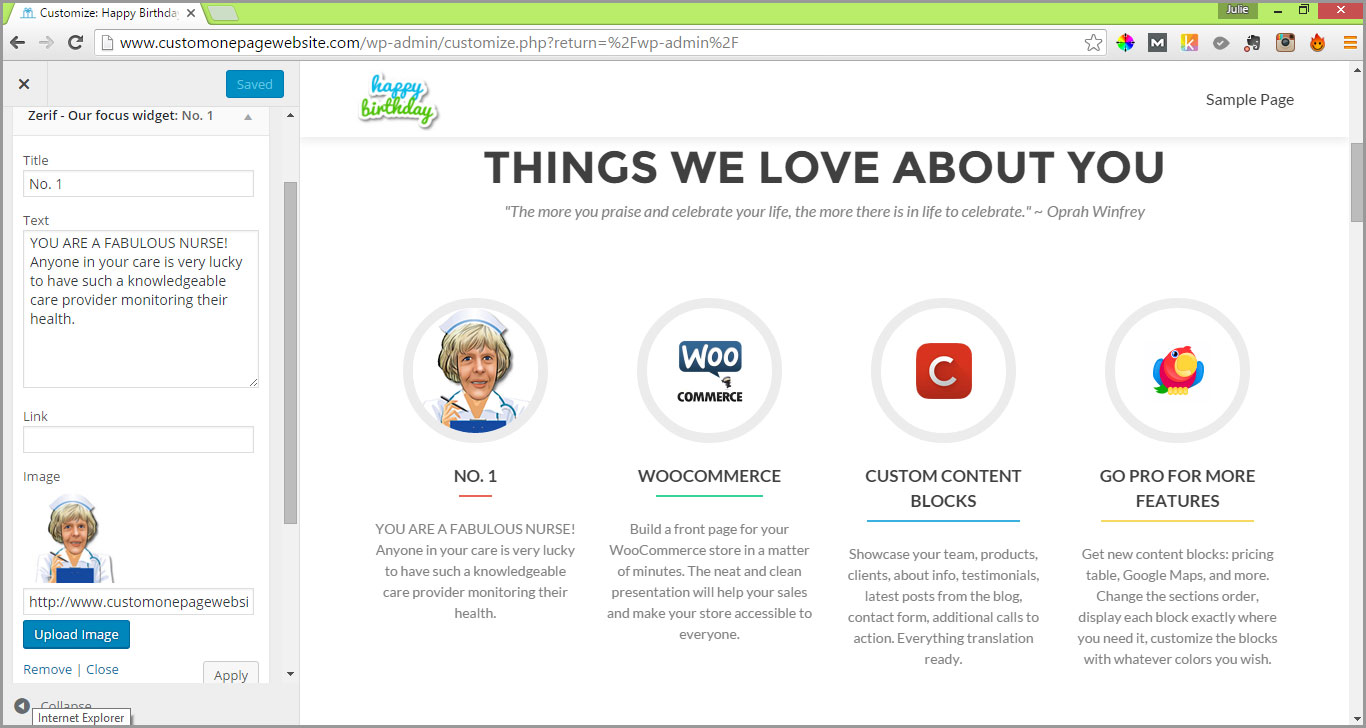
Click on “Zerif – Our focus widget: PARAL…” to modify the first image, heading and blurb. You’ll see the following editable areas displayed:

Add a “Title” into the title field. This should be a short phrase that relates to the “Our focus section” heading that you entered earlier. In the example created for you to follow along with I’m using the notion of “THINGS WE LOVE ABOUT YOU” so the Titles will be numbers.
Below the Title field is a “Text” field. Here you can elaborate on the heading. I have added some HTML formatting to my text as I wanted to create a bold sub-title and have a line break before the blurb of text following it. If you would like to replicate this formula, simply add a <strong> tag before the sub heading and </strong> following the sub heading.
Additionally, I’ve added line breaks between the sub heading and text that follows. If you would like to do this simply add the following tag where you would like the like break to occur <br>. If you would prefer a double line break (i.e. paragraph separation) add this tag <p>.
We aren’t going to use the link field for this project as we’re only creating a one-page site with some video posts, however, if you were to expand the site later and wanted to create a Page dedicated to the subject matter of a particular widget, you would create the Page first, then copy the link from that page into the “Link” field. You can also add links to external sites here.
Click on the blue “Upload Image” button to add an image that supports the text you just entered. This could be a photo that’s personal or a graphic image. Recommend the size be about thumbnail size (approx. 150 x 150 pixels). It will be styled to appear inside of a circular border, so keep this in mind when choosing an image/photo (the outside corners will be cropped).
If you need help with image creation check out the gigs on fiverr.
Once you’ve uploaded the image (same process as you did with the logo), click the blue “Apply” button to see how it looks with the other widget components.
Don’t forget to click on the blue “Save & Publish” button!
IMPORTANT TIP: Never save graphics from a search engine’s image results and use for your own purposes as they are likely copyright protected and you could wind up with a legal headache! You can download images for free from Public Domain sites such as publicdomainpictures.net. Other sites such as freedigitalphotos.net allow you to use their images for free so long as you provide a credit link to the source. Be sure to read the terms of the license for each image you’re considering. Again, you can check out this Gig on fiverr if you need help creating and/or sizing a graphic image.
Once you’re done with the first widget, click on the “Close” link (under the blue “Upload Image” button in the left sidebar) and move onto the next widget.
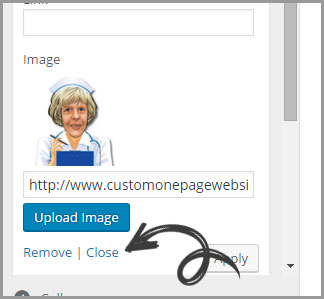
There are four widgets that are setup by default with this theme which you can edit. If you do not want to use them all then open the widget you want to eliminate by clicking on its down arrow to expand its details and click on the “Remove” link (to the left of the “Close” link under the blue “Upload Image” button) to delete it.
If you would like more than the four default widgets, click the “+ Add a Widget” button to add another widget to this section. A new menu will slide out to the right of the left hand sidebar. Scroll down this menu until you see “Zerif – Our focus widget” item and click on it.
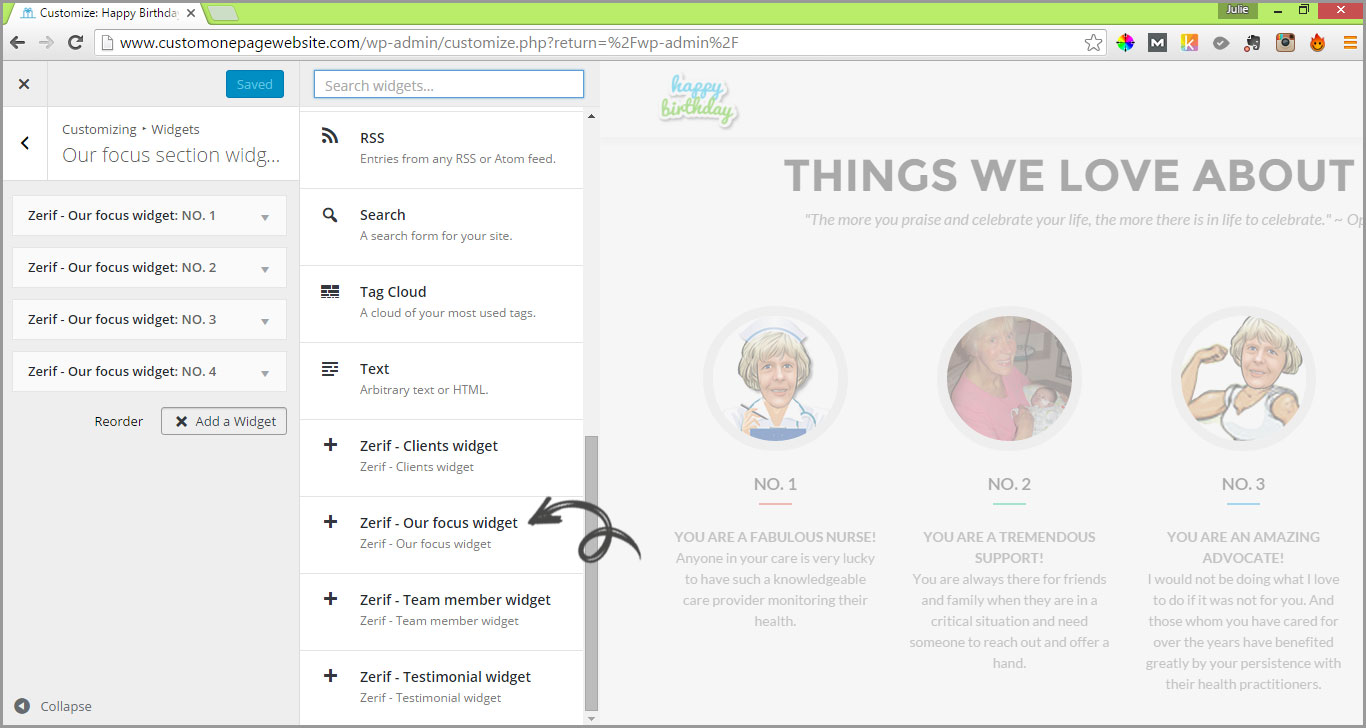
You will be presented with fresh fields to input “Title”, “Text” and “Image” to. The page style accommodates 4 widgets to a row, so if you add a 5th widget it will be moved to the center position of a second row, 9th widget will be moved to a third row and so on.
Once you’re done creating your “Our focus section” widgets, if you wish to change the order of them you can do so simply by clicking on the “Reorder” button.
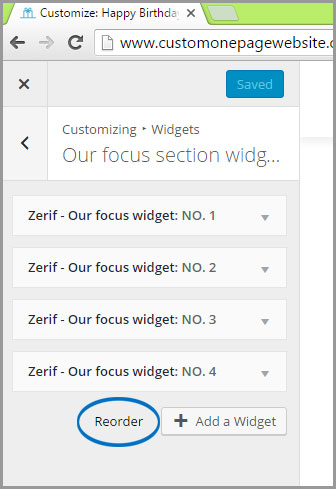
The left side navigation will change and look like the screen shot below:
NOTE: Because my widgets are numbered and I changed the order (I wanted to alternate illustration with photographic images in the first row) I had to edit widgets 2 & 3‘s numbers so they are back in chronological order.
You can either simply drag and drop the widgets to where you want them, use the up and down arrows to move the widgets; or click on the boxed arrows to display a drop down menu that gives you the option to move the widget to a whole different section. You can see how the new order appears in real time in the preview area to the right. Hit the blue “Save & Publish” button when you are happy with the order of widgets.
You can modify the content of a widget at any time by clicking on it to display its editable fields. Note that changes won’t take effect on the live site unless you hit the blue “Save & Publish” button.
When you’re done with the widgets for this section return to the main Customize navigation by clicking the arrow to the left of the “Our focus section wid…” heading at the top of the page. You’ll then have to then click the arrow to the left of the “Our focus section” heading (top of page) to get back to the main menu.
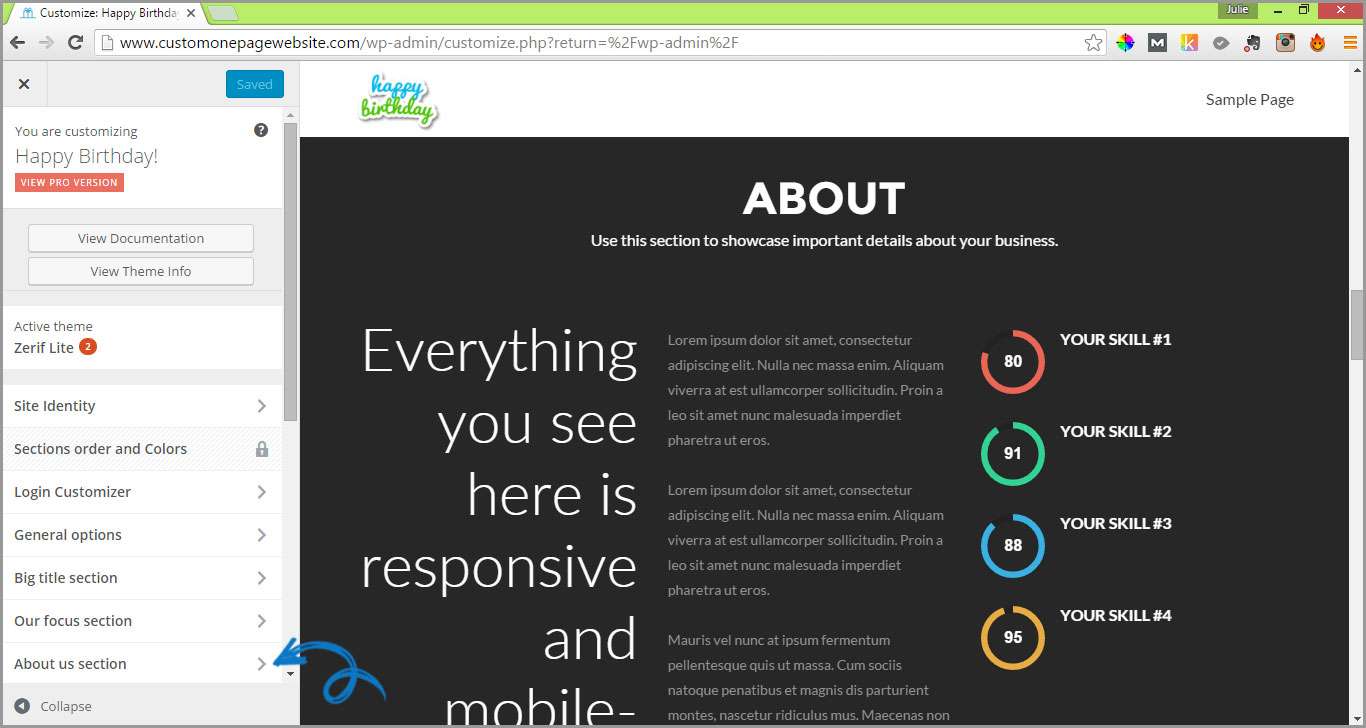
vi. ABOUT US SECTION: In the “About us section” area you could add content such as a personal letter, poem, parable, historic references or timeline of events that are important to the recipient.
I’ve chosen to add interesting trivia about the year my Mom was born in. You can find this information, along with quotes and poems easily by doing a google search. Be sure to credit the source of any copyright protected material.
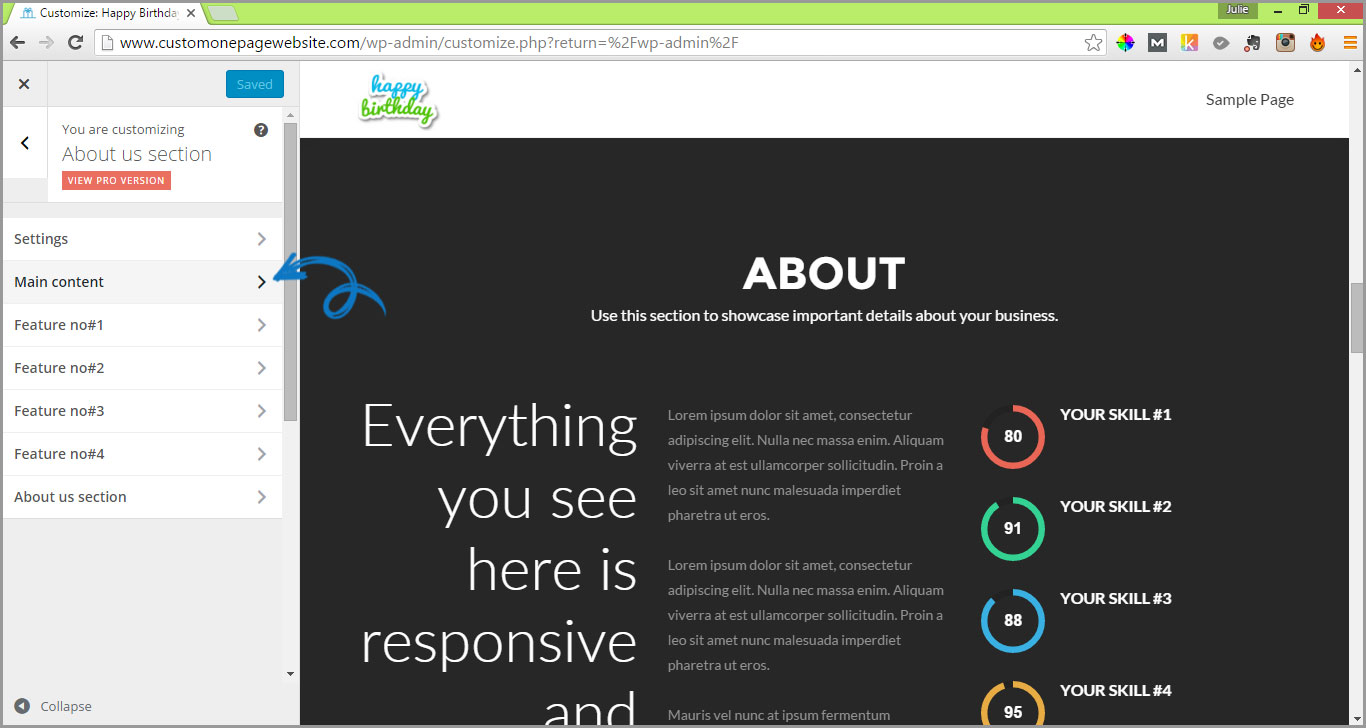
To edit this section, begin by clicking on the “About us section” menu item.
You’ll be presented with the following sub menu:
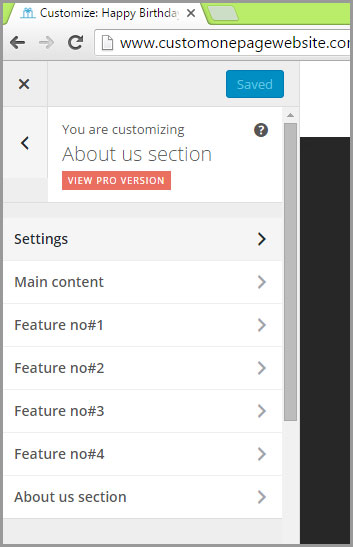
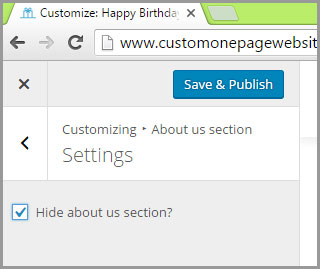
NOTE: If you would prefer not to display the About us section on your web page you can simply hide it by clicking on “Settings”, checking the “Hide about us section?” box and then clicking on the blue “Save & Publish” button.
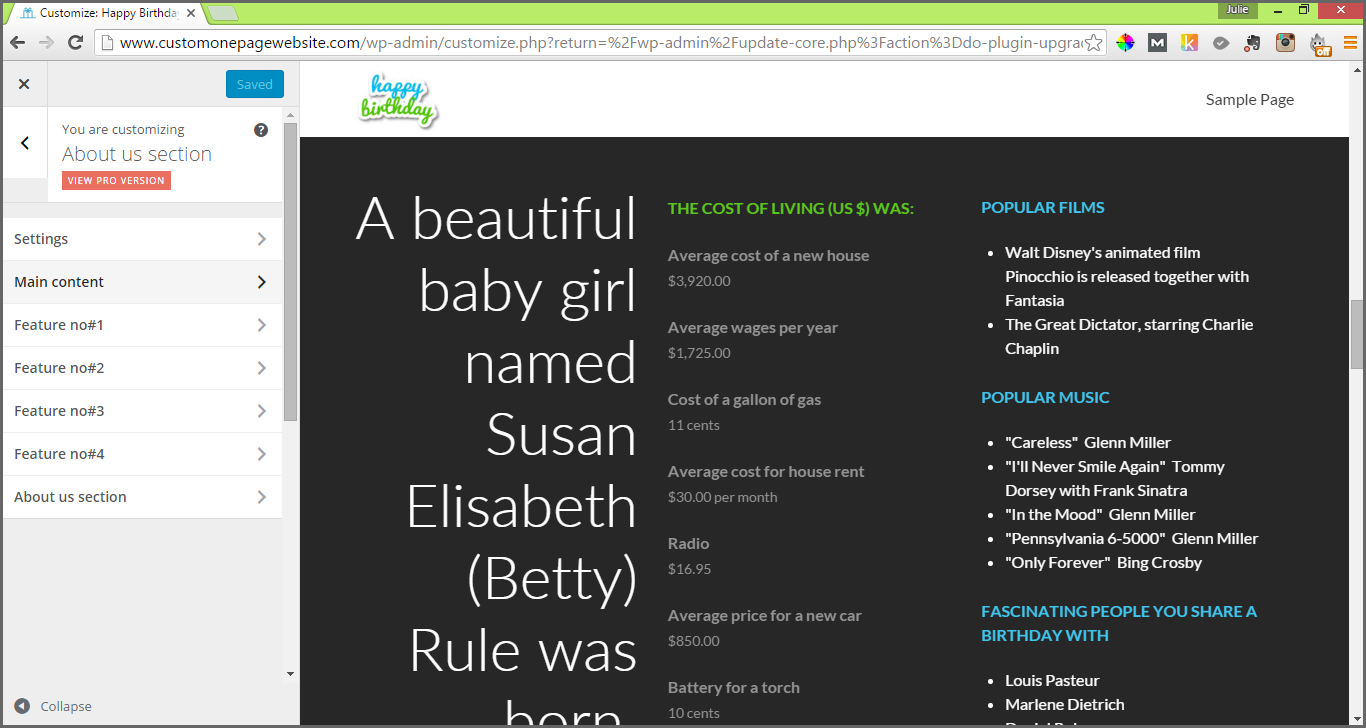
To begin editing the content click on the “Main content” sub menu item.
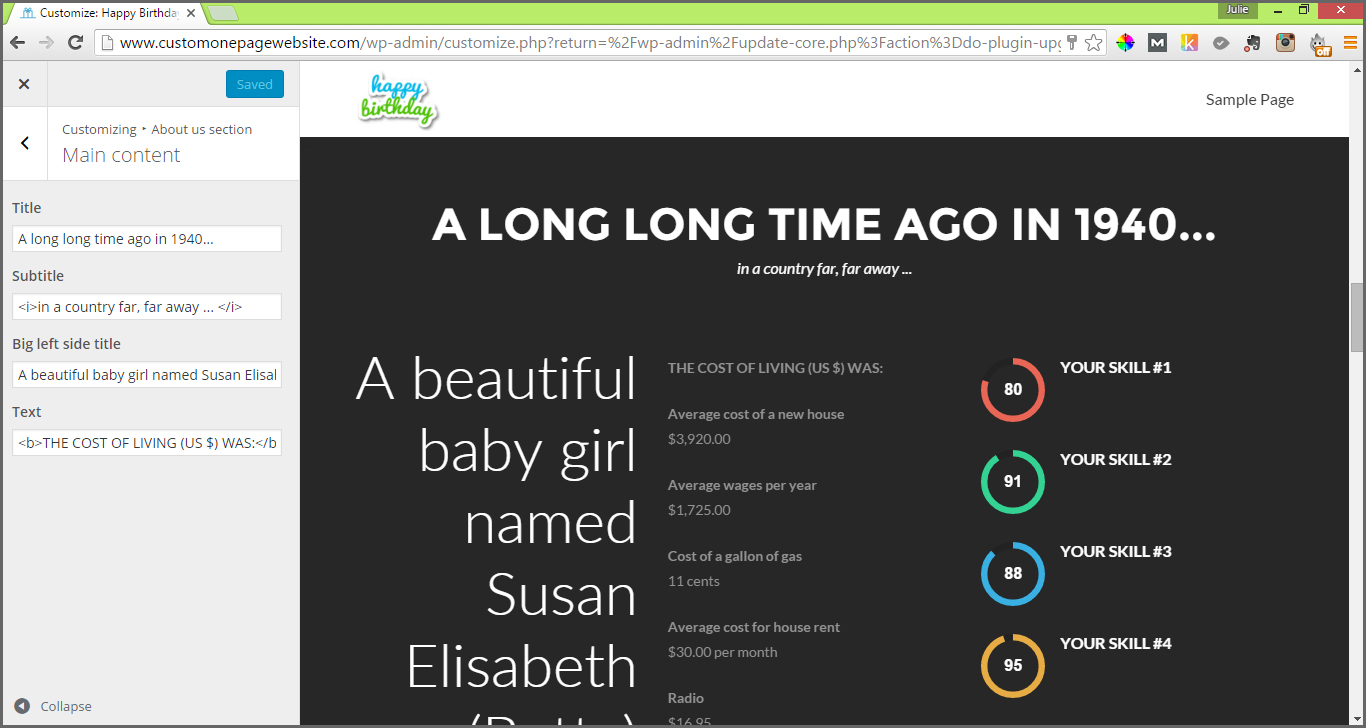
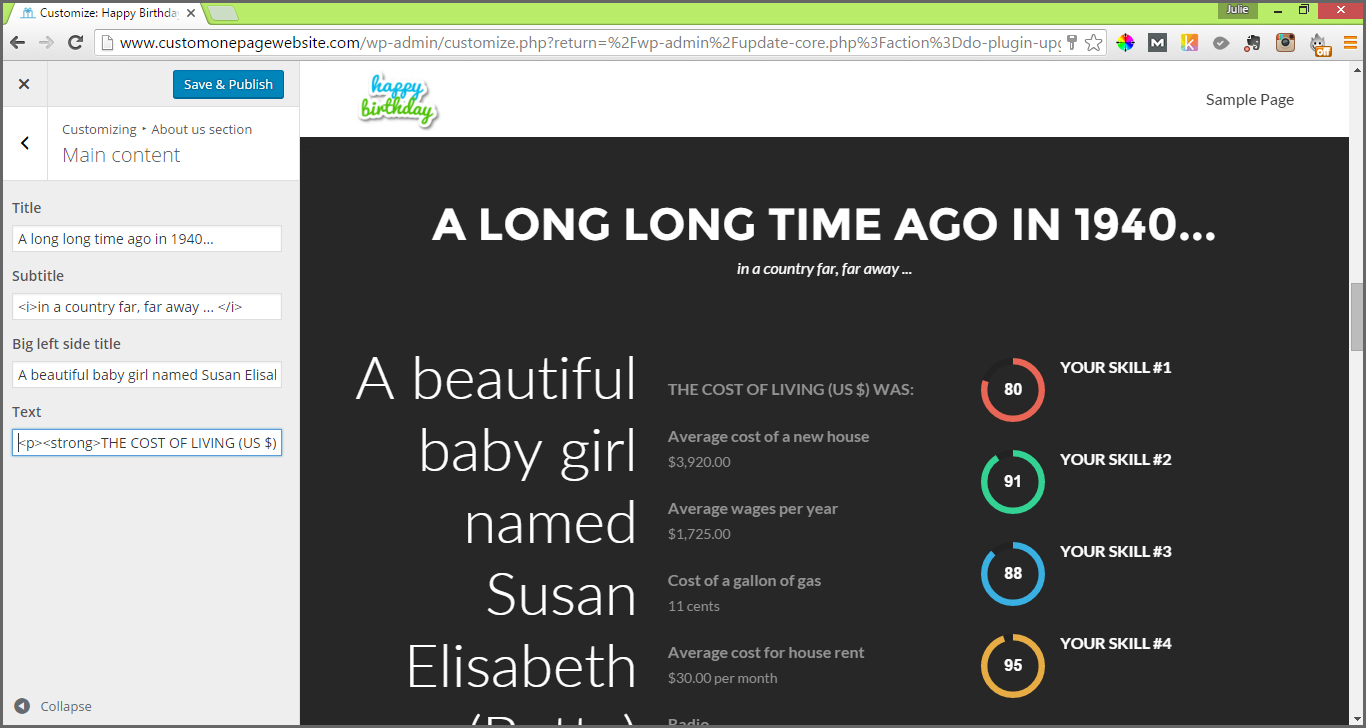
You will be presented with Main content editable fields as illustrated below:

The “Title” field is the heading at the top of the section that appears in all caps. I have edited this content to read, “A LONG, LONG TIME AGO IN 1940…” (NOTE: My Mother has a sense of humor!).
If you have chosen a quote, the “Subtitle” field is a perfect place to reference the source of the quote as it appears directly below the Title heading in a smaller font size.
If this field doesn’t work with the content you have chosen for this section, you can simply eliminate it by clearing the field of any text.
I’ve used it to complement the Title, “in a country far, far, away…”.
The “Big left side title” is the large text that runs down the left side of the main content. I’ve simply completed the thought that I introduced in the Title and Subtitle.
In the main “Text” content I’ve added quite a bit of HTML to bold and add line separation and paragraphs. If I hadn’t done this, you would see one large unformatted run on paragraph (NOTE: Continue reading to be introduced to a free automated way to create this HTML if you feel overwhelmed with adding it manually).
I took advantage of the bold styling to draw attention to “THE COST OF LIVING (U.S. $) WAS:” bulleted heading.
To bold: <strong> TEXT YOU WISH TO BOLD </strong>
To add a line break: <br />
To add a paragraph break: <p> Paragraph content </p>
If manually adding HTML is too overwhelming, fear not! There is a work around.
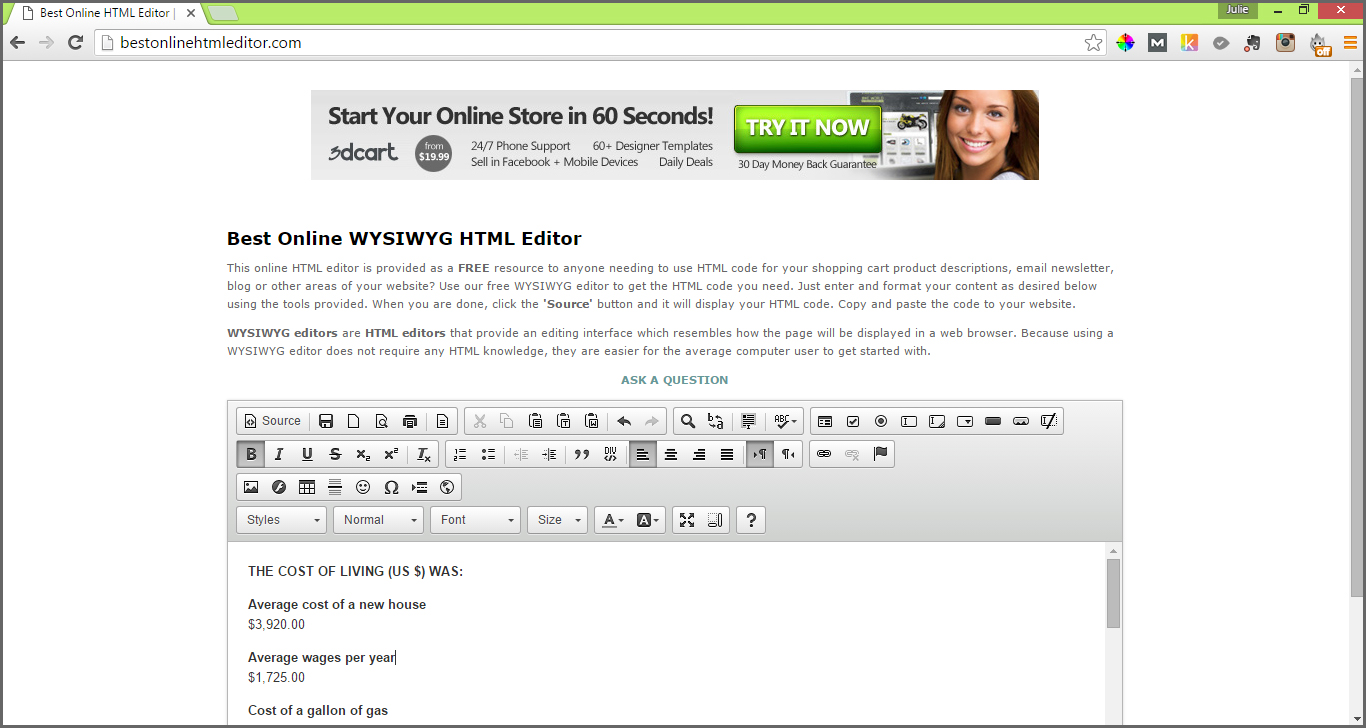
Go to http://bestonlinehtmleditor.com/ . In the large editor field delete the ‘Sample Text’ and add the content you’d like. Prior to adding additional formatting, be sure to highlight all the text and “Remove Format” if you’ve copied the content from another source. This is the icon that looks like an underlined italicized capital T with a small x to the lower right. Now you can format your text the way you’d like. This works similarly to any word program with one difference; for a line break hold down the SHIFT key while you press ENTER; for a paragraph just press ENTER on its own.
Once you’ve completed your formatting, simply click on the “SOURCE” button, then highlight the box contents, copy to your clipboard and paste into the About us section: Main content ‘Text’ field.
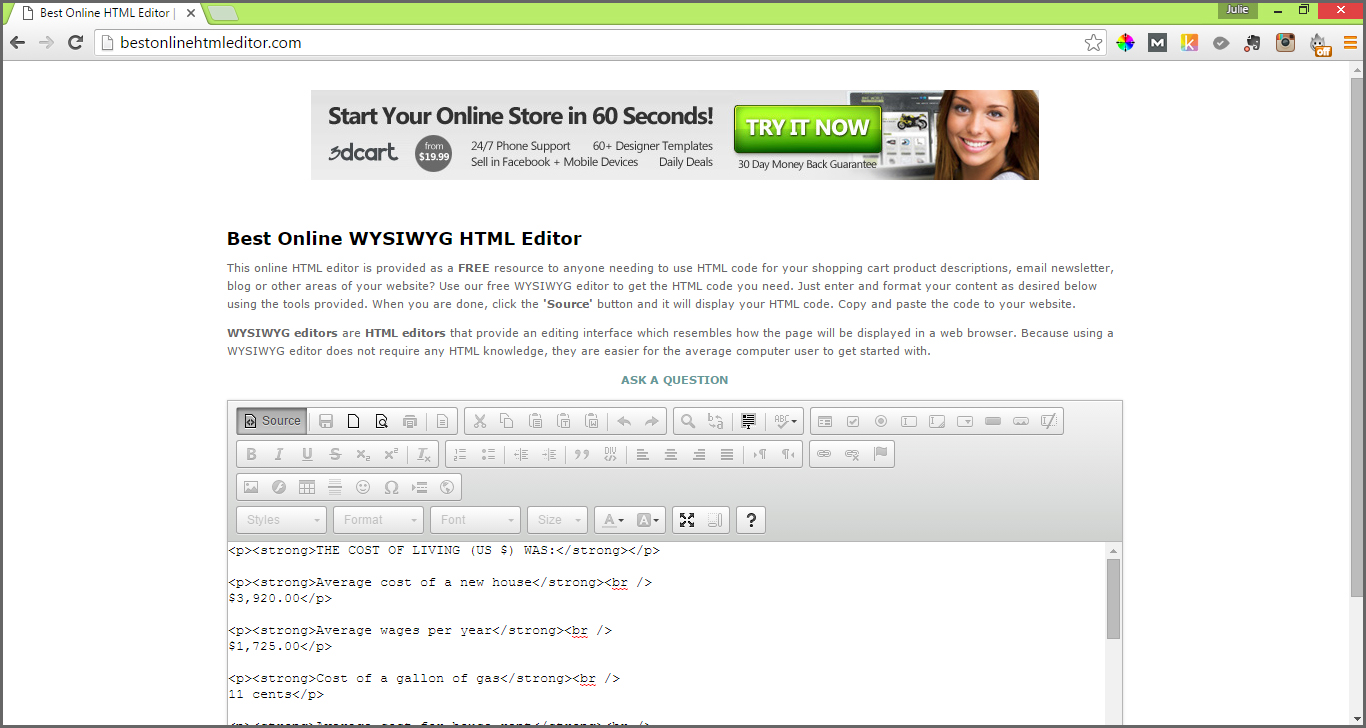
NOTE: For me, this added a paragraph tag <p> before my bulleted heading, which I don’t want, so I simply removed the first <p> so the text is in alignment with the other columns at the top.
Don’t forget to hit the blue “Save & Publish” button at the top of the sidebar!
There are four Feature segments that appear in the third column of the “About us section” (to the right of the “Text” content you just added).We need to return to the main “About us section” menu to edit these, so to do so click the arrow that points left at the top of the Main content sidebar menu.
Next, click on “Feature no#1”.
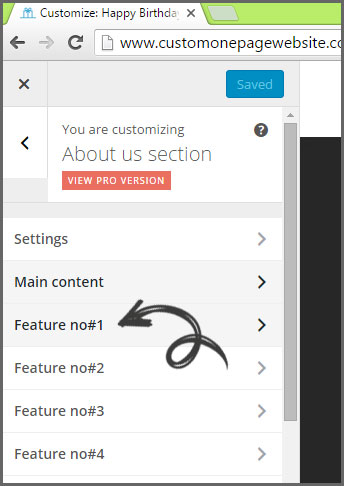
Each Feature is displayed by default with a percentage graphic. Percentages make more sense to incorporate into a business site but if you can think of a creative way to include them, go for it! I’ve decided to use these sections to highlight pop culture aspects of the 40’s.
“Feature no1 title” = A bold heading in all CAPS.
“Feature no1 text” = Text content of feature.
“Feature no1 percentage” = If you wanted a percentage graphic to be displayed here you would enter the percentage number (no percentage sign required). If you don’t want to have the graphic appear delete the content in the field.
NOTE: In this example, I used the http://bestonlinehtmleditor.com/ editor to add a pop of color to the feature headings and bullets; and the middle column heading.
Again, for any field that you DO NOT want displayed, simply remove any content from the field and don’t forget to hit the blue “Save & Publish” button.
The last remaining menu item in the About us section is titled, “About us section”. If you click on this, you are taken to a menu that allows you to add a widget. I chose not to add any widgets in this section as by default they appear under a heading of “Our Happy Clients” which isn’t editable with the Zerif Lite version. However, if you want to add widgets here and modify this heading, the Zerif Pro version will provide the support to do so.
vii. OUR TEAM SECTION: Now we are going to make the “Our team section” an “Birthday Wishes” section!
In the main “Customize” menu, click on the “Our team section” to expand its options.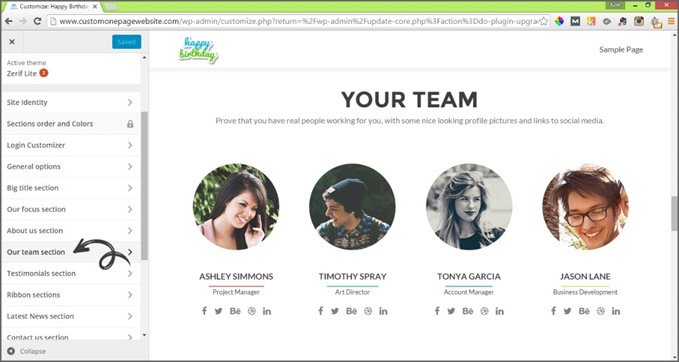
You will be presented with a new menu with two options:
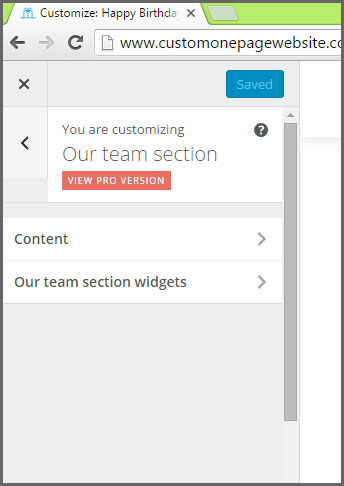
Clicking on the “Content” menu choice will present a new sidebar that has options to modify this sections title and subtitle or to hide the section all together.
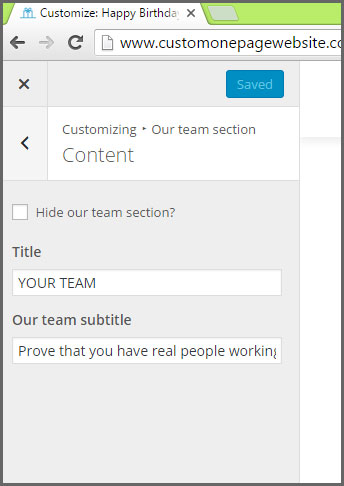
In the “Title” field I’ve revised “YOUR TEAM” to “BIRTHDAY WISHES”. And in the “Our team subtitle” I’ve modified the text so that it contains a short italicized quote.

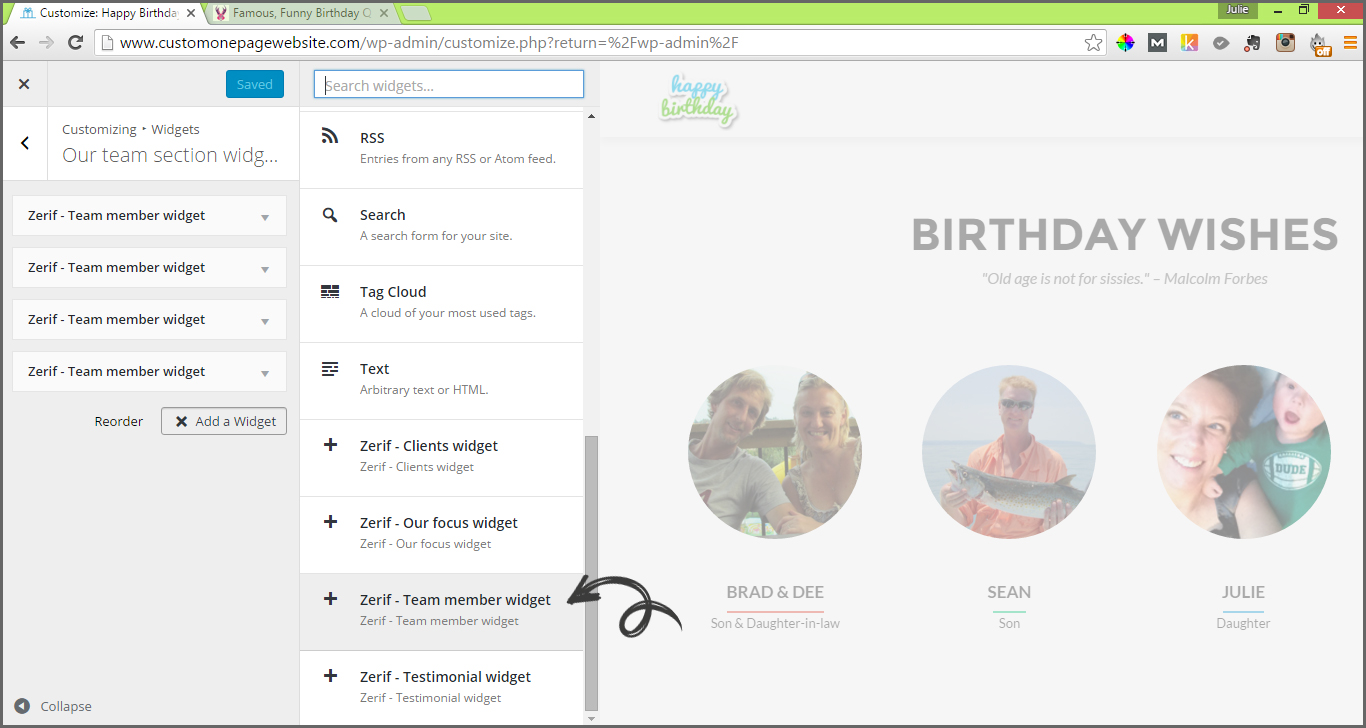
Now, onto the widgets. Return to the Our team section menu and select “Our team section widgets”.

From the Our team section widgets submenu that appears, click the first “Zerif – Team member widget” item at the top.

This is what you’ll be presented with:
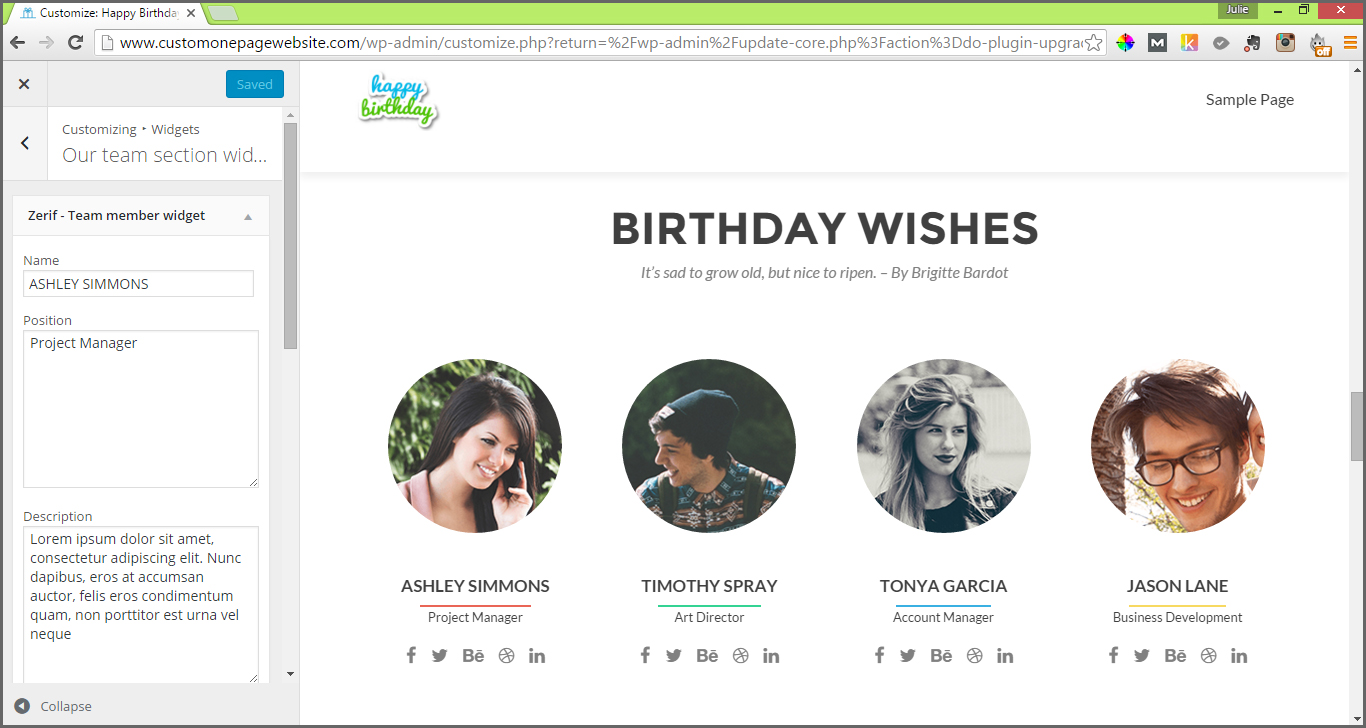
The fields displayed in the left sidebar were designed to be utilized for business applications, however we can still mould them to work for a personal webpage. We’re going to use this section to upload pictures and short birthday messages from friends and family members (if you wanted to up the cute factor you could include pets here also).
In the “Name” field type the name of the friend or family member.
In the “Position” field type the relation of that person to the site recipient (i.e. daughter, son, grandson, friend, etc.).
In the “Description” field, type the birthday wishes. They will display on mouse over of the friend or family members photo.
The social media fields aren’t necessary for our purposes. Delete the default “#” that is in each of the social media fields to remove the associated icons from under each photo (NOTE: If you wish to include social media links, simply replace the hashtag symbol # with an actual link).
Now, click on the blue “Upload Image” button to upload a photograph. Recommend that you crop and resize images to 150 pixels x 150 pixels or they may end up distorted.
Be sure to click the “Apply” button and the blue “Save & Publish” button at the top of the sidebar after modifications.
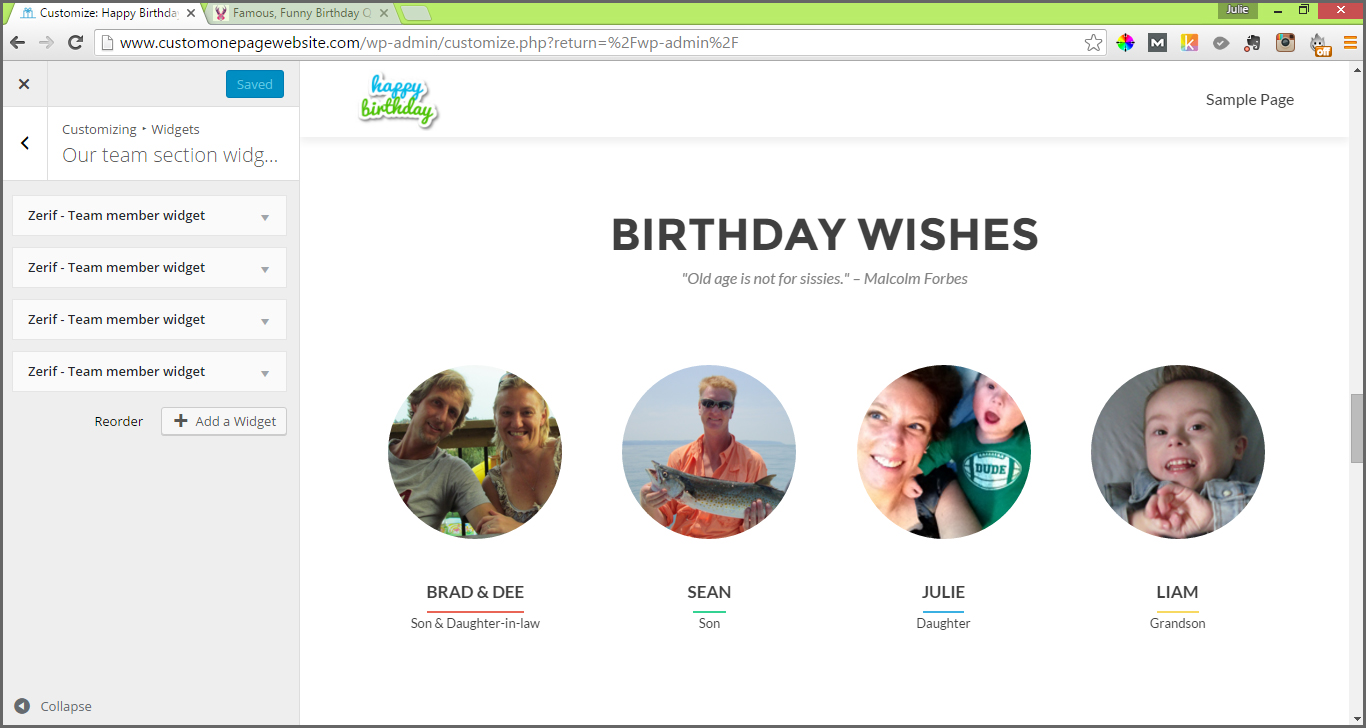
To add a widget, click on the “+ Add a Widget” button, then scroll down the secondary menu that pops up until you see “+ Zerif – Team member widget” and select it.
You can add as many “+ Zerif – Team member widgets” as you wish. As with the “Our focus widgets” the webpage will accommodate 4 widgets to a row.
NOTE: Again, you can check out this Gig on fiverr if you need help creating and/or sizing a graphic image.
viii. TESTIMONIALS: You could use this section to include funny famous birthday quotes or change the title to “FAVORITE MEMORIES” and post short anecdotes about the birthday boy or girl as detailed by friends and family. This would be a great idea for a milestone birthday. The process is similar to what we just walked through for the OUR TEAM SECTION.
With the free Zerif Lite theme you aren’t able to change the color of the brown background. If you want to be able to do that, you’ll have to purchase the Zerif Pro theme.
Start by selecting “Testimonials section” from the main Customize menu.
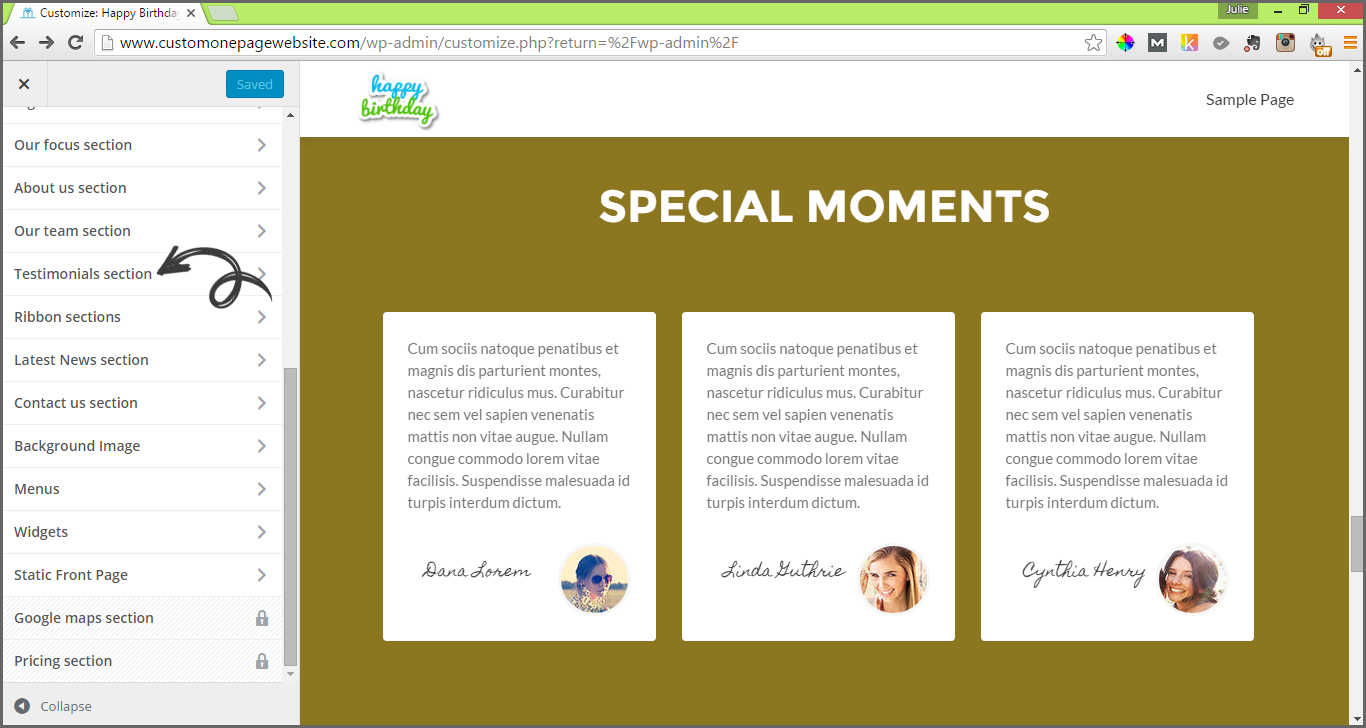
Change the title first by selecting “Testimonials section” from the Testimonials section sub menu. Yes, we know the repetitive labels are a little confusing!
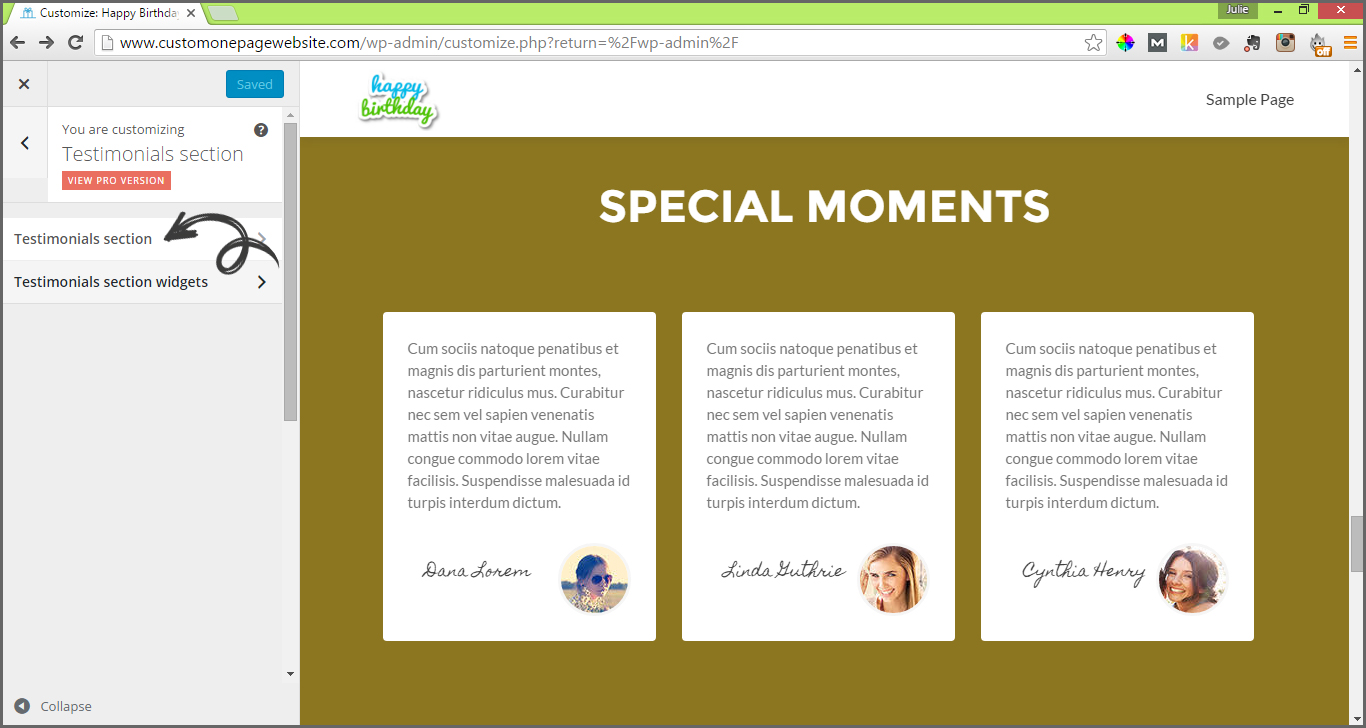
You can hide this section all together if you’d like by simply clicking in the checkbox beside “Hide Testimonials section?”; or you can change the title in the “Title” field to one more appropriate for a Birthday site. I’m going to go ahead and change the Title to “Special Moments”. Don’t forget to click the blue “Save & Publish” button at the top of the sidebar before moving on to the next step!
Now select the back arrow to return to the Testimonials section menu choices.
![]()
From the Testimonials section menu, select the “Testimonials section widgets” option.
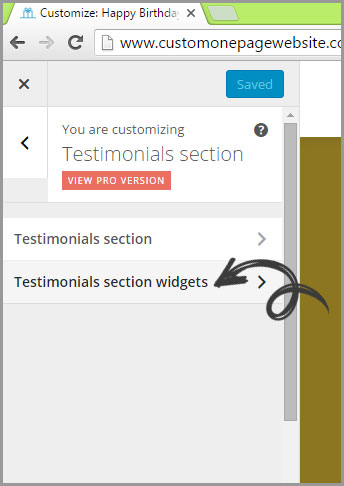
Now click on the first “Zerif – Testimonial widget: ..”
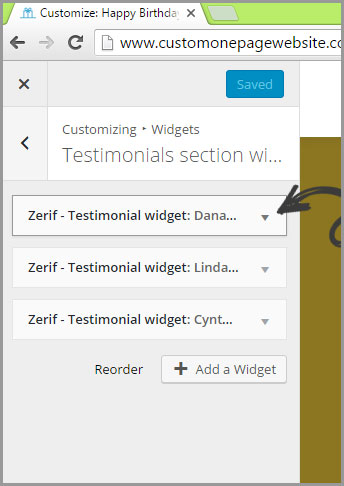
You will be presented with expanded fields as illustrated below:
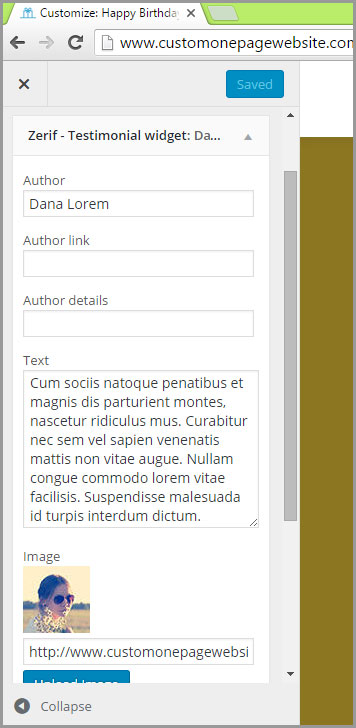
In the “Author” field, change the default name to that of the content contributor.
It’s up to you whether you want to add an “Author link” or “Author details”.
In the “Text” field I’ve changed the default Lorem Ipsum text to reflect a memory about the birthday recipient.
To change the “Image”, click on the blue “Upload Image” button, then click the blue “Upload Files” link and the grey “Select Files” button to select an image file for upload to the Media Library.
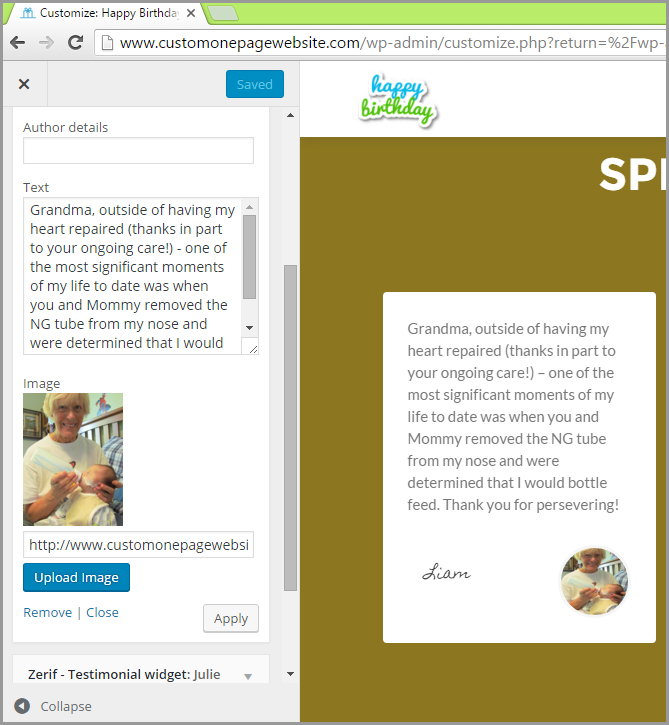
If you don’t want to include an image simply remove the link under the thumbnail of the image in the “Testimonials section widgets” sidebar, then click on the grey “Apply” button and be sure to also click the blue “Save & Publish” button at the top of the sidebar.
ix. CONTACT US: We’re going to make some quick edits to the “Contact us section” before moving on to posts. You should see something similar to the following after selecting the “Contact us section” label from the main Customize menu (NOTE: I have scrolled down using the right hand scroll bar to the bottom of the page so I can preview changes as I apply them).
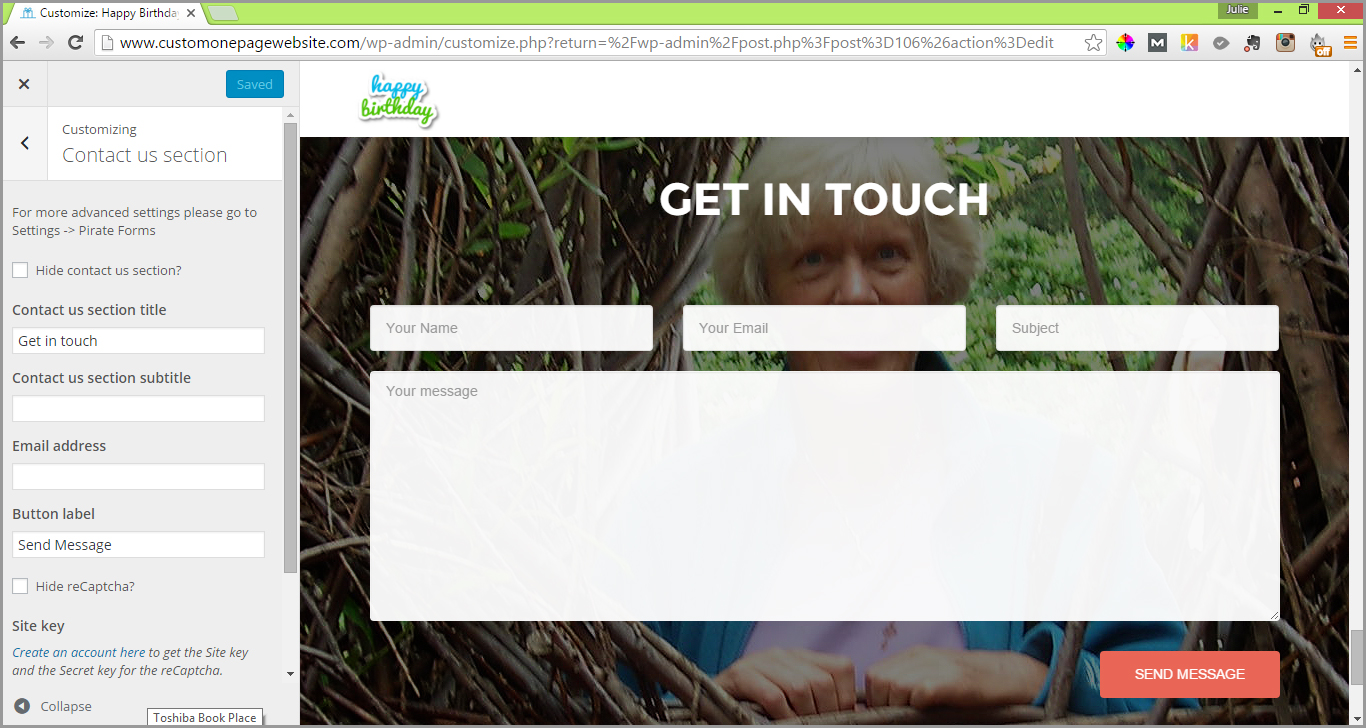
So for the purposes of this Birthday Celebration webpage, in the field under “Contact us section title”, I’m going to change the heading of this section from “GET IN TOUCH” to “SEND BETTY A GREETING!”. If you wish to add a subtitle you can do so in the field labelled “Contact us section subtitle”.
The most important field in this section is the “Email address” field. Make sure you enter the address you would like any comments to be sent to.
You may change the “Button label” which is “SEND MESSAGE” by default if you’d like. I’m just going to leave this as is.
Lastly, click on the box beside “Hide reCaptcha?” and hit the blue “Save & Publish” button at the top of the sidebar.
x. LATEST NEWS: This is the section where the most recent posts will appear. If close friends and family members were to take a few minutes to add a post on a somewhat regular basis, think of the life story that would be logged over time! Posts don’t have to be long. Just a title, an image or piece of video and a short description is all that’s needed to create a post.
I’m going to rename this section “MORE BIRTHDAY LOVE” and add posts that contain video messages from loved ones for the birthday recipient.
To change the section title, select “Latest News section” from the main Customize menu.
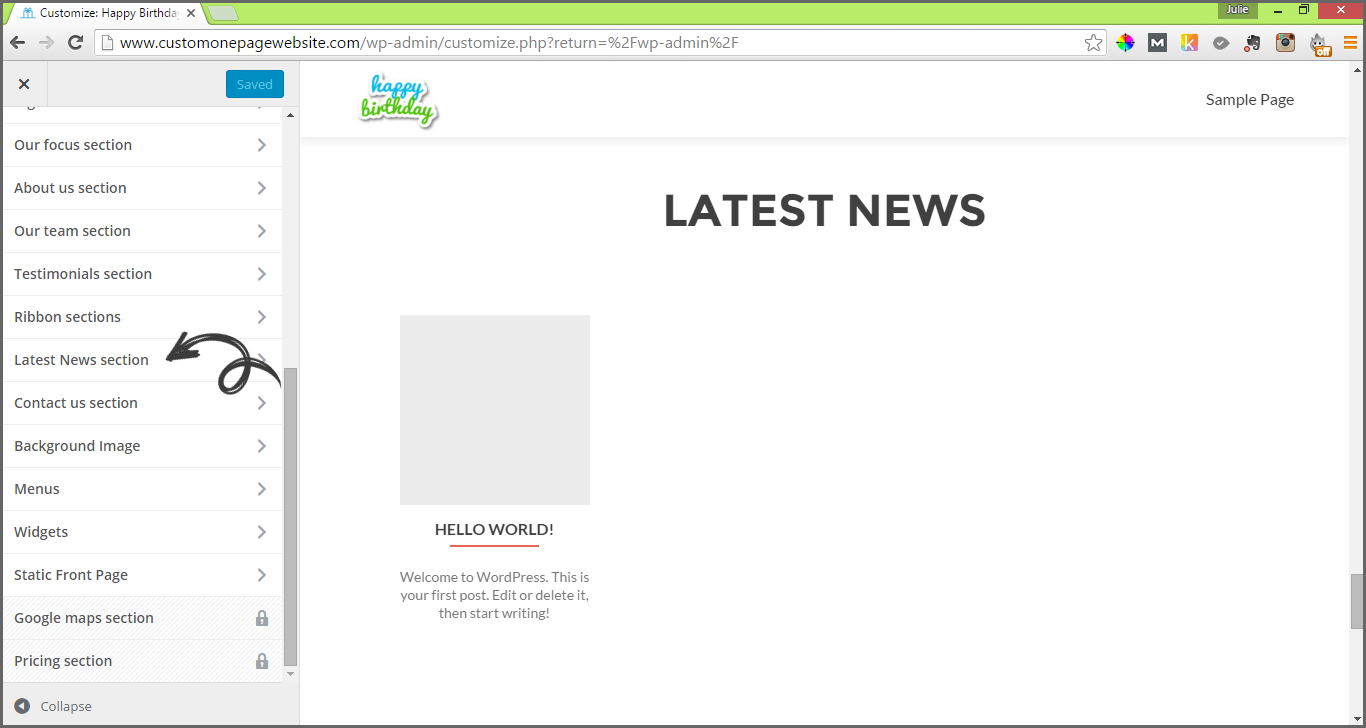
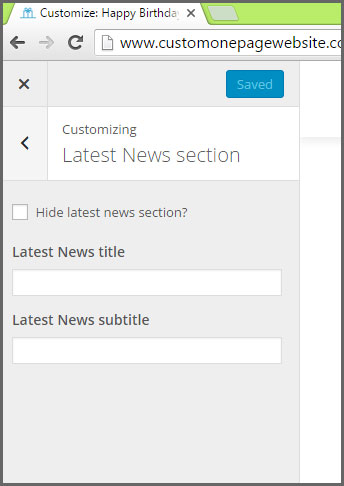
There are only a couple of options you are able to modify in the Latest News section sidebar.
You can hide this section all together by checking the box next to “Hide latest news section?”. I want to display this section so I’m going to leave this box unchecked and move down to the “Latest News title” field.
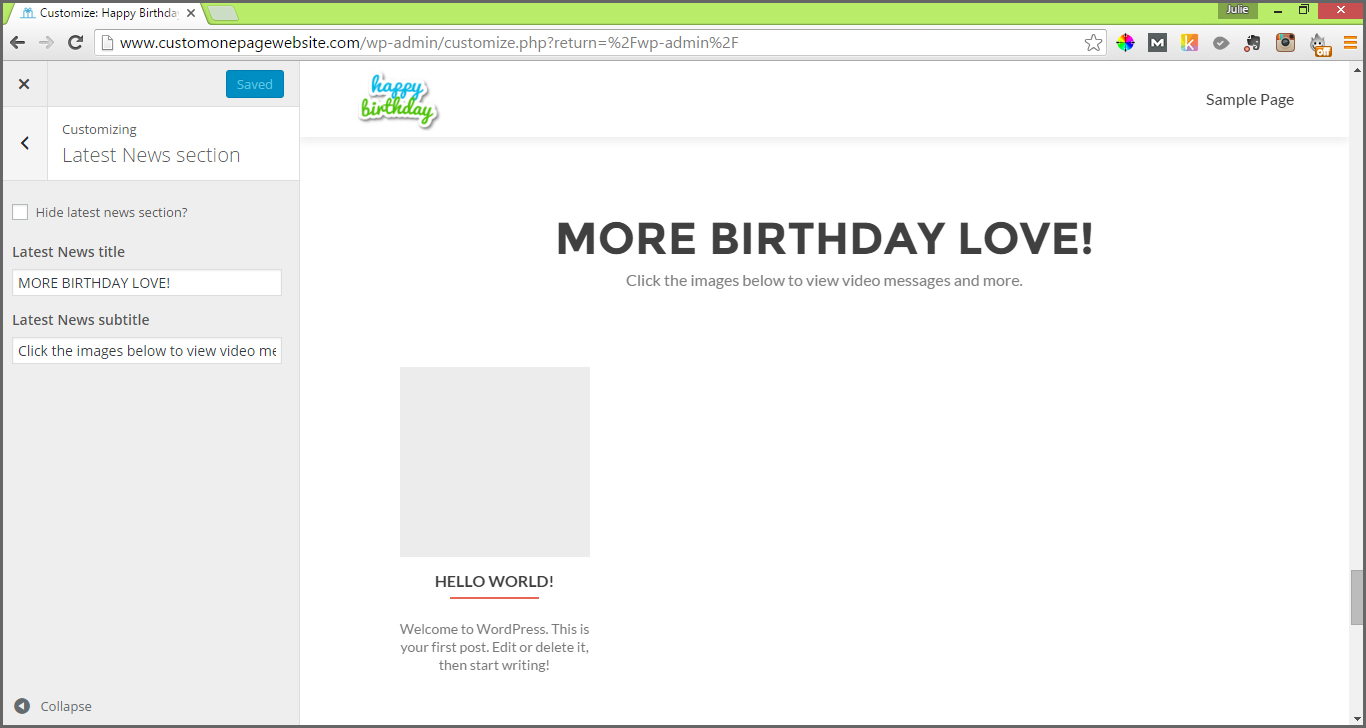
As I already mentioned, I want to change this section heading to “MORE BIRTHDAY LOVE!”, so will enter that in the title field.
I would like to further describe what will be found in this section and how to access the posts, so I’m going to also add a subtitle that says “Click the images below to view video messages and more.” in the field under “Latest News subtitle”.
Posts are added in another section of the admin, so once you’ve saved your work, click on the “x” in the top left corner (to the left of the “Save” button) to return to the WordPress dashboard.
Give yourself a huge pat on the back! You’ve just added a new skill set to your resume – ability to install and customize a WordPress theme!