
WHY IS IT IMPORTANT TO PROTECT YOUR WEB PAGE?
WordPress is a very popular Open Source (FREE) Content Management System (CMS) and therefore is vulnerable to hackers.
HOW CAN I PREVENT AN ATTACK ON MY WEB PAGE?
While the focus of this course isn’t WordPress Security, we’ll help you get started with tools and steps you can implement to make your web page less vulnerable.
NOTE: If you decide to start a passive income blog or build a small business website I recommend considering Sucuri’s services. They take care of complete website security for you. Starting at less than $18 per month they are well worth the peace of mind.
1. ONE OF THE SIMPLEST THINGS YOU CAN DO TO PROTECT YOUR WEBSITE IS MAKE SURE YOU CHOOSE A STRONG USERNAME AND PASSWORD.
- CHOOSING A USERNAME:
- Never leave the default “admin” Username.
- Stay away from using your name or common generic usernames such as “administrator”, “support” etc.
- Don’t pull from your domain name to create your Username.
- Never use a Username that you have used for another website login.
- Choose a UNIQUE Username. Again, recommend that you use a random combination of upper and lower case letters and numbers to make it difficult for a hacker to gain access.
- CHOOSING A PASSWORD:
- Never choose a Password like “cr@y0n5”. In other words, don’t use symbols & numbers that resemble letters in place of letters. There is hackbot software that can crack passwords like this in 3 minutes.
- Your best defense is to use a long Password that is comprised of random upper and lowercase letters, numbers and special characters. Passwords over 15 characters long are safest.
- To check how strong your Password is go to https://howsecureismypassword.net/ and enter it in the field provided.
- Recommend you change your Password on a frequent basis. Monthly or quarterly (depending on how much you value all the work you’ve poured into your site!) is good practice.
- If you just audibly grimaced because you’re wondering how you’re going to keep track of all your passwords, don’t fret! There are FREE password manager tools such as the one at RoboForm that will take the pain out of this task.
-
IMPORTANT PROFILE SETTINGS & HOW TO CHANGE YOUR WORDPRESS ADMIN PASSWORD:
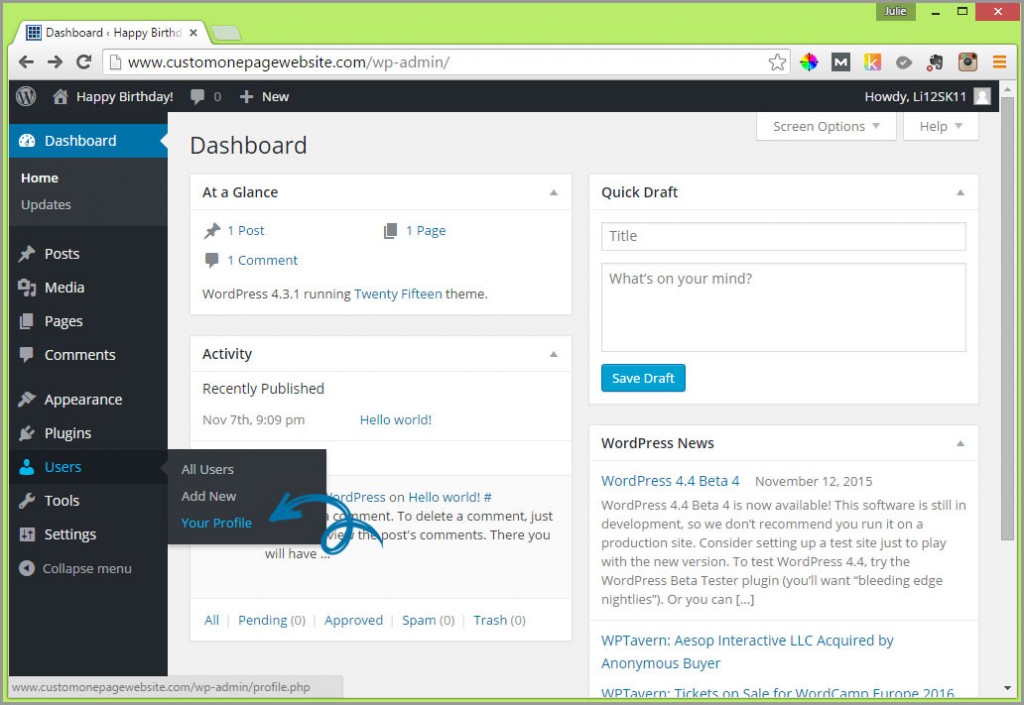
- From your WordPress dashboard, move down the left side navigation to “Users” and from the pop up menu that appears, click on “Your Profile”.
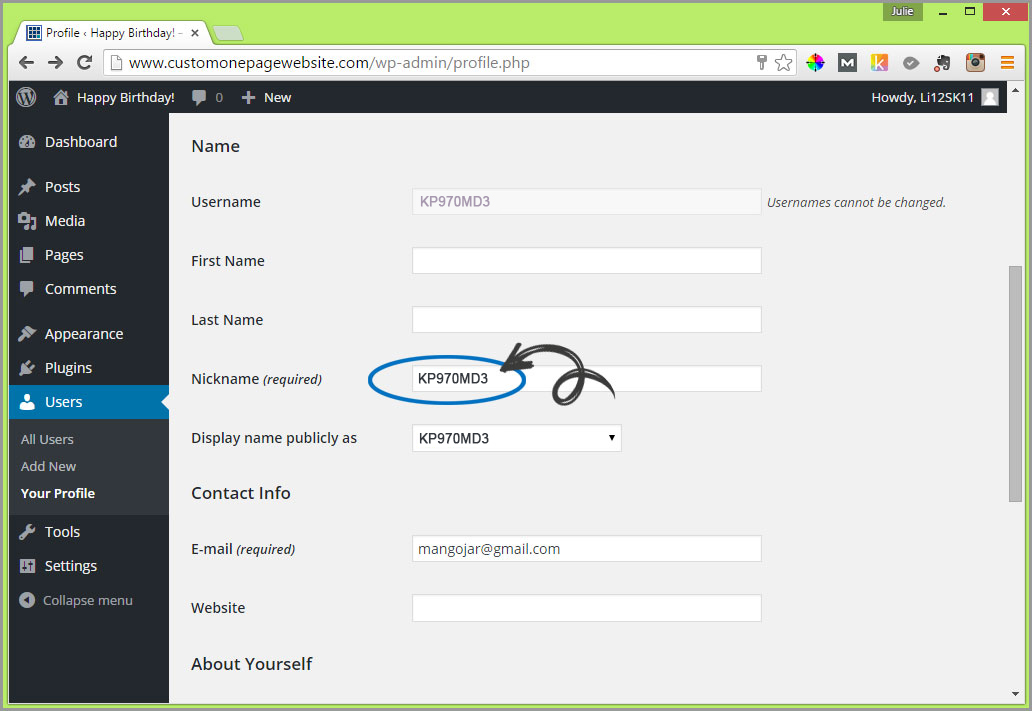
- Once on the “Profile” page, scroll down to the “Name” section. You’ll see that your “Username” is greyed out. You’re not able to change this.NOTE: If you feel that you didn’t create a strong enough Username when you installed WordPress, then you will have to add a new “User” that you assign an “Administrator” role to and then go back in and delete the original Username you created.When you installed WordPress a “Nickname” was automatically defined for you (same as your Username). It’s very important that you change this default so that the “Nickname” is different than your Username. This is the name that will appear publicly when you post a comment so keep this in mind as you make the change. Be sure to scroll down and click on the blue “Update Profile” button to save the revised Nickname.

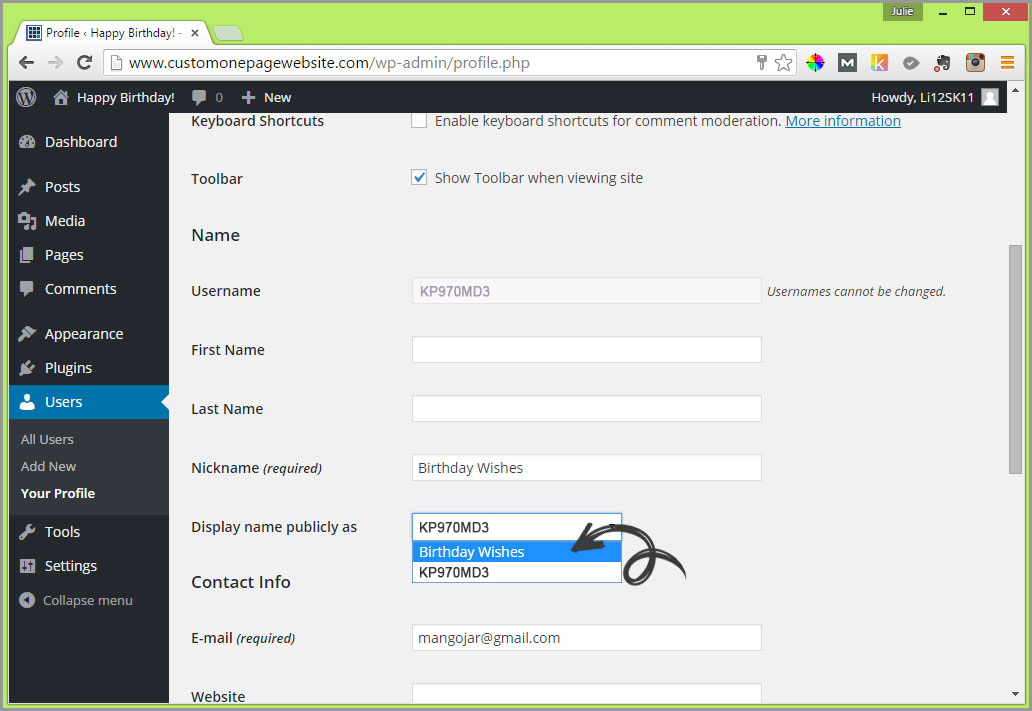
- Once you’ve modified the Nickname field, you will need to adjust the setting for “Display name publicly as“ from the drop down menu to the right of it. The new Nickname you created should now appear here. Select it. Again, click on blue “Update Profile” button to save the new settings. This action adds another roadblock for a hacker, as it removes easy access to guess your Username by simply looking at who authored posts and comments.

- Now, let’s take a look at how to generate a strong password. If you scroll down towards the bottom of the “Profile” page, you’ll see there is a heading “Account Management”. In this section you’ll see a sub heading “New Password” with a “Generate Password” button to the right of it.
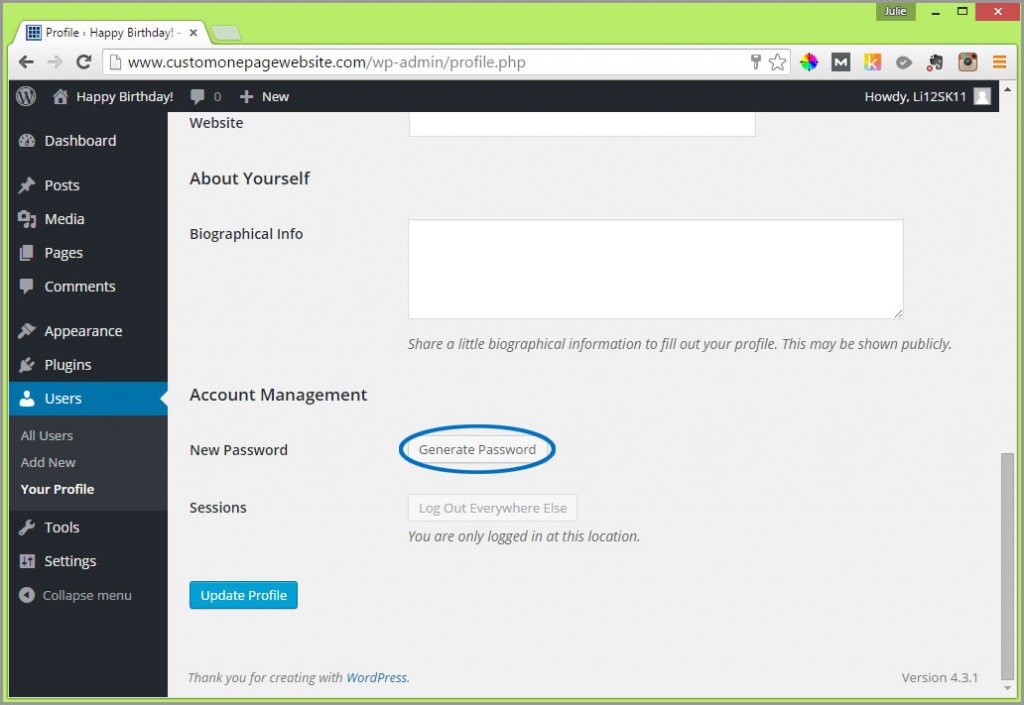
- Clicking on this button will produce a long, strong password comprised of random upper and lower case letters, numbers and special characters.The password should already be highlighted (in blue) so if you click the right side button on your mouse or keypad and then with your left side mouse or keypad button click on “Copy” in the menu that appears, then your password is sitting in the clipboard (memory) of your computer and can be pasted (right click + using left mouse or keypad button select Paste) either into an email, whatever word processing application you are familiar with or into a FREE account at RoboForm. You could also write it down or print it out. Again, make sure that you click on the blue “Update Profile” button to retain the new password settings.
- From your WordPress dashboard, move down the left side navigation to “Users” and from the pop up menu that appears, click on “Your Profile”.


2. ALWAYS KEEP WORDPRESS SOFTWARE, PLUGINS & THEMES UPDATED!
Hackers source out vulnerabilities in old versions of WordPress, themes & plugins, so it’s very important to keep on top of updates. Installing the FREE plugin “Wordfence” will assist you by sending an alert to the email address you provide anytime an update is required.
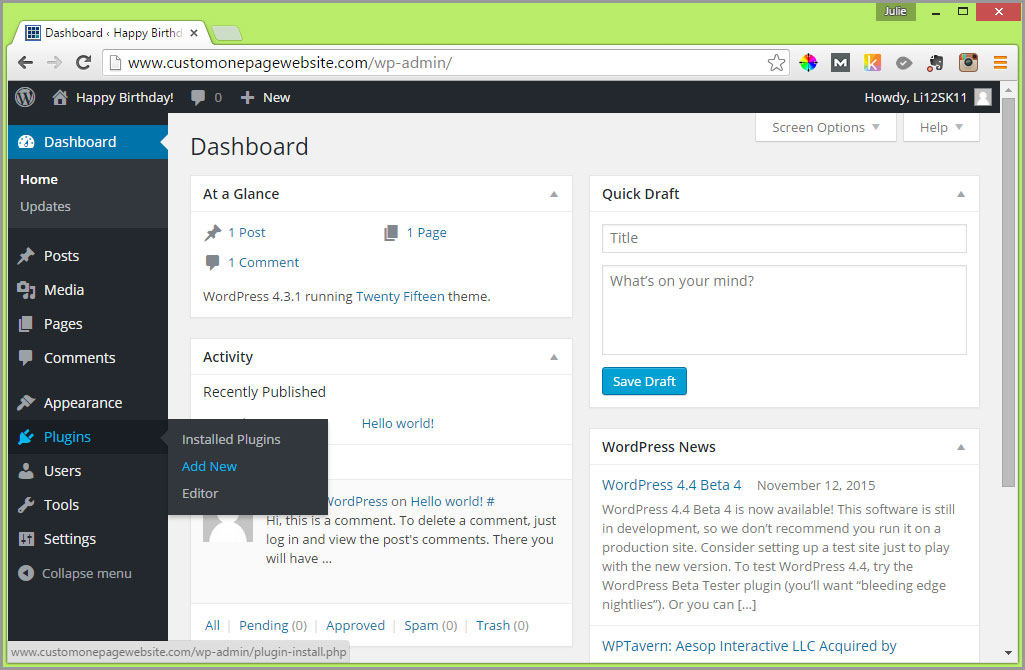
On the left side Dashboard menu move your mouse down to “Plugins” and from the menu that appears, click on “Add New”.
In the next screen you’ll see a field top right that says “Search Plugins”.
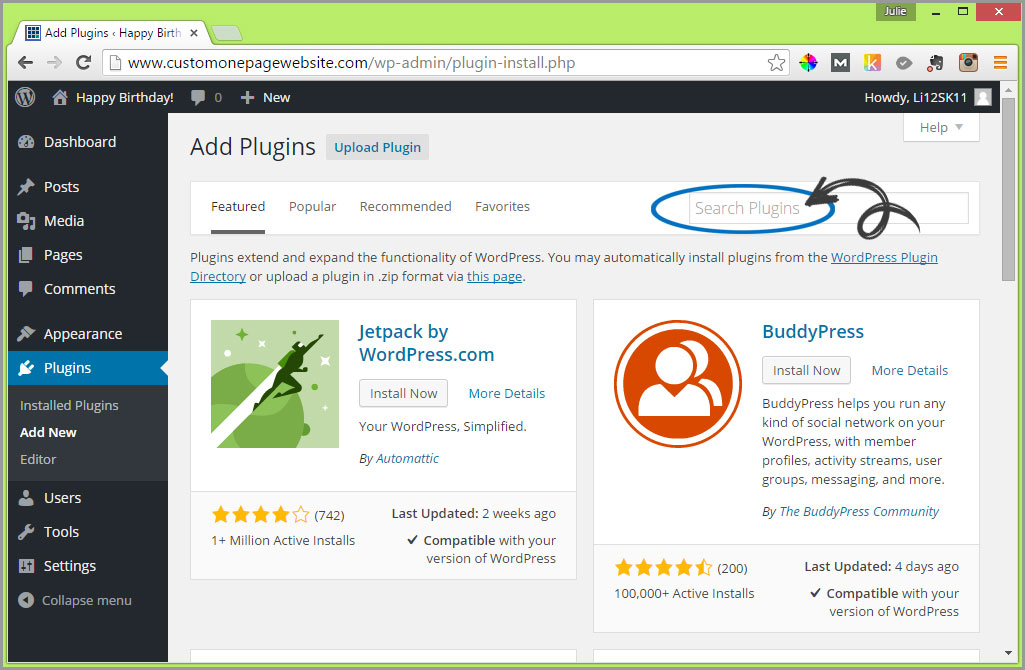
Type in “Wordfence” (without the quotes).
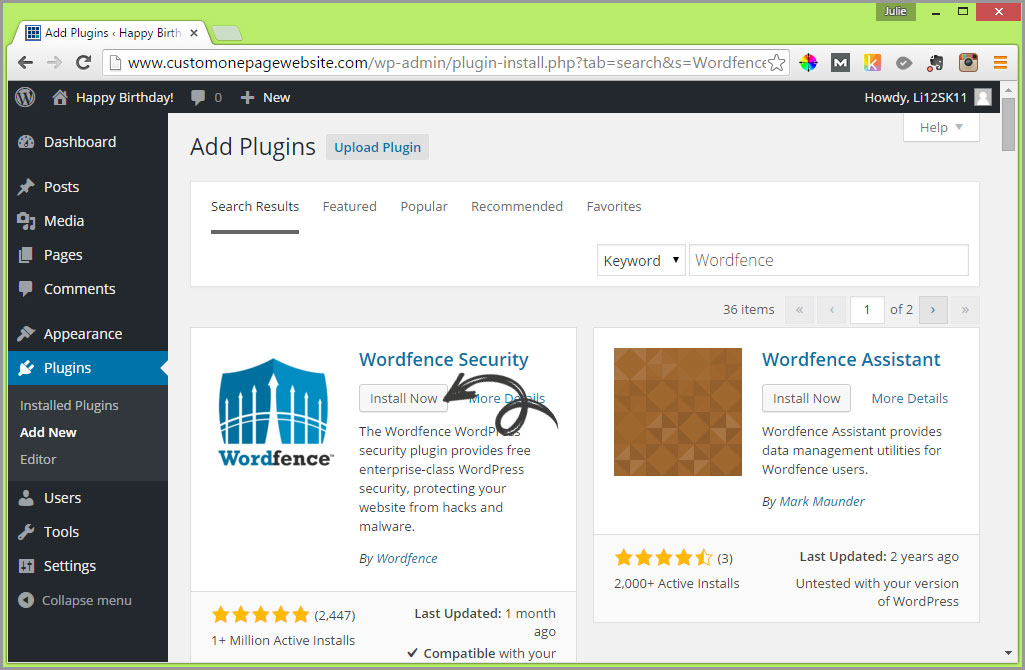
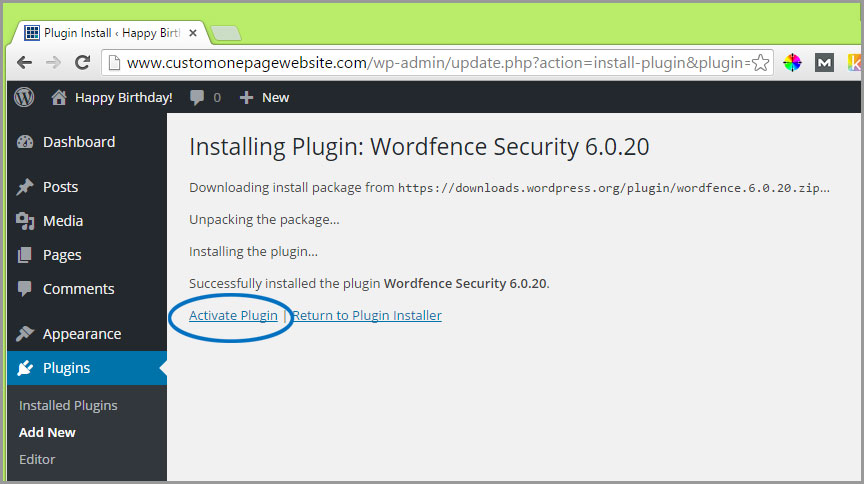
Click the “Install Now” button on the “Wordfence Security” Plugin. You’ll be taken to a screen that describes the steps of the Plugin’s installation. Click on the blue underlined “Activate Plugin” link.
In the Wordfence pop up box that appears, enter the email address you would like to receive notifications at then click the “Get Alerted” button.

Wordfence will notify you anytime an update is required so you can take care of the update right away. Don’t be thrown by updates. They are a simple task to manage. Let me show you a quick example, so that you’ll know what to expect and won’t feel overwhelmed by the lingo.
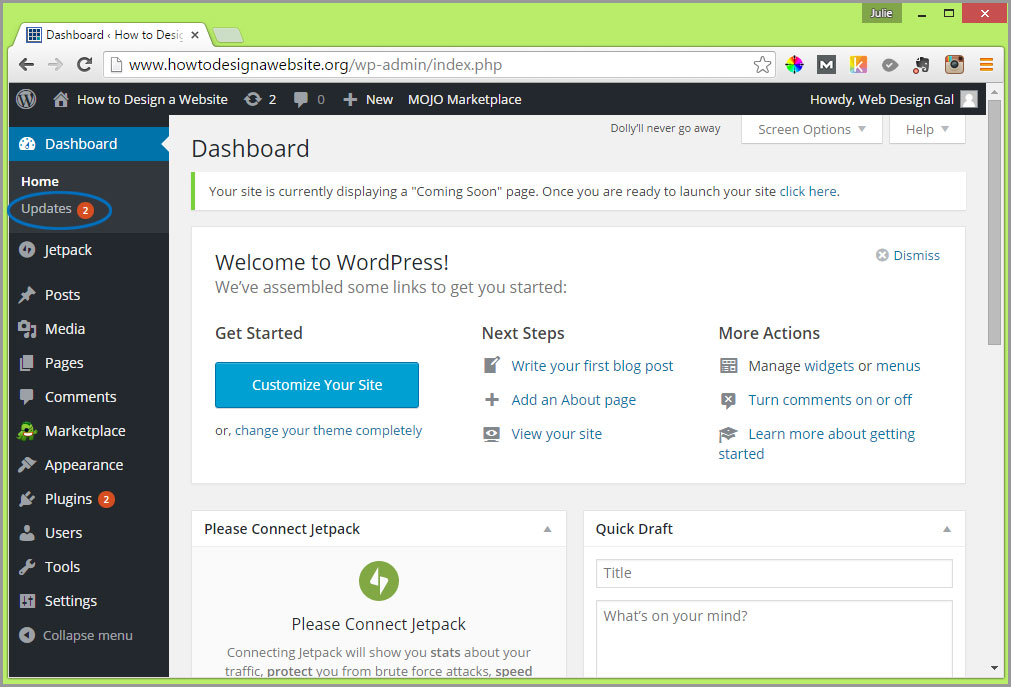
If updates are required, when you log into your WordPress Admin Dashboard you’ll see an orange circle with the number of updates needed similar to the screen below:
Clicking on the “Updates” link will take you to a “WordPress Updates” screen like the one below:
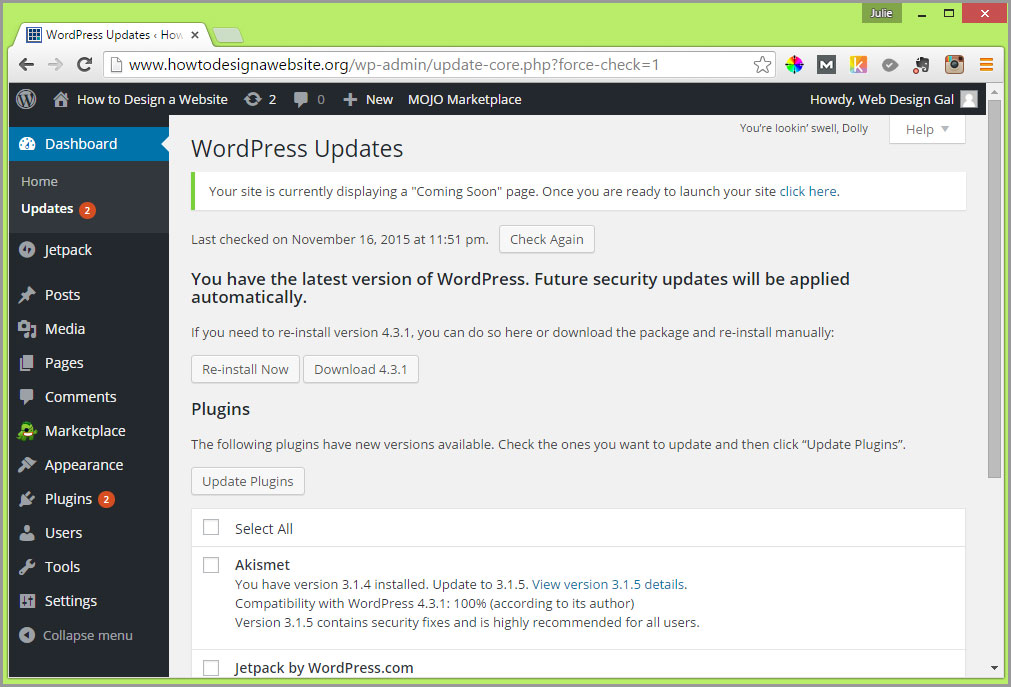
You can see from this screen that you don’t need to worry about updating WordPress itself (from a security perspective) as the software automatically applies security updates. However, Plugins and Themes have to be manually updated. All this means is that you need to click the “Select All” check box and click on the “Update Plugins” button (or “Update Themes” button if those are the required updates that are presented to you).
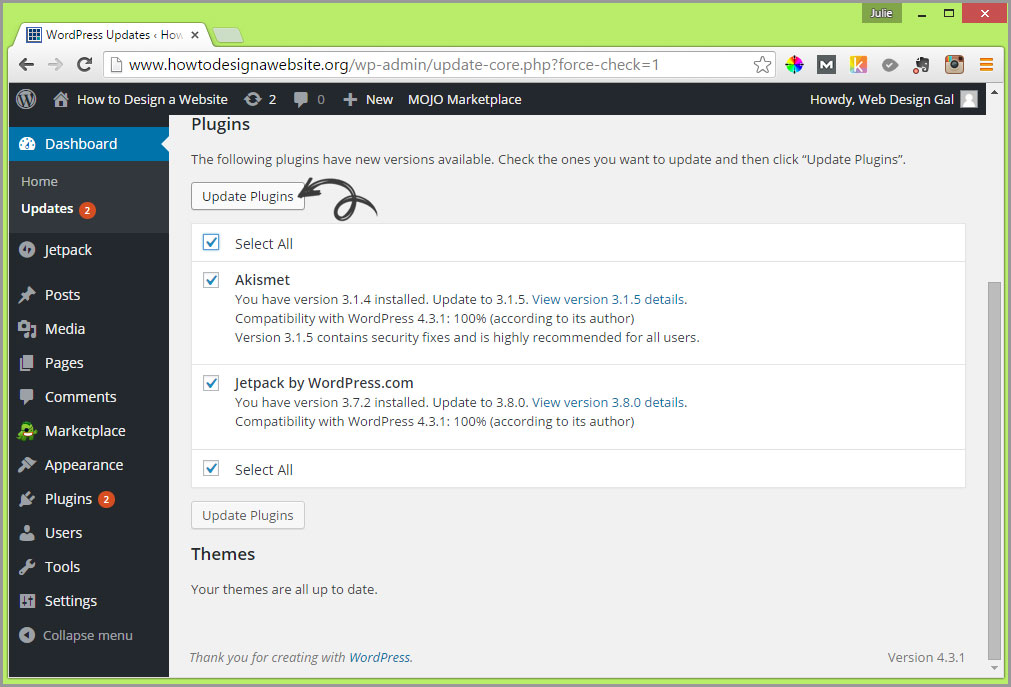
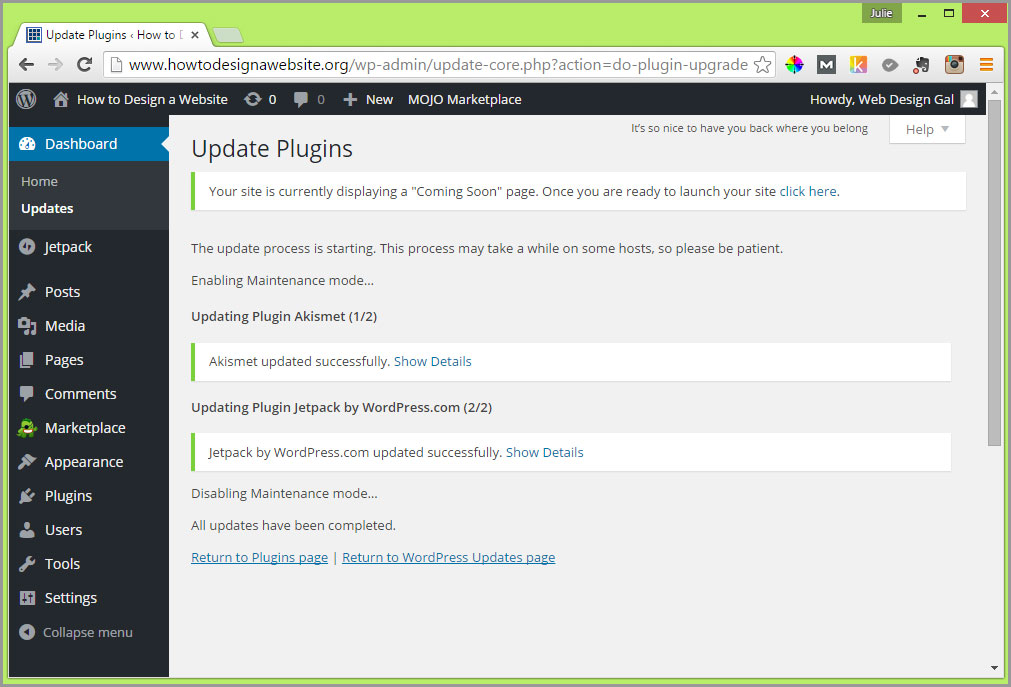
That’s it. That’s all you have to do! After you hit the “Update Plugins/Themes” button you’ll be presented with a screen similar to the one below that tells you the updates have been completed.
Now, let’s move on to the next security task.
3. KEEP MALICIOUS WEBSITE ATTACKS AT BAY!
So while I use Wordfence to notify me of any updates required and to keep apprised of login attempts to the admin that aren’t mine; it’s a plugin designed by Eli Scheetz called “Anti-Malware” that saved my sanity after an attack on a site I’d poured a tremendous amount of work into. The plugin is free, however a donation to Eli will provide you with automatic updates. I should note that I don’t get a commission from promoting Eli’s plugin. I just think he’s an honest guy who delivers a great product which I use. The plugin was created to help WordPress admins clean infections off their site. So let’s install it now.
Just as you did with the Wordfence install, mouse over “Plugins” in the left side menu and choose “Add New” from the pop up menu. Then in the “Search Plugins” field type “Anti-Malware” (without the quotes) and hit the Enter key on your keyboard. You should be presented with a screen like the one below:
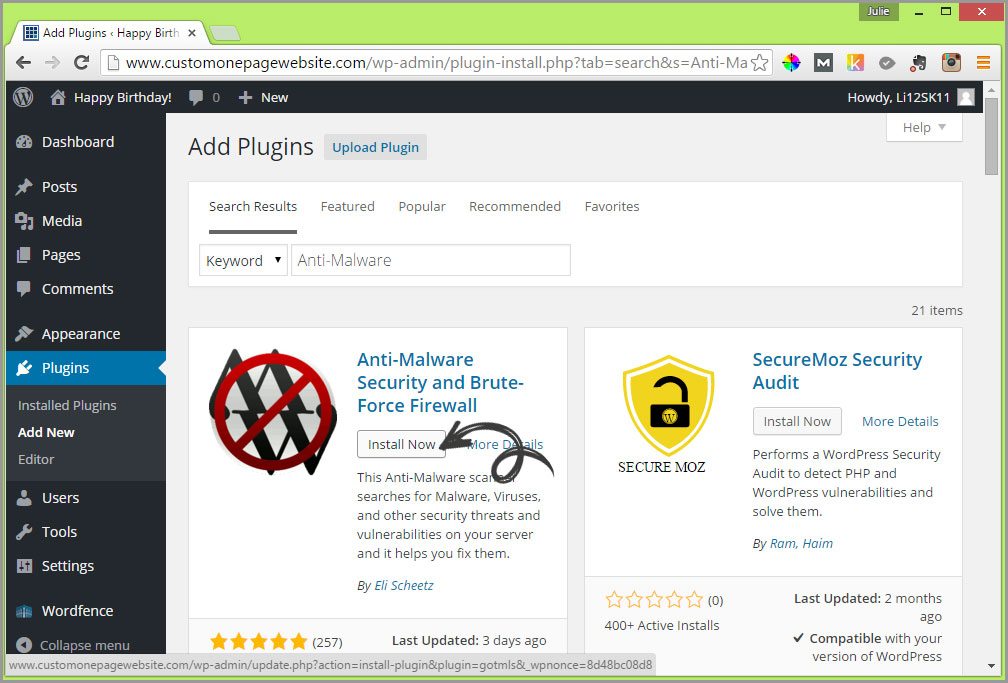
Click on the “Install Now” button for “Anti-Malware Security and Brute-Force Firewall”. Then on the screen that follows click the blue underlined “Activate Plugin” link.
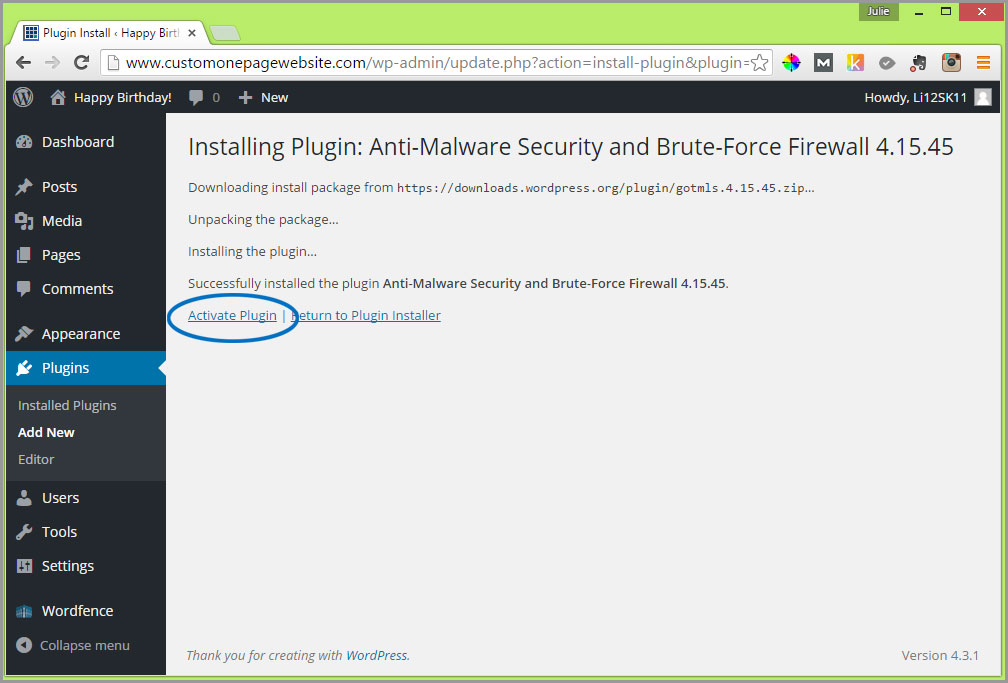
Your screen should now look like the one below.
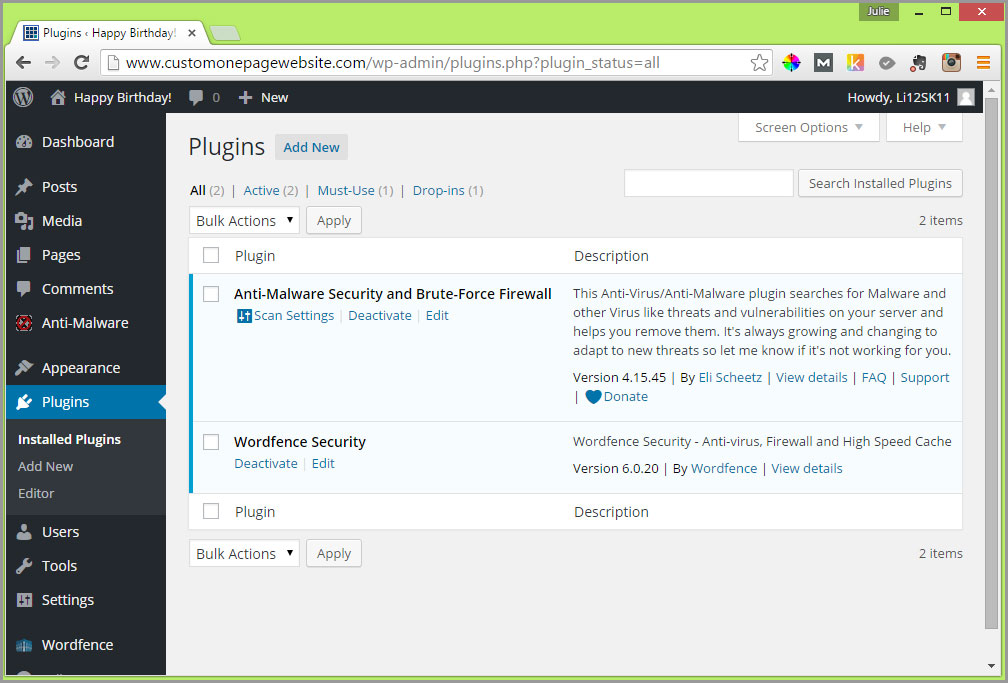
You’ll notice that there is a new label that has been added to the left hand WordPress menu that says “Anti-Malware”. If you select it, you may see a screen similar to the one below.
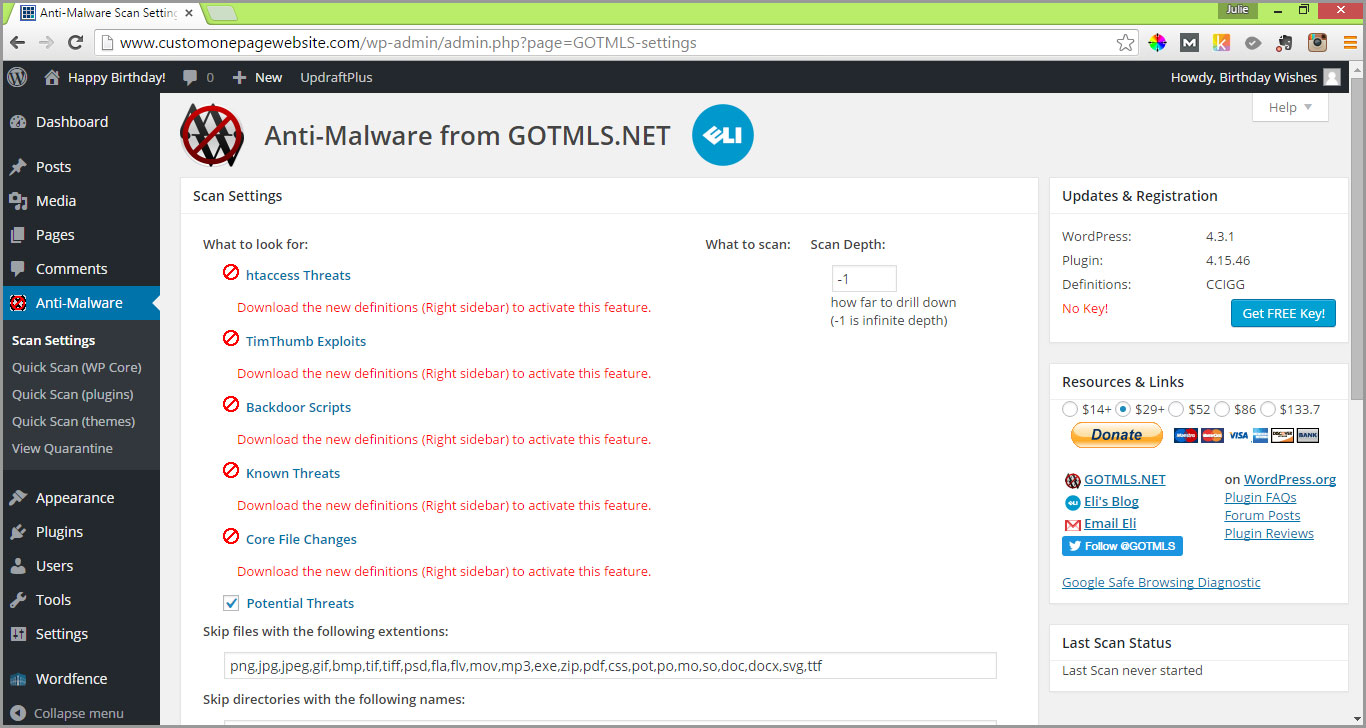
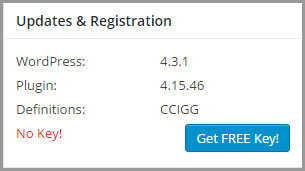
Focus on the “Updates & Registration” box on the right hand side. If you see “No Key!” in a red font, click on the blue “Get FREE Key!” button next to it.
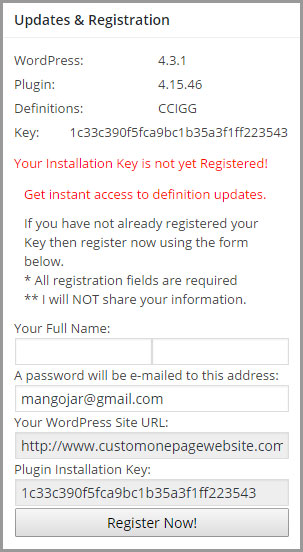
You will then be presented with new “Updates & Registration” content that says in red, “Your Installation Key is not yet Registered!”.
Fill out the required fields (i.e. Your Full Name: and the email address you’d like your password to be emailed to). Then click on the “Register Now!” button.
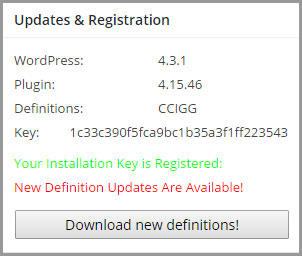
The “Updates & Registration” sidebar will change again and you will be presented with a new red notification message that says “New Definition Updates are Available!”. Click on the “Download new definitions!” button.
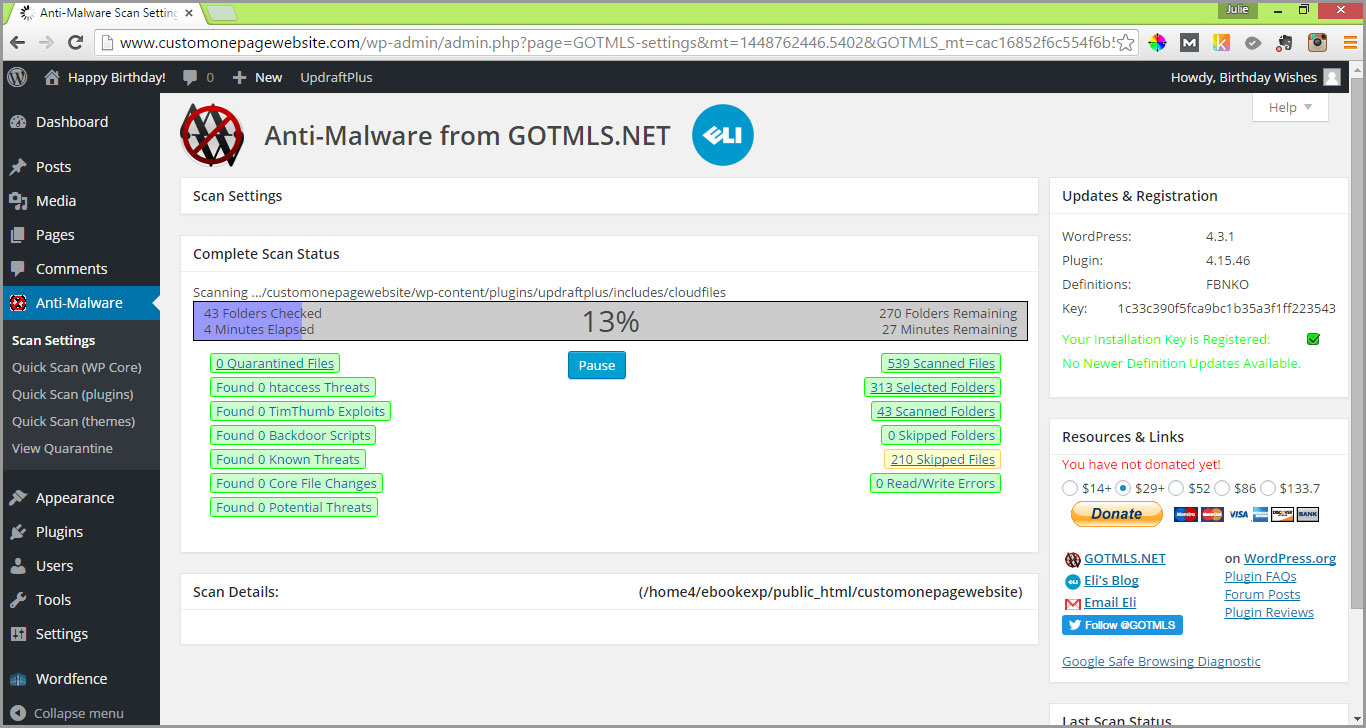
On the next screen you’re presented with you’ll see a blue button that says “Run Complete Scan”. Click on this to scan your site for malicious files.
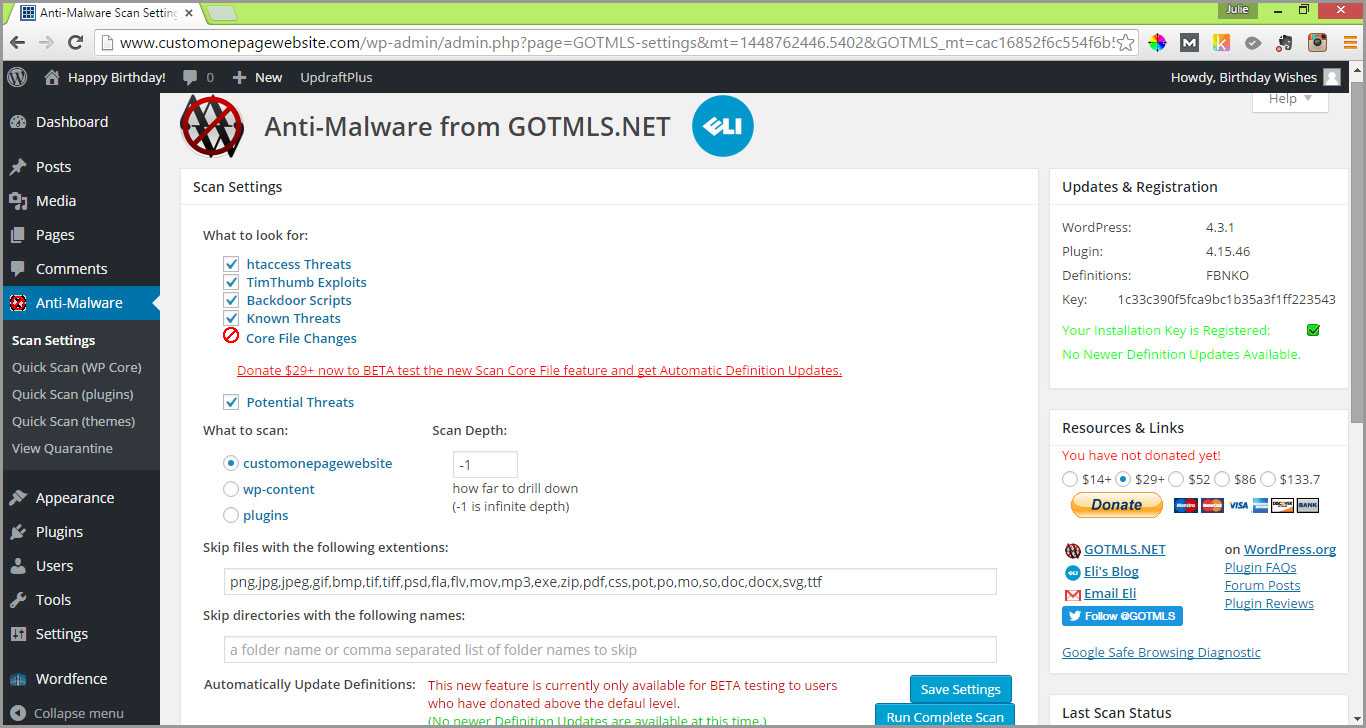
Recommend running a complete scan on a regular basis.
4. BACK UP ALL YOUR HARD WORK!
There’s one more plugin that is optional to add to address basic security maintenance. It’s called “UpdraftPlus” and is a FREE simple to use back up plugin. Bluehost customers might be wondering why we need this when I mentioned that Bluehost’s basic service backs up your files regularly. The reason is because they back up your files to the same server that your website sits on, so if your website is hacked and files are infected, your backup likely will be as well. There are some downsides to hosting with an inexpensive plan, but we can work around them!
So once again, on the left side menu hover over “Plugins” and choose “Add New” from the pop up menu that appears. Type in “UpdraftPlus” (without the quotes) and hit the Enter key on your keyboard. You should be presented with a screen similar to the one below. Go ahead and click the “Install Now” button for “UpdraftPlus Backup and Restoration” and then click on the blue underlined “Activate Plugin” link that is displayed on the screen that follows.

Every time you add a plugin, you’ll notice that the WordPress menu on the left side expands and new labels appear. For example, you should see new main labels for the Anti-Malware and the Wordfence plugins you installed earlier that each contain a sub menu of options which appear when you hover over them.
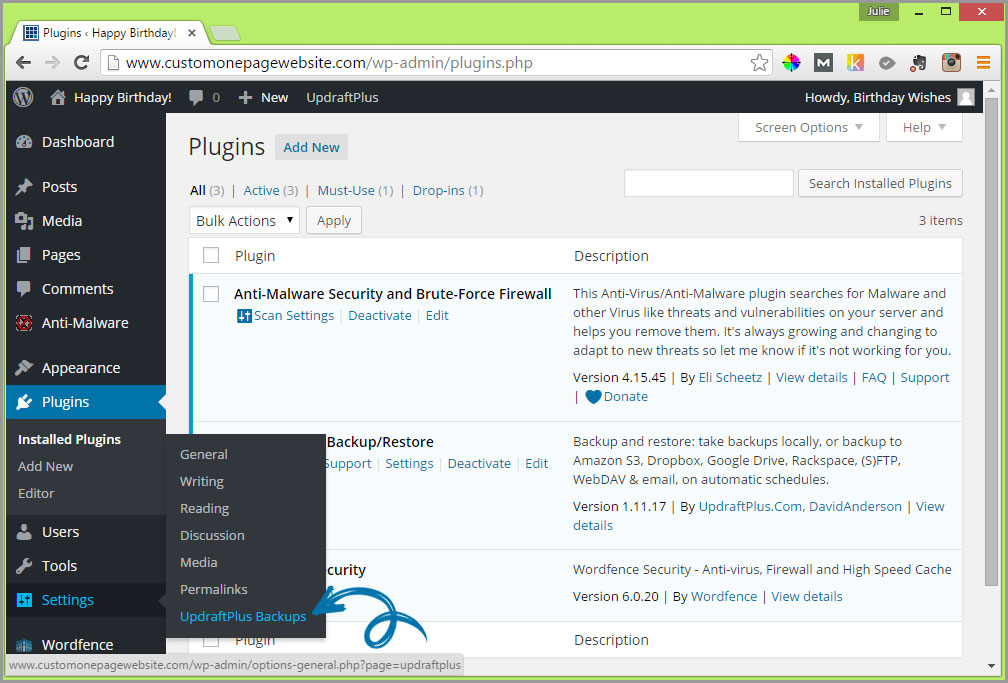
Options for the UpdraftPlus plugin you just installed appear under the “Settings” label as “UpdraftPlus Backups”. Click on this now.
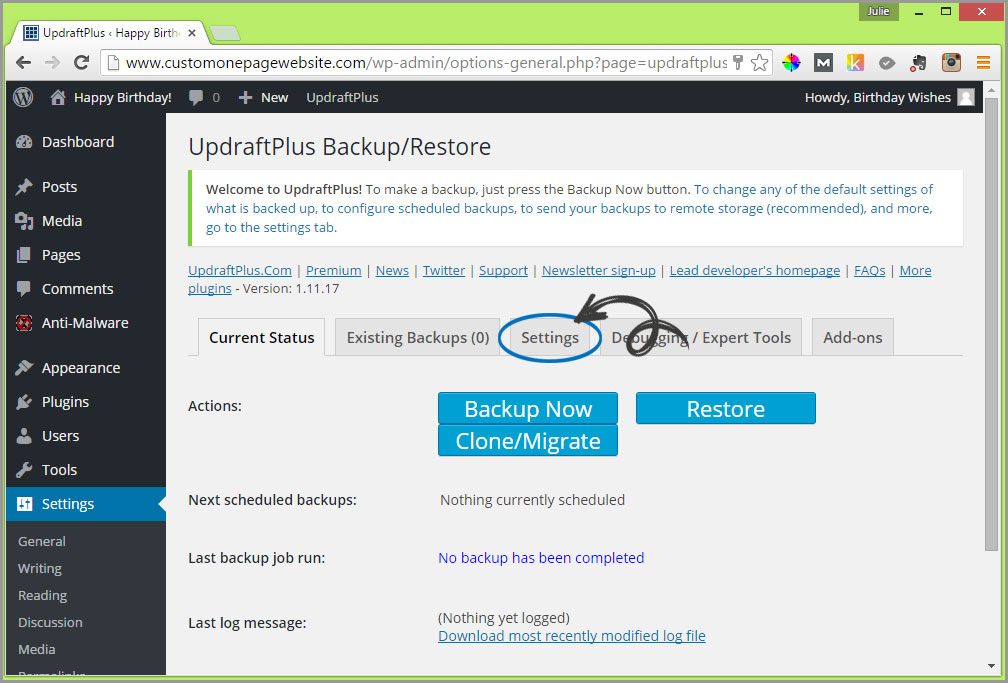
You’ll be taken to a screen that looks like the one below. Click on the “Settings” TAB.
The frequency of how often you should schedule backups is really dependent on how regularly content is added/changed on the site you are creating. In the case of a personalized birthday web page, recommend back up prior to gifting it, and depending on whether you zip through this guide in a day or over the course of a week or more, perhaps do manual backups at intervals until your web page is complete. If you are creating a blog or digital scrapbook site that has frequent updates, then recommend modifying the settings to automate daily backups.
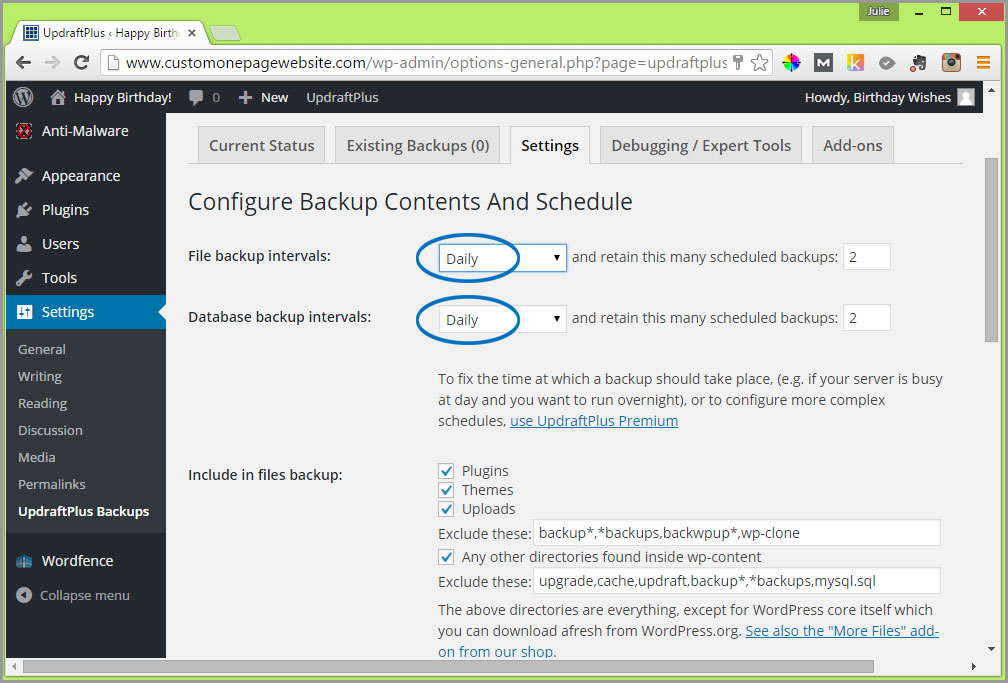
Once you’ve set the schedule for “File backup and intervals:” and “Database backup intervals:” then scroll down the page to “Choose your remote storage:” You are provided with several options in a drop down menu. I recommend either “Dropbox” or “Google Drive”.

Both choices facilitate online storage of files. A Dropbox account comes with 2GB of free space. Google Drive comes with 15GB of free space.
I’m going to illustrate using Google Drive. The first thing you need to do is set up a gmail account if you don’t already have one. It’s very straight forward to do and comes with so many additional free tools that it’s worth the brief time investment. I promise! Go to https://accounts.google.com/signup now and fill in all the fields to create a Google account.
Once you have a Google account return to “Settings” > “UpdraftPlus Backups” > click the “Settings” TAB, then scroll down to “Choose your remote storage:” and select “Google Drive” from the drop down menu. You’ll be presented with a screen similar to the one below.
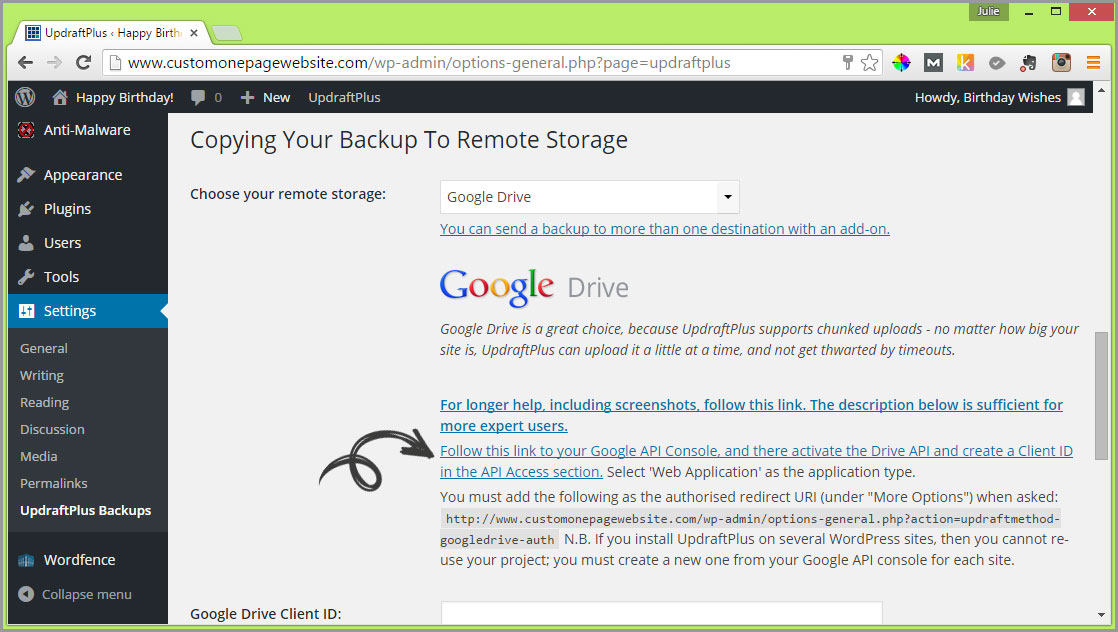
Next, use your right mouse button to open the blue link that says: “Follow this link to your Google API Console, and there activate the Drive API and create a Client ID in the API Access section. in a new tab.”
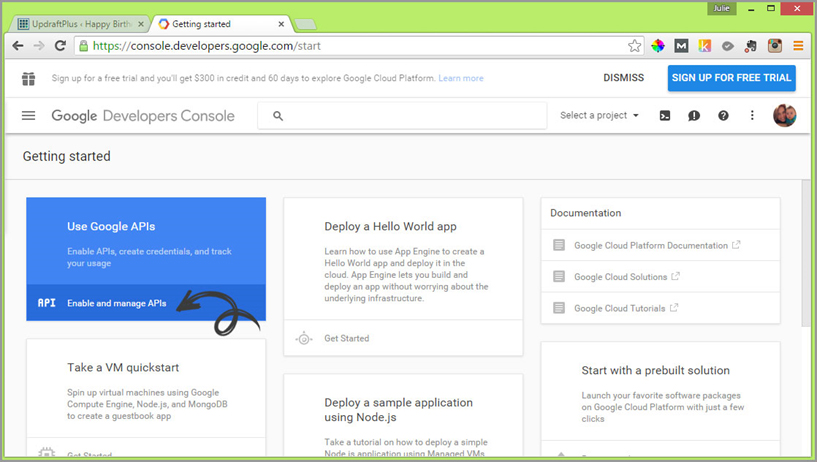
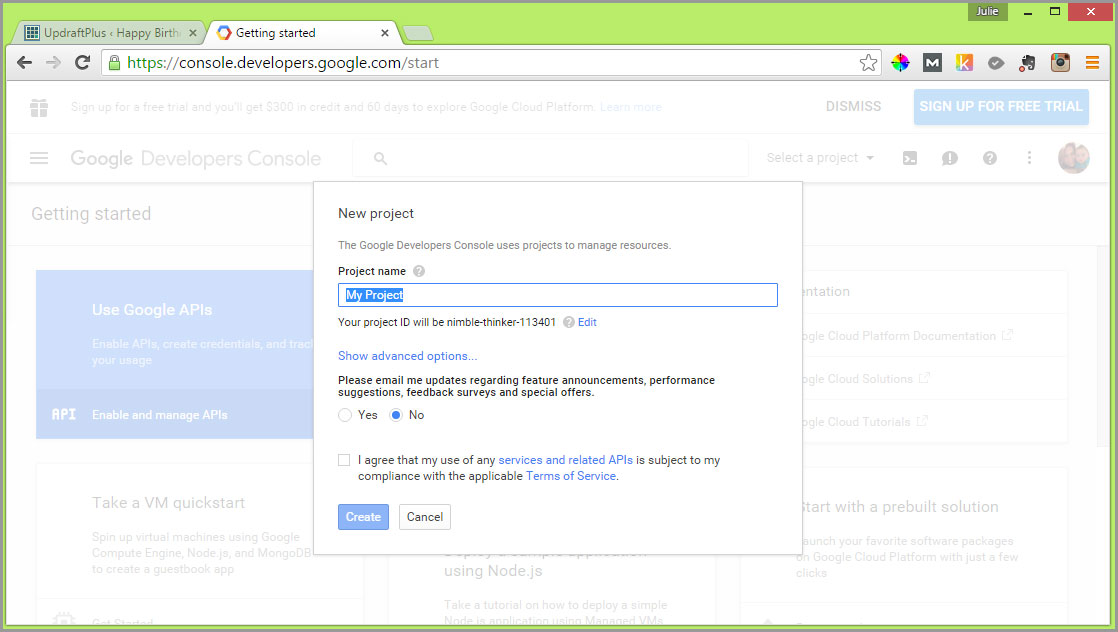
In the new tab that appears, click on the white link that says “Enable and manage APIs” (on dark blue background). Then, in the screen that follows, give your project a name and check the box to agree to the terms before clicking on the blue “Create” button.
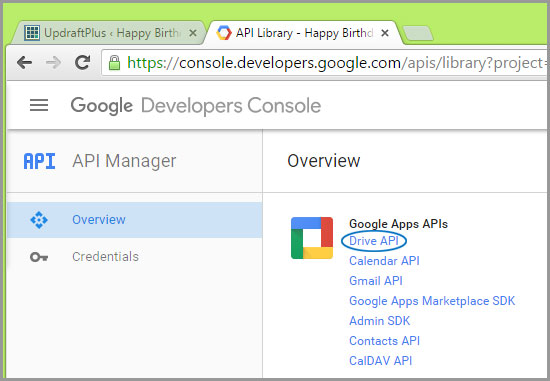
Scroll down the next screen to the “Google Apps APIs” and click on the “Drive API”.
On the next screen click on the blue “Enable API” button.
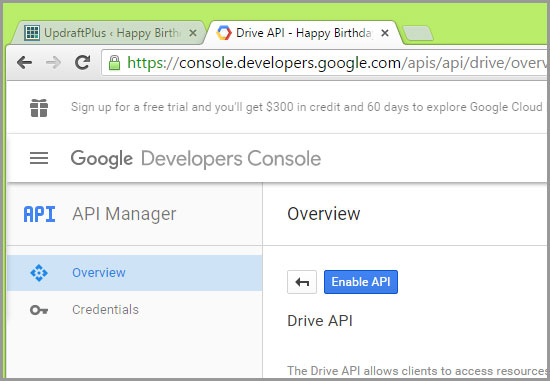
Then, from the left side menu click on “Credentials”.
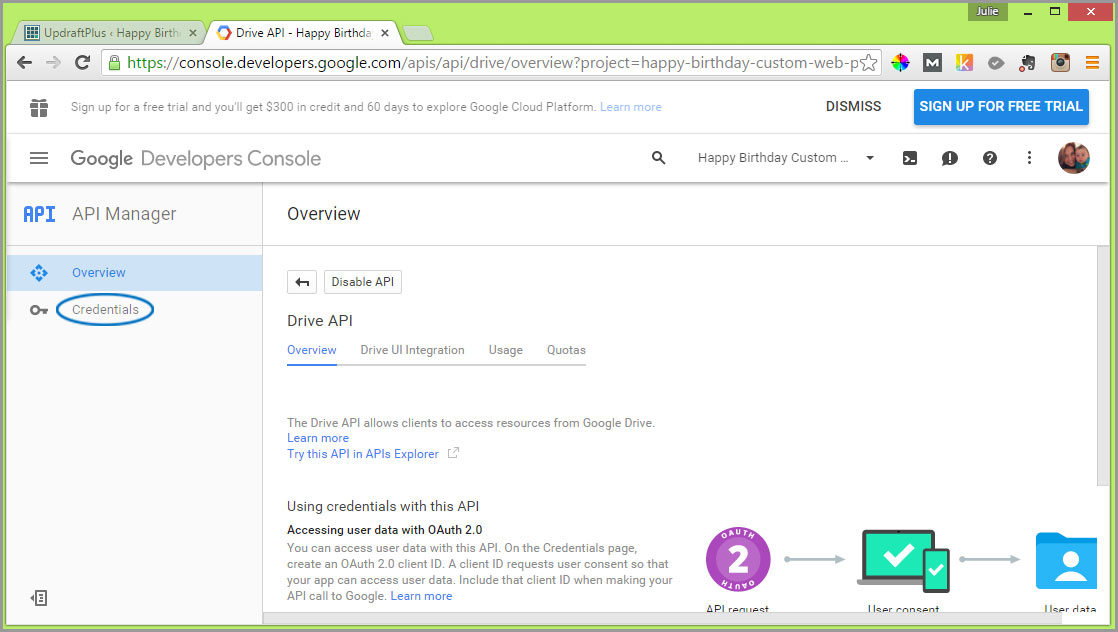
On the next screen you are presented with, click on “OAuth consent screen” menu option.
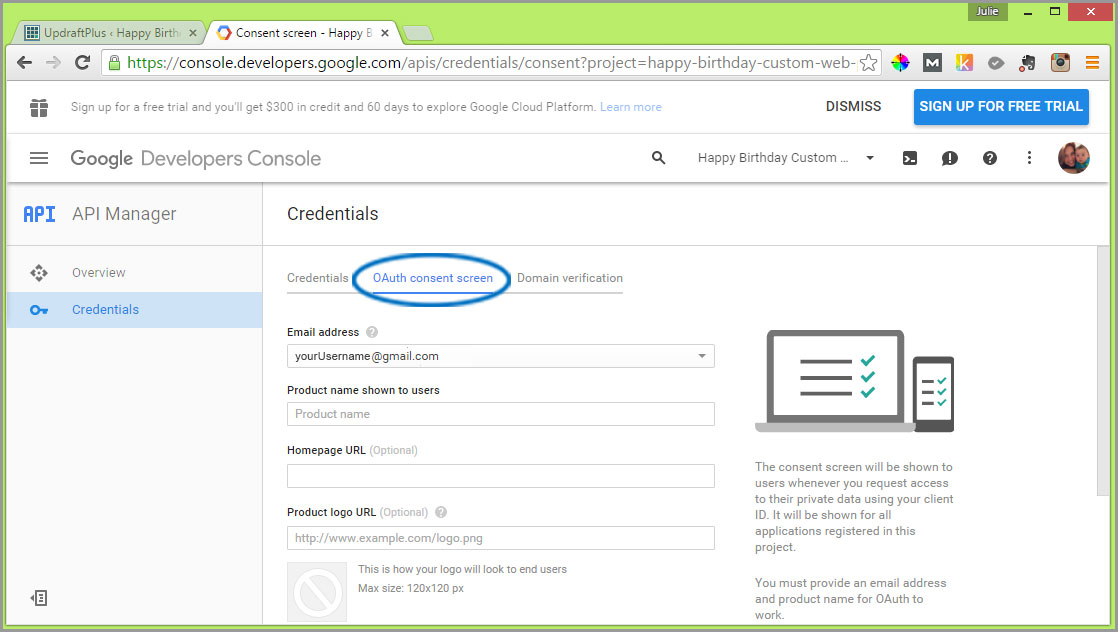
Your Email address should be prefilled with your gmail account address. The only other field required on this screen is “Product name shown to users”. Enter something along the lines of “Birthday Backup” here and click the blue “Save” button. You’ll be taken back to the Credentials core TAB. Click on the blue “Add Credentials” button and then select “OAuth 2.0 client I.D.”

Under the Application Type heading click on the radio button for “Web application”. Clicking this will display additional fields that you need to fill in.
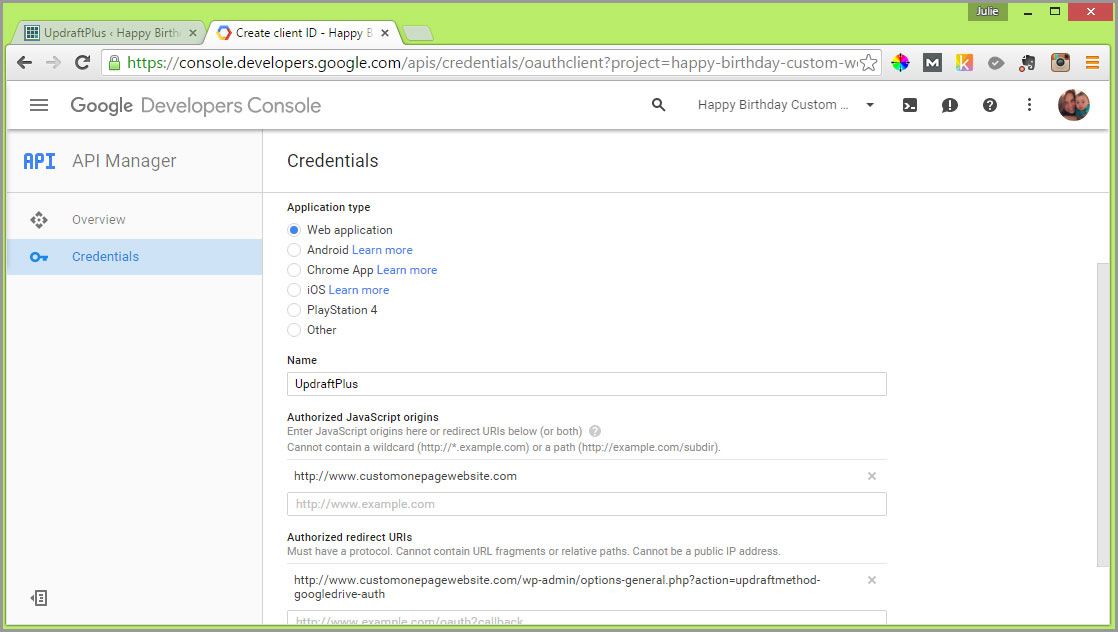
In the “Name” field enter “UpdraftPlus” (without the quotes).
For the “Authorized JavaScript origins”, enter your site’s URL (i.e. http://www.yourdomain.com).
In the “Authorized redirect URI” field, paste in the URL that is displayed in your UpdraftPlus settings page back in your WordPress admin console = “Settings” > “UpdraftPlus Backups” > “Settings” TAB > Scroll down to “Choose your remote storage” > Select “Google Drive” from the menu options. You will see a paragraph of text that has a web address (URL) in it, similar to this one “You must add the following as the authorised redirect URI (under “More Options”) when asked: http://www.customonepagewebsite.com/wp-admin/options-general.php?action=updraftmethod-googledrive-auth“
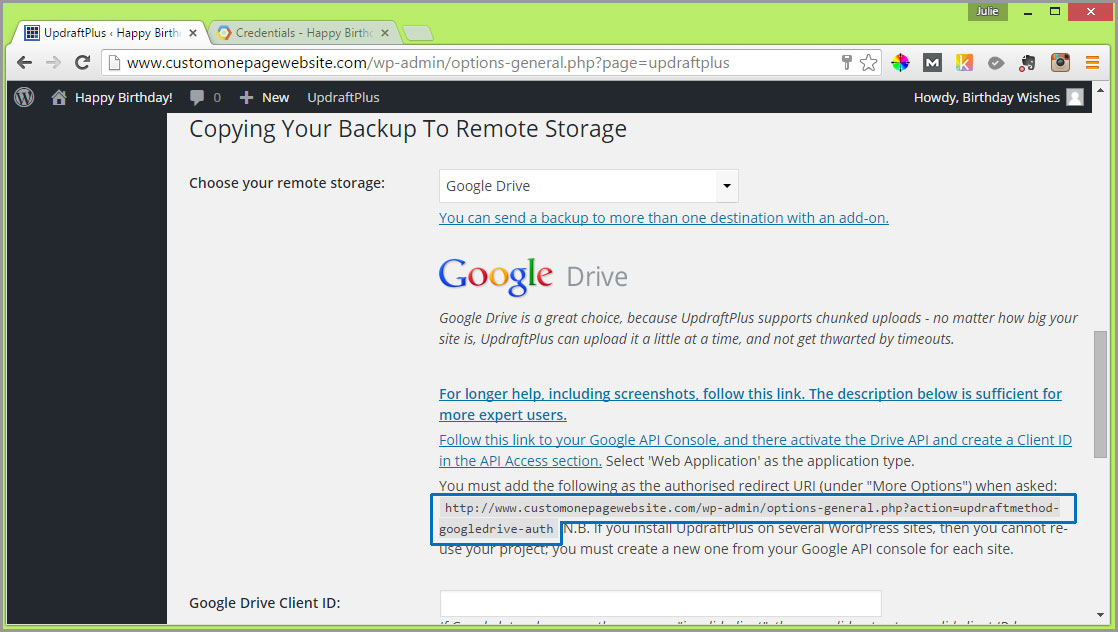
Select the entire web address by clicking the left mouse button down, holding it starting just in front of “.” and dragging to the end of the address. Then, click on the highlighted text using your right mouse button. A menu will appear, left click on “Copy”. Now go back to the Google Developers Console and in the “Authorized redirect URI” field click your right mouse button and from the menu that appears, under “Paste Options” use your left mouse button to select the third clipboard icon with the letter A over it.
Once you’ve entered the URL, click on the blue “Create” button. You’ll be presented with a screen that contains your “client ID” and “client secret”.
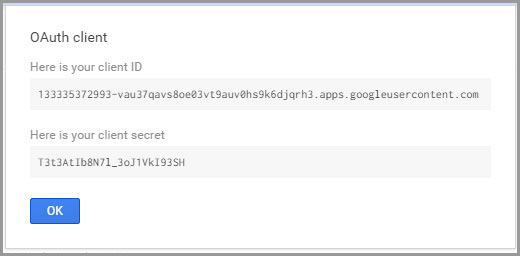
Now you need to copy your “client ID” and “client secret” into their respective fields just below the paragraph where you retrieved the Authorized redirect URI from in your WordPress Admin console. To copy, highlight the client ID with your mouse by clicking in front of the first number with your mouse, then holding the left button down while you drag across until you’ve selected the entire client ID, then click on the highlighted text using your right mouse button to display a menu from which you will use your left mouse button to select “Copy”.
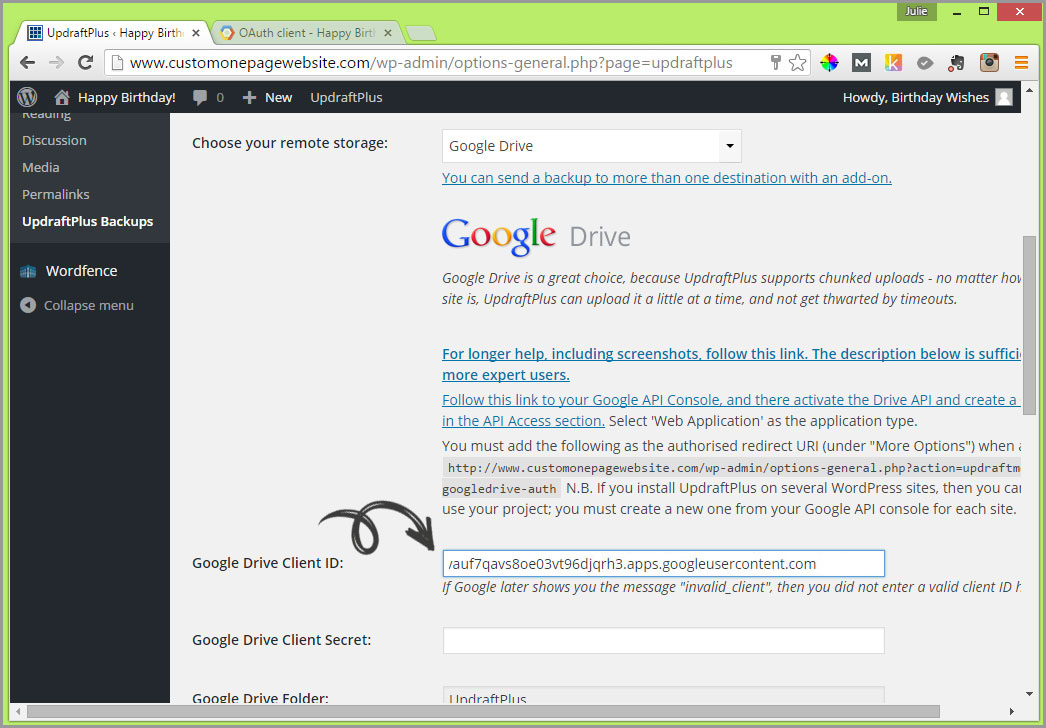
Now that your client ID is in your computer’s memory, head back to the “Settings” TAB under “UpdraftPlus Backups”. Scroll down the page to the “Google Drive Client ID:” field and right click your mouse inside the field. From the menu that pops up, use your left mouse button to select “Paste”.
Repeat the same process for the “Google Drive Client Secret”. When you paste it in, you will notice that the letter/number combination is masked.
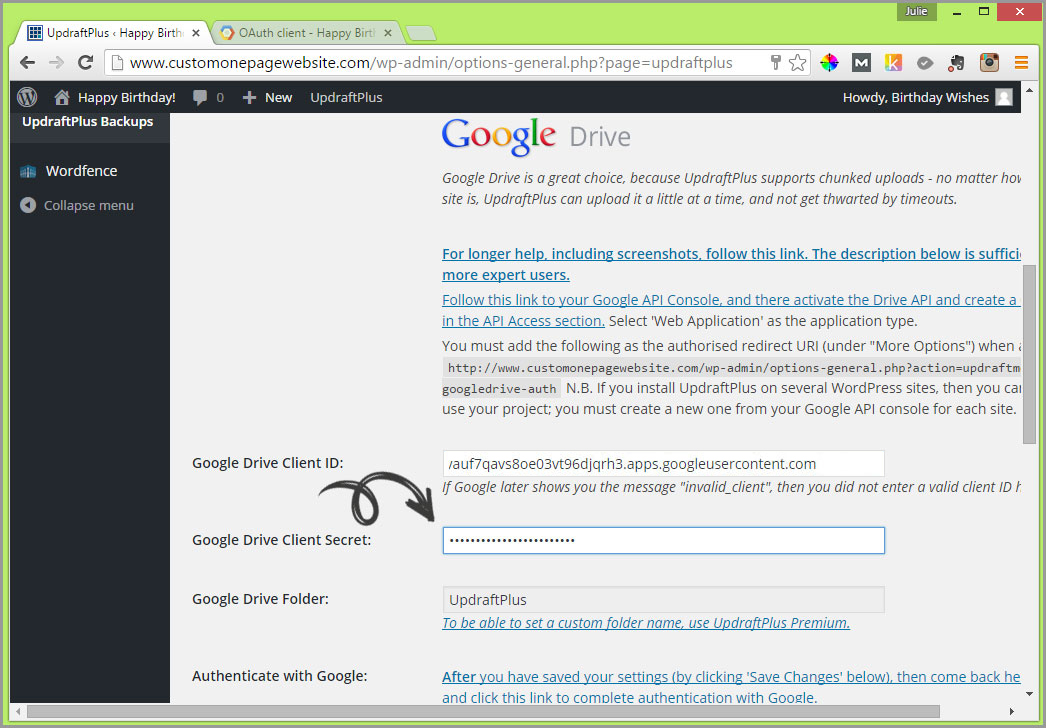
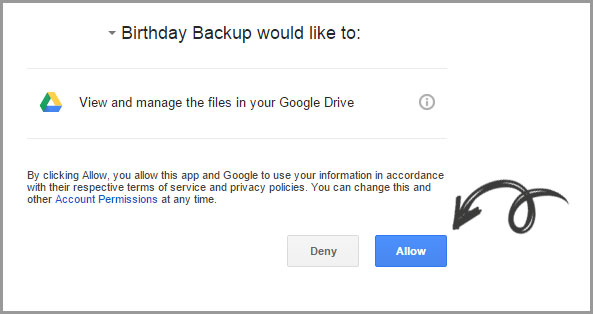
After you’ve pasted in the Google Drive Client Secret, then scroll down and click on the blue “Save Changes” button. This will return you to the “Current Status” TAB of the UpdraftPlus Backups module. There should be a link at the top of the screen that says, “UpdraftPlus notice: Click here to authenticate your Google Drive account (you will not be able to back up to Google Drive without it).”. Click on the link and in the screen that follows, click on the blue “Allow” button.
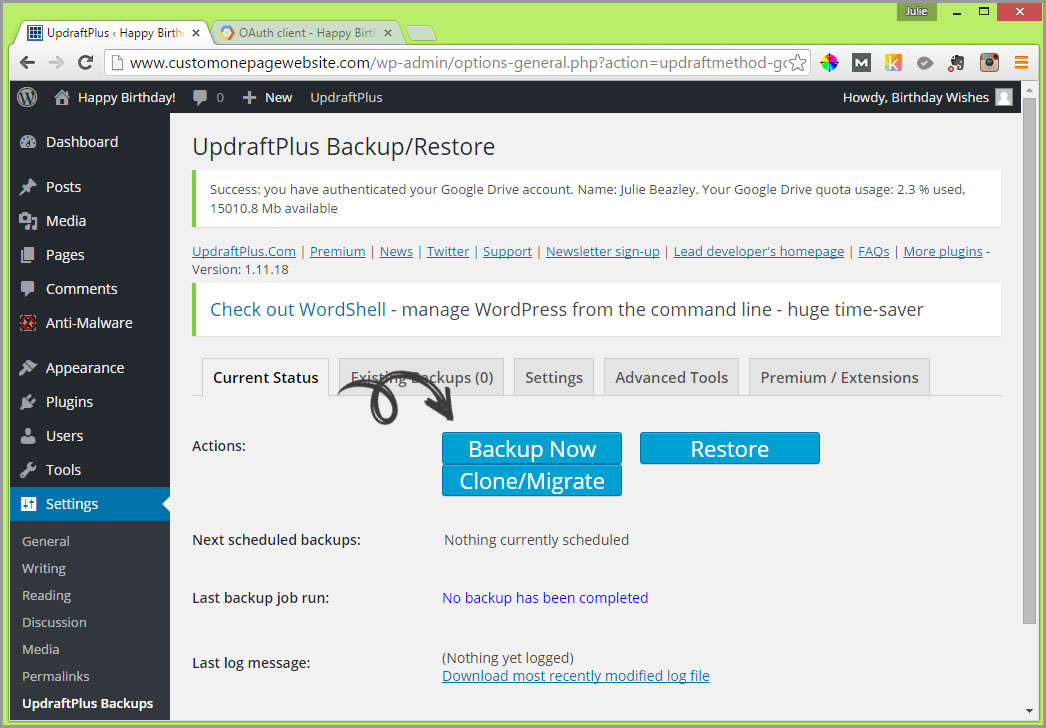
Once you’ve completed this step you should be returned to your WordPress install with a new notification at the top of the screen that says something along the lines of “Success: you have authenticated your Google Drive account. Name: YOUR NAME. Your Google Drive quota usage: x % used, x Mb available”
Congrats! You’re all set to do backups. Now all you have to do is click on the large blue “Backup Now” button.
You will be presented with a similar screen:
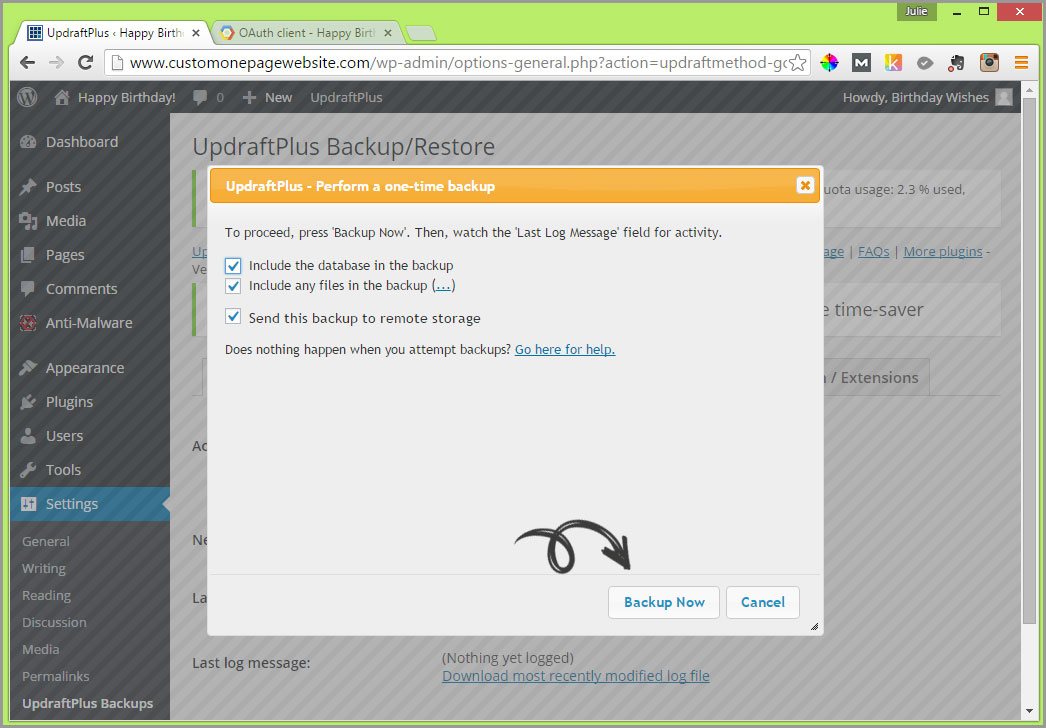
Click the “Backup Now” button here to confirm. You will see a progress bar that illustrates the backup is being done.
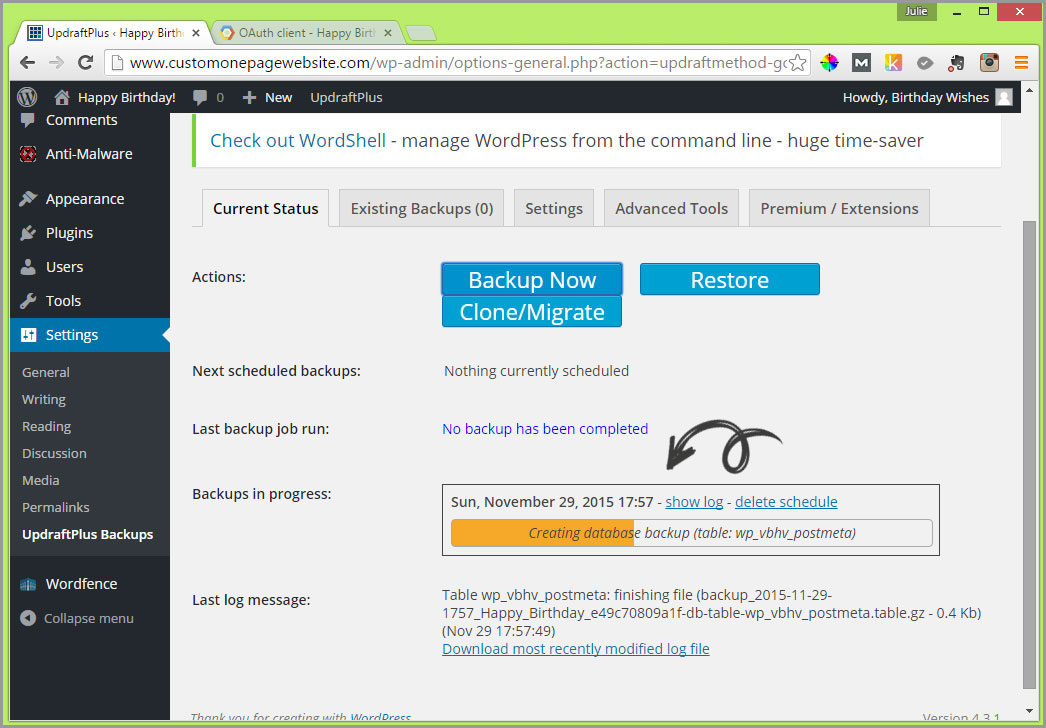
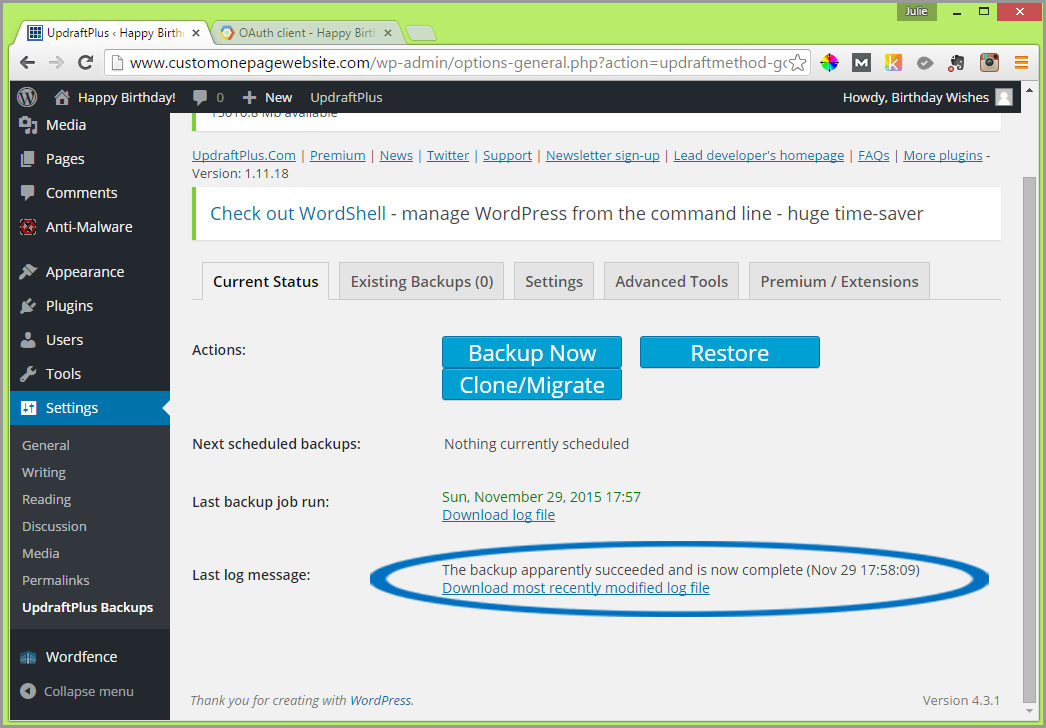
When your backup is complete, the “Last log message:” will say “The backup apparently succeeded and is now complete” , followed by a date and time in brackets.
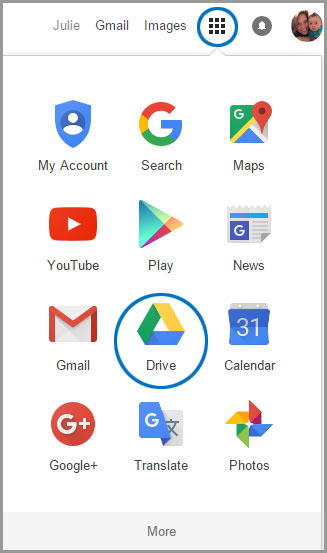
To see where your backup is, open a new browser tab to Google’s home page, click on the “Google Apps” icon (looks like a keypad) in the upper right area of your screen and then from the icon menu that appears, select the “Drive” icon.
You’ll see a new folder called “UpdraftPlus” on your Google Drive.
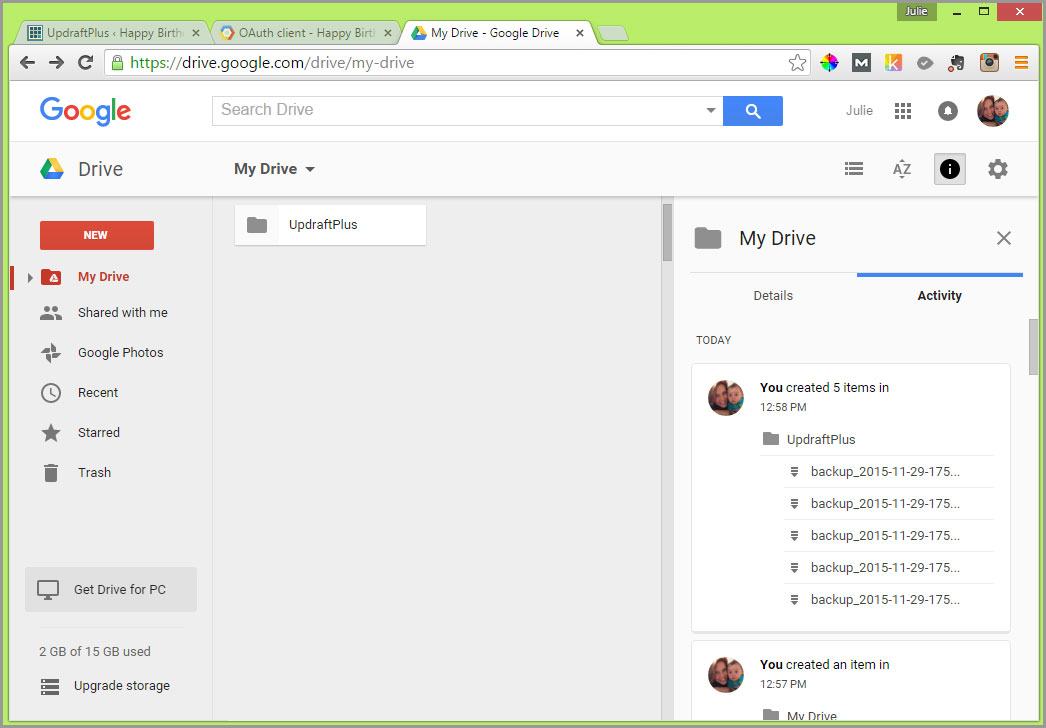
If you double click on the UpdraftPlus folder you should see the backup files.
YOU DID IT! Give yourself a pat on the back! Now that you’re connected to Google Drive, any future backup’s you do will be extremely easy!