
WHY INSTALL WORDPRESS?
WordPress is the application that we will create and customize our Web Page in. Its user friendly editor makes WordPress one of the most powerful blogging and website Content Management Systems (or CMS) available. And it’s an open source creation tool, which means it’s FREE! So let’s go ahead and install WordPress now.
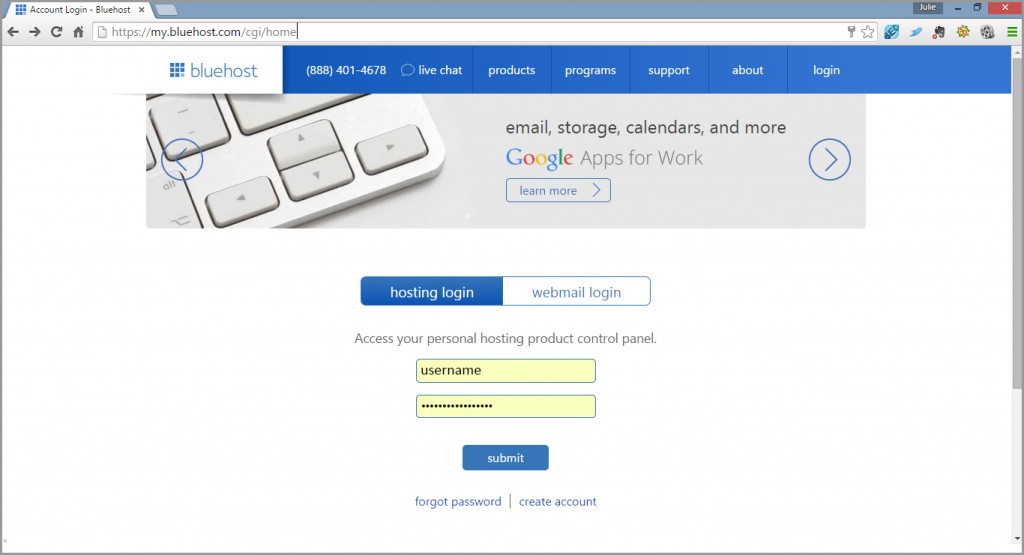
- Login to your Bluehost account by clicking on the “login” link in the blue menu bar at the top of the screen.
- You will be presented with a pop up screen which you can close immediately (for our purposes) by clicking the ‘x’ at the top right of the pop up (see below).
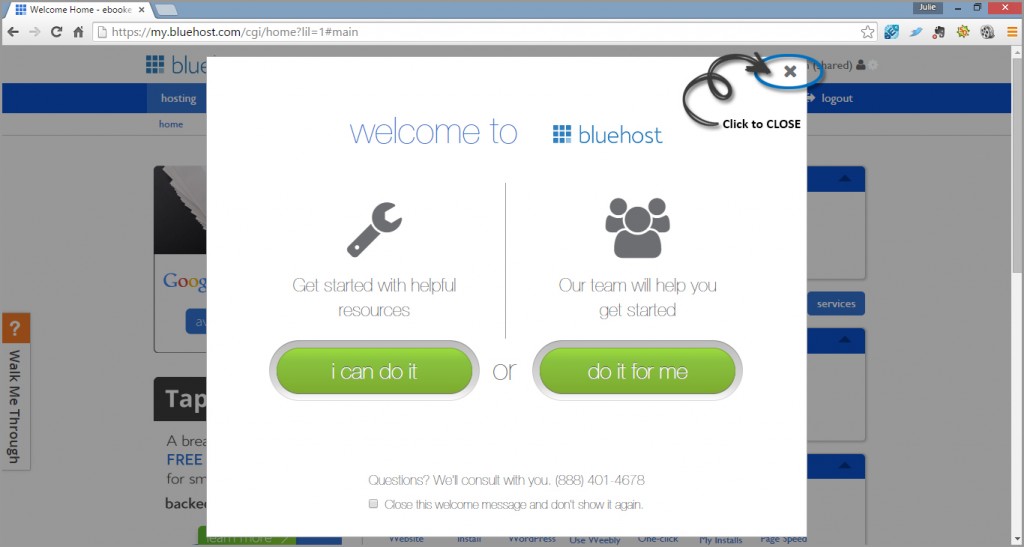
When you have more time to get acquainted with Bluehost’s features, recommend taking a look through each of the guide options. Once you close the pop up screen, you’ll be at the account holder home page (see below).
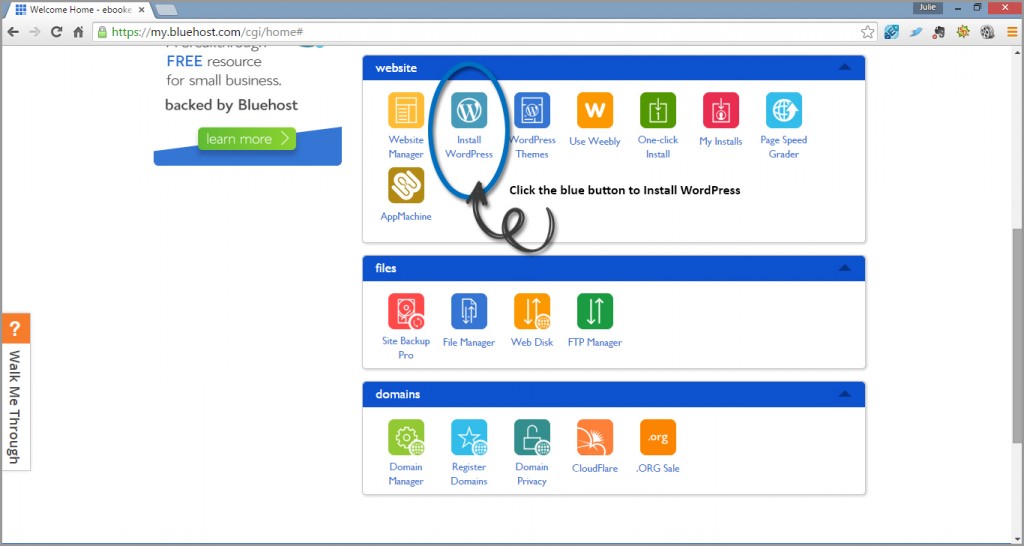
- Scroll down to the dark blue “website” heading and click the “Install WordPress” icon.
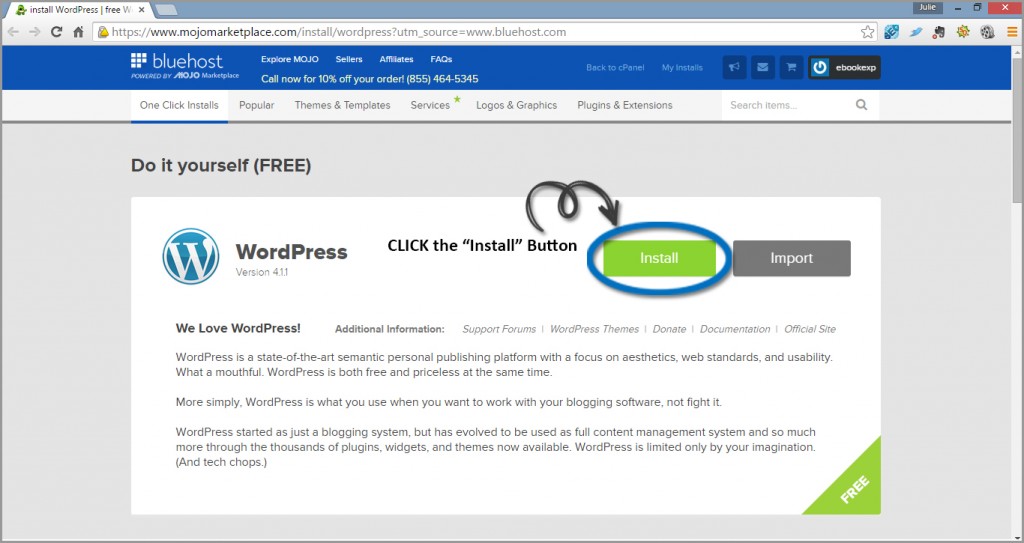
- You will be brought to a screen that says “Do it yourself (FREE)” WordPress > with a large green button that says “Install” (see image below). CLICK the big green “Install” button!
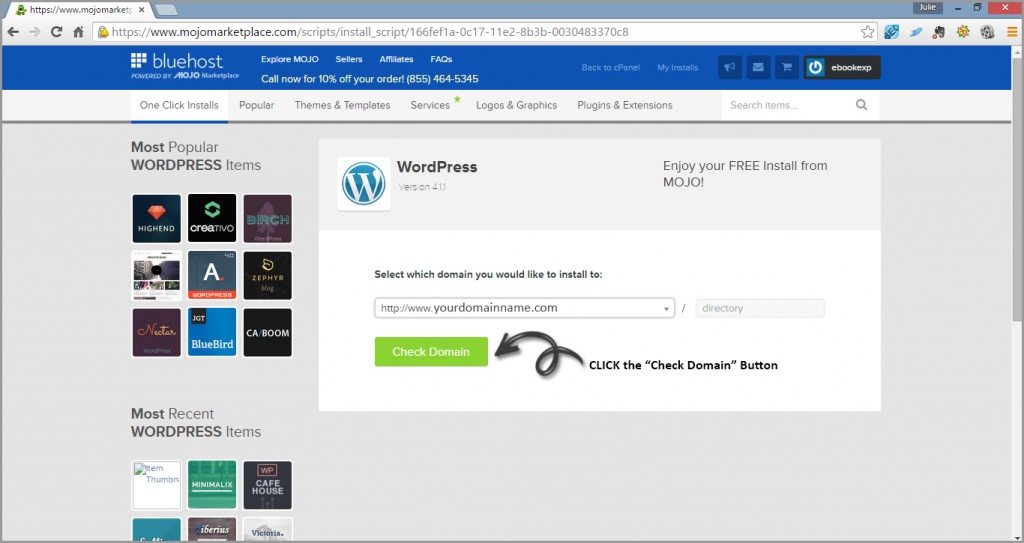
- Next, you will be taken to a screen asking you to select which domain you would like to install to. At this point, you’ll only have one domain – which should be displayed by default, so you can go ahead and click the large green “Check Domain” button.
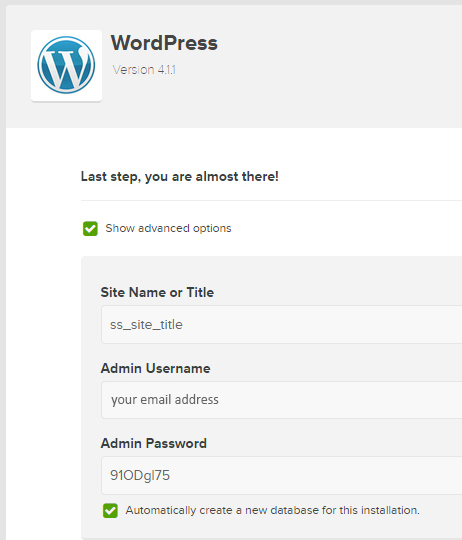
- Once you’ve done this, you’ll be presented with a screen that has two options, each to the right of a green checkbox. The first option says “Show advanced options” and the second says “I have read the terms and conditions of the GPLv2”. Take a look at the GPLv2 link and if you are in agreement (you must be to continue the install process), then check both boxes.

The first item, “Show advanced options”, will expand to reveal three additional fields that you can edit.
- Site Name or Title = This is what will appear in the top tab of your browser. So change the default “ss_site_title” to something like “Happy Birthday!”
- Admin Username = You will use this to login to the Webpage Content Management System (CMS) (NOTE: This is a separate login from the one you just created that allowed you access to your account control panel). One of the most common methods for hackers to gain access to your site is through brute force username & password guesses, so ensure that your Username is long and includes random upper and lower case letters and numbers.
- Admin Password = You will use this in tandem with the Username to login to the Webpage CMS. So again, don’t make it easy for a hacker to access. Also recommend that you use a different password than what you would typically use with your other accounts. Remember, if you are gifting this to someone, they may want access to make edits so will require this information. Use the tool at https://howsecureismypassword.net/ to check your password strength. For additional security measures, view Step 4 of this guide.
 Once you’ve revised the fields above and read and checked the …”terms and conditions”… box, then go ahead and click the big green “Install Now” button.
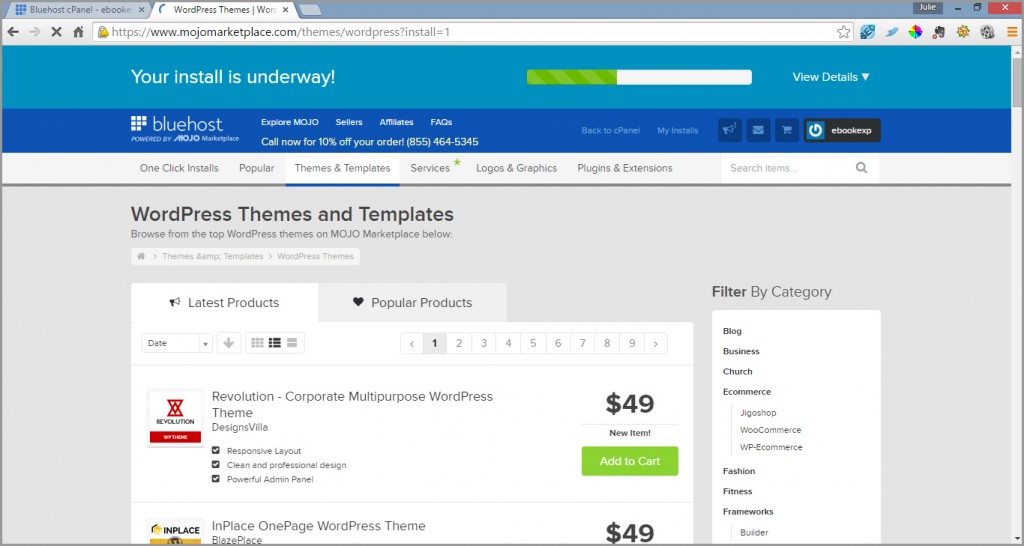
- You’ll be taken to another screen with a “Your install is underway!” message and a green progress bar in the blue navigation header at the top. You don’t need to worry about the WordPress Themes and Templates displayed in the body of this page as we’ll be installing a FREE theme during the next step.
Once the install is finished, the navigation bar will change from blue to orange and a new button will appear that says “View Credentials”.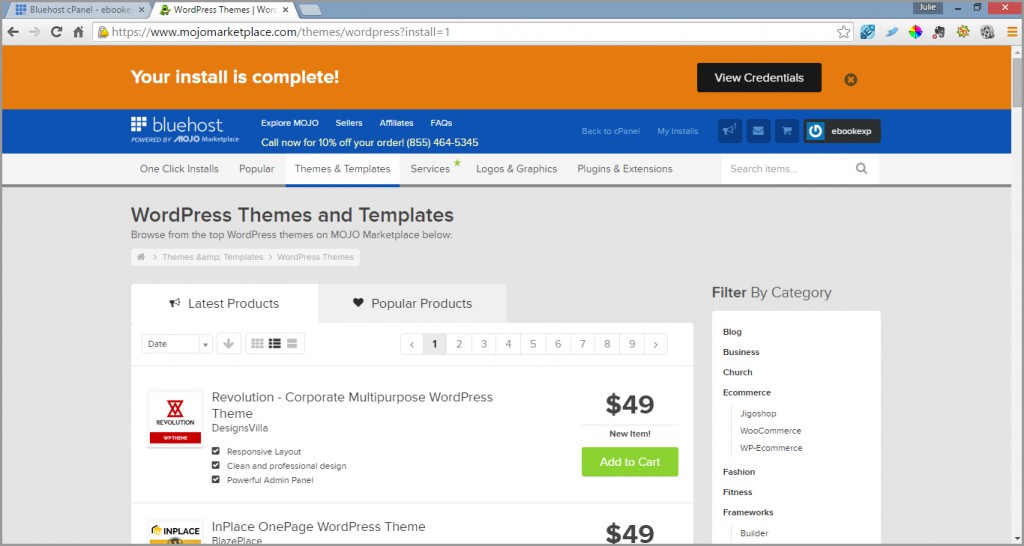
When you click the “View Credentials” button you will see a screen similar to the one below.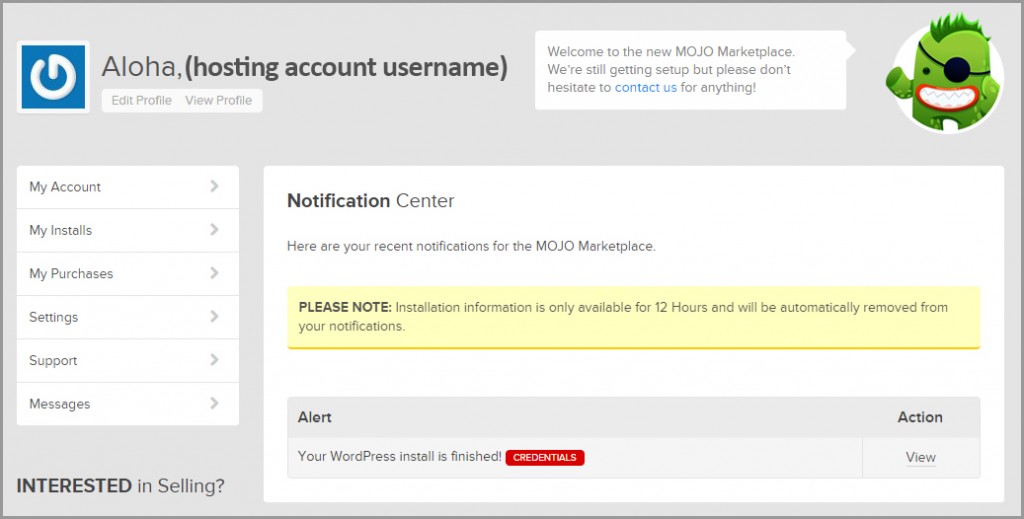
In the “Alert” box, under the “Action” header there is a “View” link. Click this to view the Credentials of the install you just completed!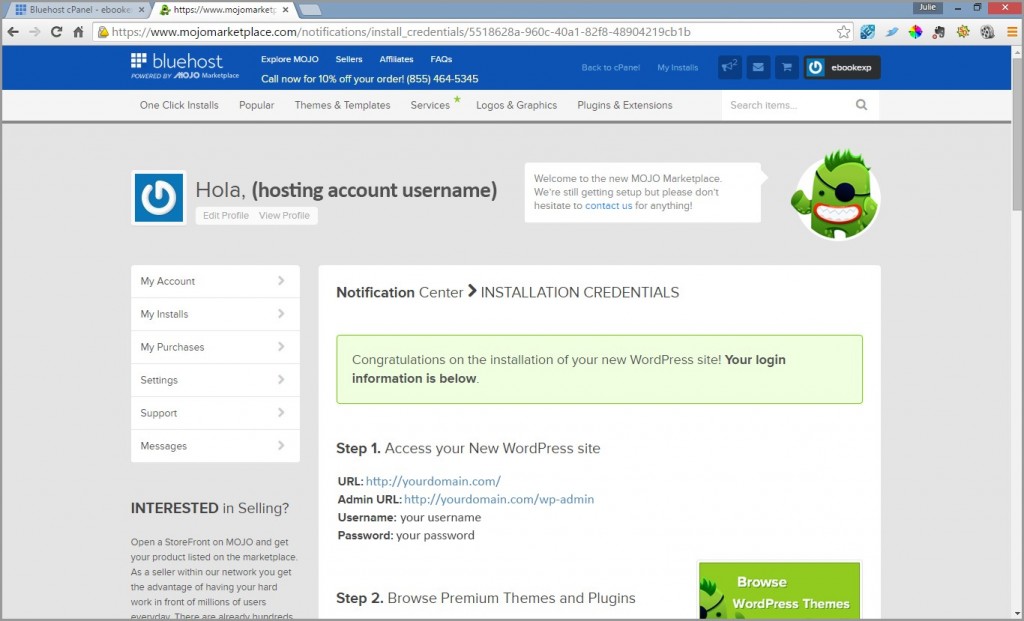
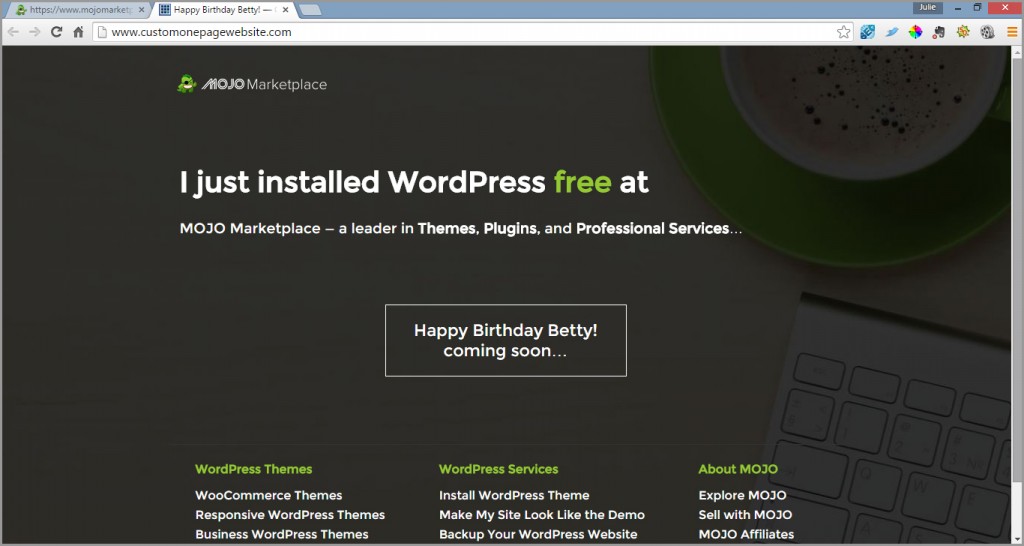
Click on the URL: link and you will see how your site appears before changing the theme and adding content to it.
Click on the Admin URL: link and log in using the credentials you created earlier (NOTE: The admin URL link is always http://www.yourdomain.com/wp-admin/).
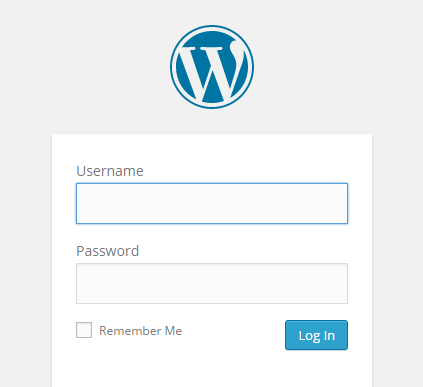
Congratulations! You have made it into the editing area of your website.
Let’s look at your WordPress settings